
How to configure the Domotz IT Portal integration

IT Portal logo.
The image displays the text "IT Portal" with the letters "IT" in blue and "Portal" in black. The "O" in "Portal" has a unique design with a central dot.
Domotz network management software includes integration with IT Portal documentation management IT software.
The Domotz IT Portal integration provides smoother documentation and knowledge base access.
Setting up the IT Portal integration with Domotz
Step 1
Log in to your Domotz account, with your Team Leader account, and click on the Settings tab in the top right corner.
Step 2
Click on API Keys.
Step 3
Click Create an API Key.
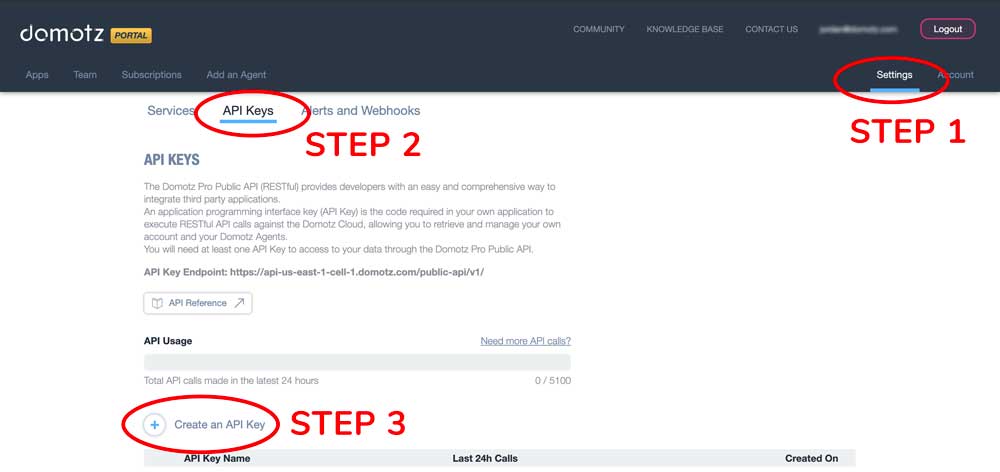
Accessing and Creating an API Key in the Domotz Portal
1. Click on the "Settings" option located in the top-right corner of the Domotz Portal interface.
2. Navigate to the "API Keys" section within the sidebar menu.
3. Select the "Create an API Key" button to generate a new API key. This will allow you to integrate third-party applications with your account using the Domotz Pro Public API.
After you’ve entered your Domotz account password…
Step 5
Add a NAME for your new API Key and click Create.
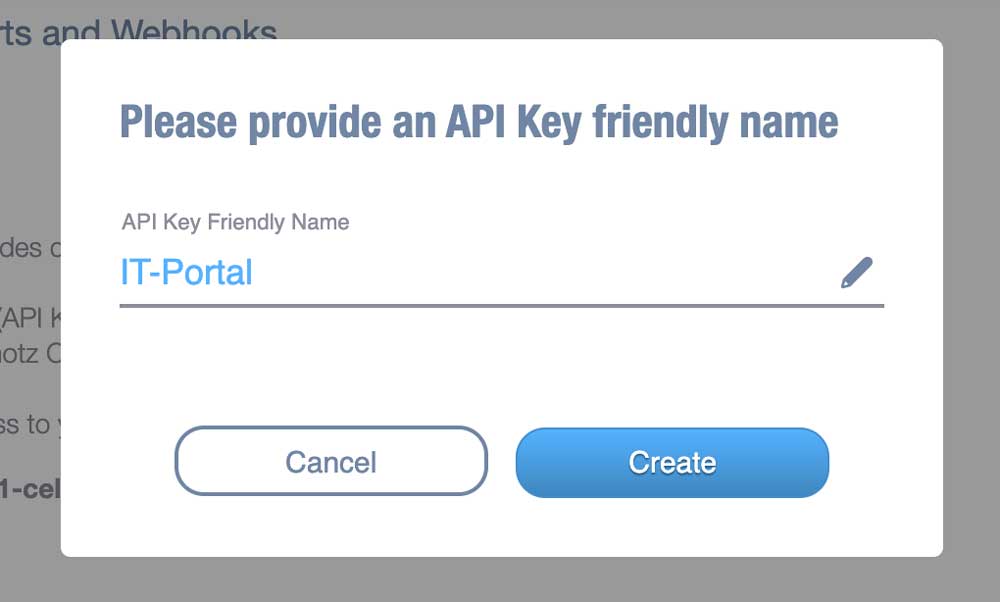
Dialog box for naming an API Key.
1. Enter a friendly name for the API Key in the provided text field labeled "API Key Friendly Name." The example text is "IT-Portal."
2. Click the "Create" button to save the name, or click "Cancel" to discard changes.
Your API Key is now created in Domotz!
Take note of the API Key and the API Key Endpoint — you will be using these to connect in IT Portal.
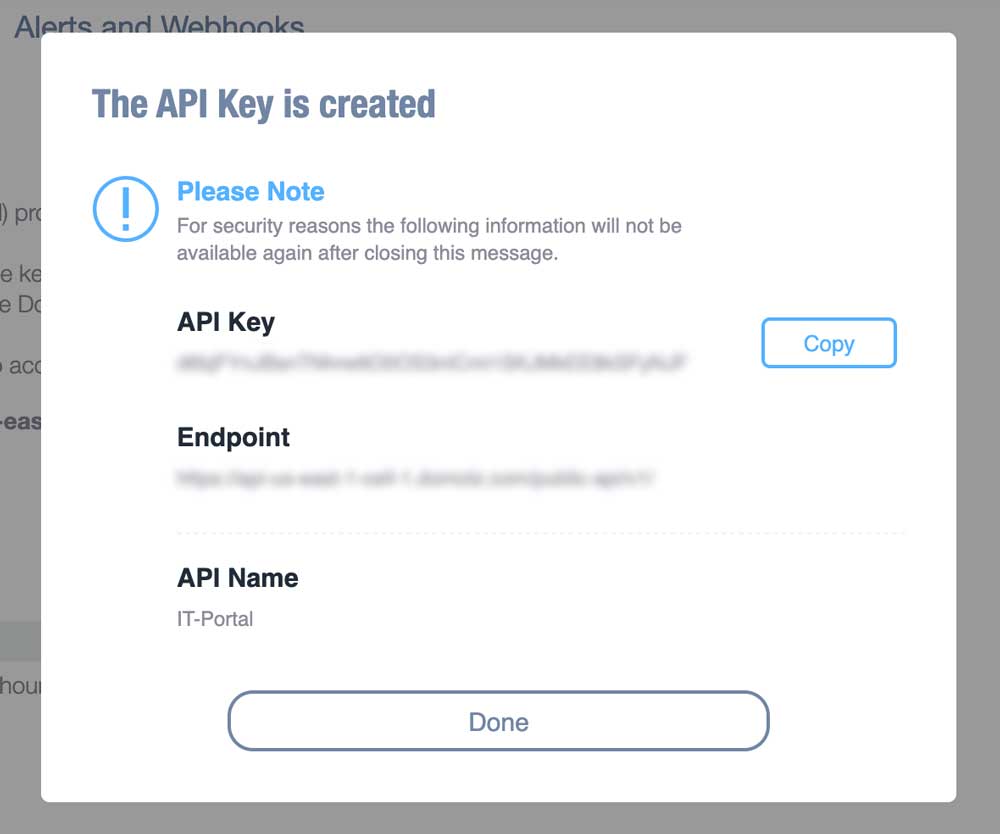
API Key Creation Confirmation
1. A notification states that an API Key has been created.
2. A note emphasizes that the displayed information will not be available again after closing the message.
3. The API Key is displayed with an option labeled "Copy" to the right. Use this to copy the key for immediate use.
4. An "Endpoint" URL is provided for API interactions.
5. The "API Name" is listed as "IT-Portal."
6. A "Done" button is available to close the message once the information is noted.
Switch over to the IT Portal.
Step 6
Go to Admin Settings > Site Settings > Integrations/Links > Select the Domotz tab.
Step 7
Enter the API Key Endpoint provided by Domotz in the Server field.
Step 8
Enter the API Key provided by Domotz in the API Key field.
Step 9
Click the Test Domotz button to ensure that your API Key Endpoint and API Key settings are correct and providing communication with Domotz.
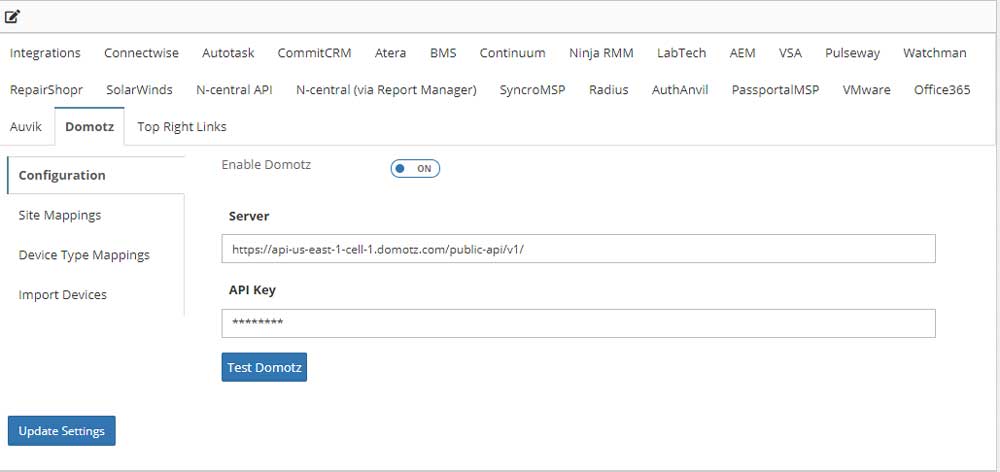
Configuring Domotz Integration.
1. In the main navigation menu, select the "Domotz" tab.
2. In the Configuration section, toggle "Enable Domotz" to "ON."
3. Enter the Server URL in the "Server" field. An example provided is "https://api-us-east-1-cell-1.domotz.com/public-api/v1/".
4. Enter your API key in the "API Key" field.
5. Click the "Test Domotz" button to confirm the integration is working correctly.
6. Click "Update Settings" to save the configuration.
After confirming your connection is successful…
Step 10
Start mapping your Domotz companies and sites to IT Portal companies and sites.
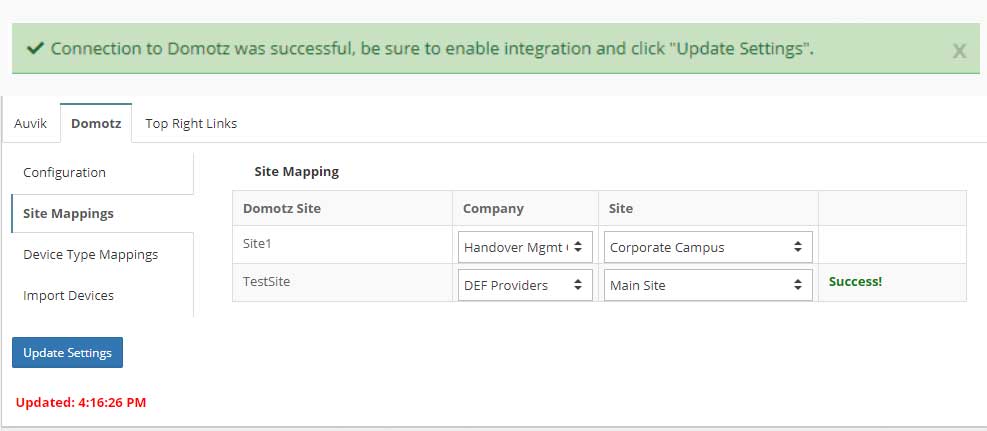
Domotz Integration Confirmation and Settings Update
1. Ensure the connection to Domotz is successful; a confirmation message in green will indicate this success.
2. Navigate to the "Domotz" tab to manage site mappings.
3. Under "Site Mapping," verify or select the desired Domotz site, corresponding company, and site details from drop-down menus.
4. Click "Update Settings" to save any changes.
5. Check the last updated time displayed in red for reference.
Step 11
Start mapping the Domotz device types to IT Portal device types.
You may want to read the IT Portal knowledge base article on adding device types to IT Portal. For example, “Wearables” are not featured in IT Portal by default, so if you wanted a field available called “Wearables” you would need to create one prior to mapping.
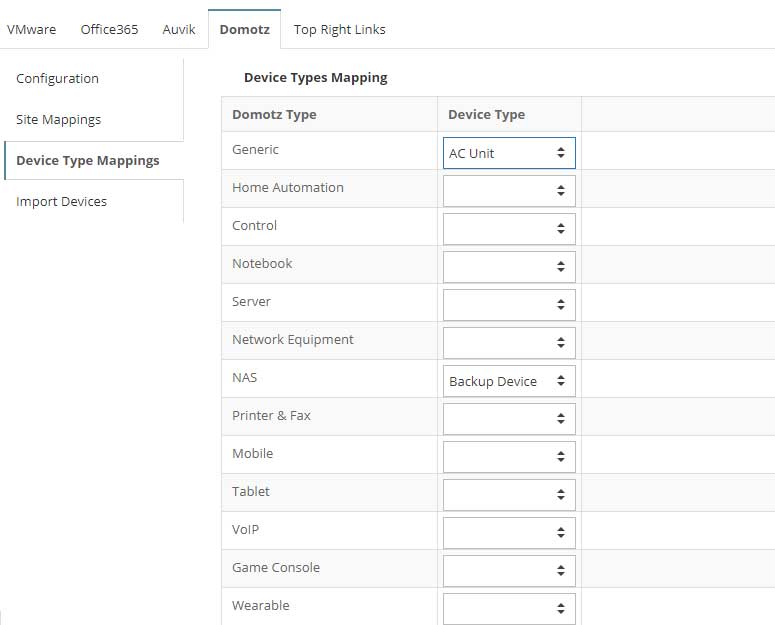
Device Type Mapping Interface
1. Navigate to the "Device Type Mappings" section under the "Domotz" tab.
2. In the "Device Types Mapping" table, there are two columns: "Domotz Type" and "Device Type."
3. For each Domotz Type, select a corresponding Device Type from the dropdown menu.
- Example: For "Generic," select "AC Unit."
- For "NAS," select "Backup Device."
4. Continue mapping each Domotz Type to its appropriate Device Type to ensure accurate device categorization.
Now that all of the API communication, site mapping and device mapping is complete…
Step 11
Click the Import Devices button.
The process will take a few minutes to complete.
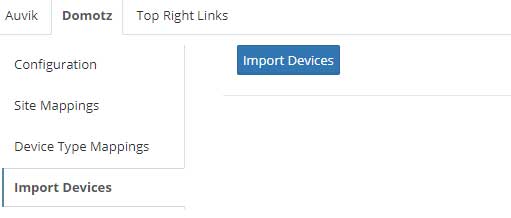
Importing Devices in Domotz
1. Navigate to the Domotz tab at the top.
2. From the menu on the left, select "Import Devices."
3. Click the blue "Import Devices" button on the right to start the import process.