In this article, we’ll cover how to configure custom SNMP versions and credentials in Domotz.
There are four ways to set SNMP credentials:
- Globally for the collector – using the collector Settings Default Credentials section.
- Per device – using the Device Details view, where you can set custom SNMP credentials for a single device.
- In bulk – using the Inventory view, which allows you to select multiple devices from multiple collectors and update their SNMP credentials in just a few clicks.
- Using Device Profiles – using reusable configuration templates that bundle SNMP credentials with other device settings, ideal for standardized deployments across multiple devices and sites.
1. From the Collector Menu
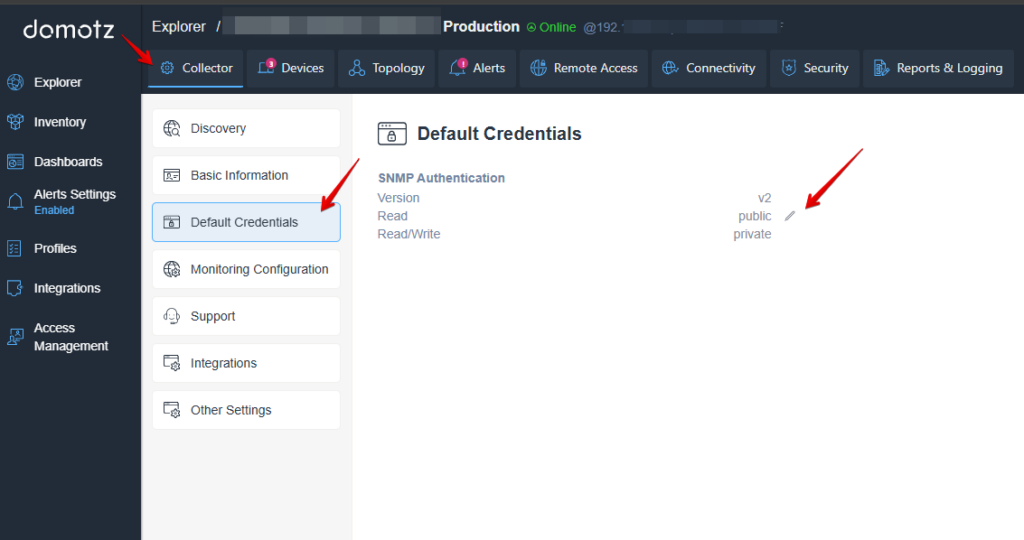
To set SNMP credentials globally for all devices on a collector (new discovered devices and current), navigate to Webapp > Explorer > Select the Collector > Collector menu > Default Credentials click on the pen icon to edit the default site SNMP settings.
Once clicked, select the SNMP version and enter the appropriate credentials. For SNMPv1/v2, enter the Community Read and Community Read/Write strings. For SNMPv3, enter the User and Password along with the desired Authentication Type and Data Encryption settings.
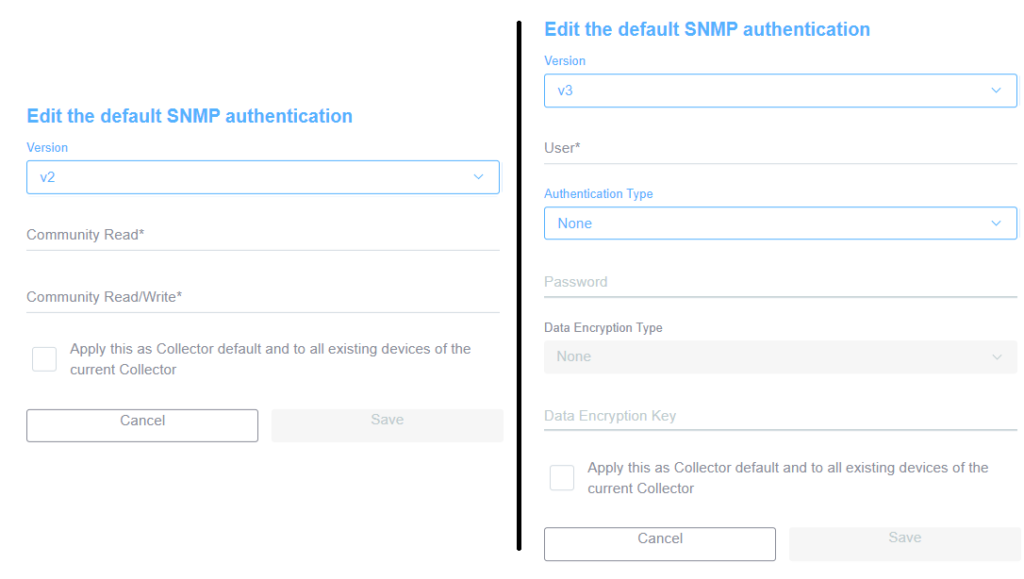
Domotz supports the following SNMPv3 Authentication Types: None, MD5, SHA, SHA-224, SHA-256, SHA-384, and SHA-512.
The supported Data Encryption Types are: None, DES, AES, AES-256B, and AES-256R.
2. From Device Details view
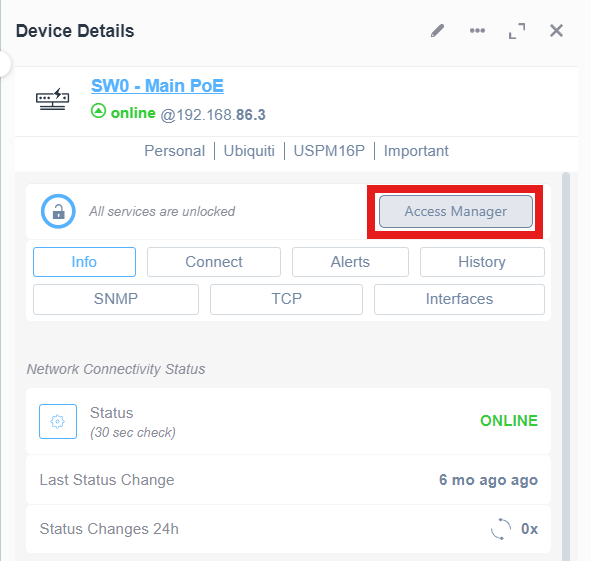
From the Collector Devices section, select one of your devices (such as a switch) and select the Access Manager button.
This will open the Credentials Manager. At the SNMP section, click on the lock icon to edit the SNMP version and credentials.
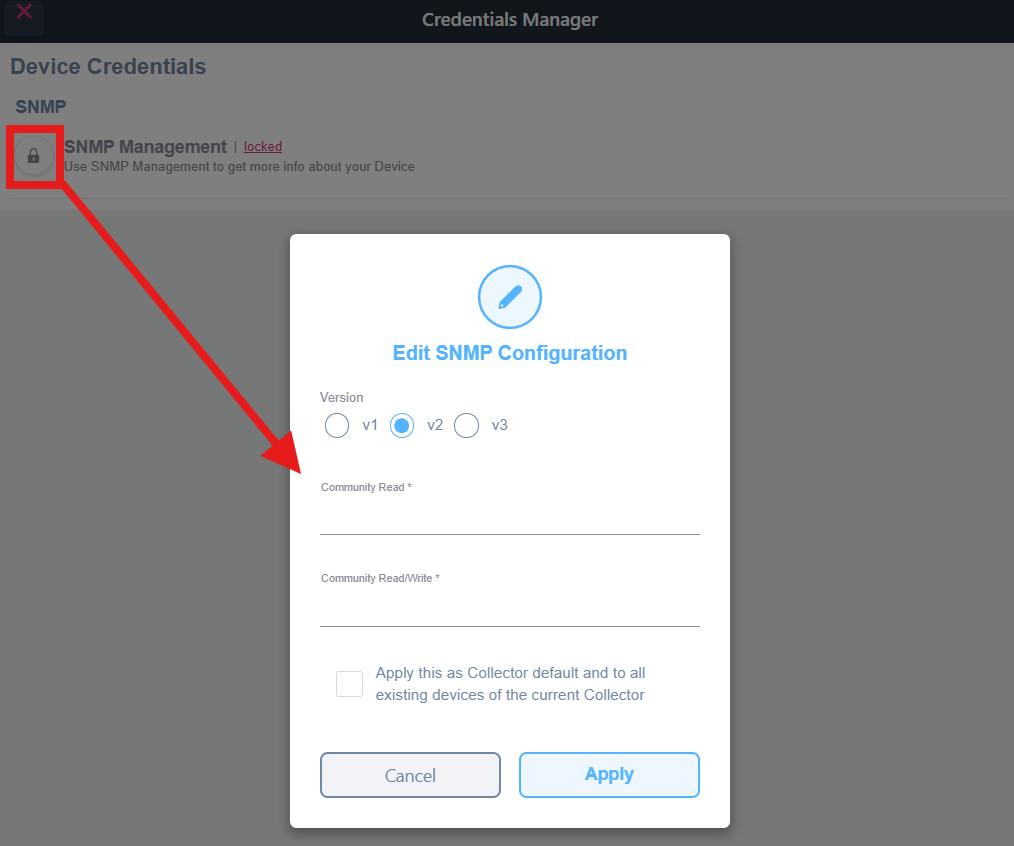
This change will only affect the selected device. To apply the changes globally to all devices under the same collector, make sure to check the box “Apply this as Collector default and to all existing devices of the current Collector”.
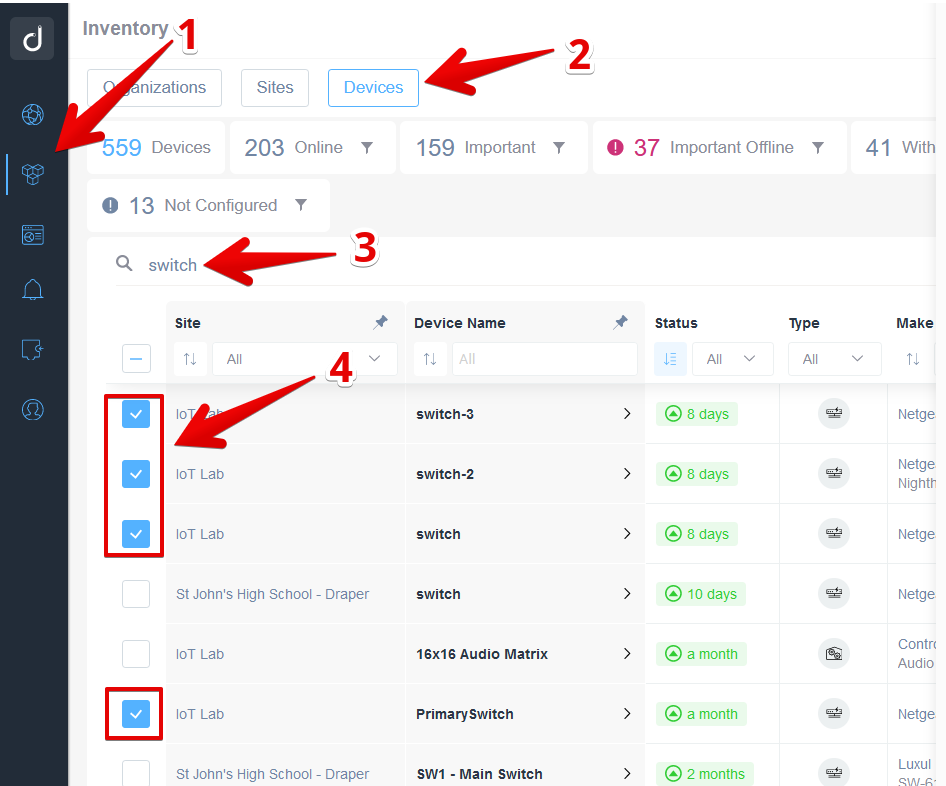
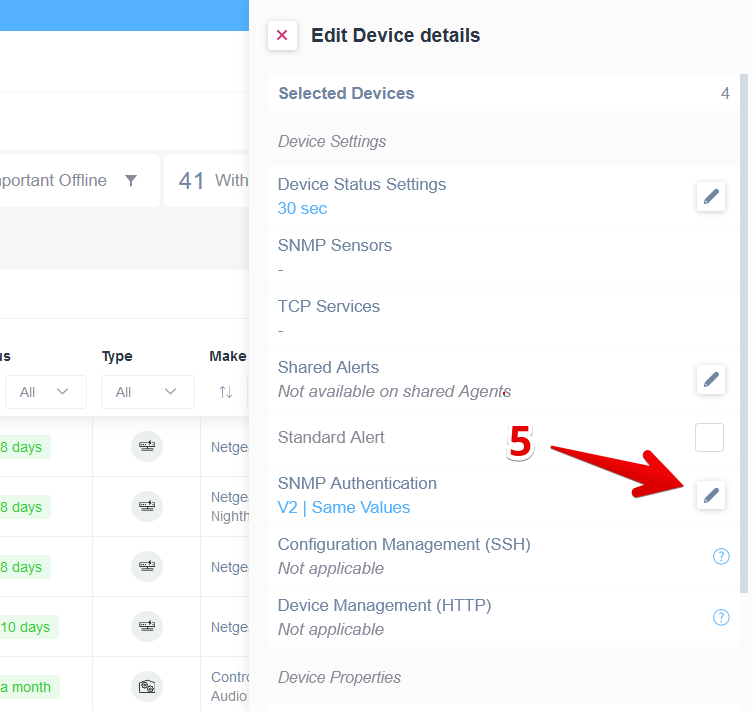
3. From the Inventory view
The Inventory view lets you select multiple devices across multiple collectors and update their credentials at once.
Navigate to Webapp > Inventory, select the devices you want to update, and apply the appropriate SNMP version and credentials.
4. Using Device Profiles
For larger environments or standardized deployments, you can use Device Profiles to define SNMP credentials as part of a reusable configuration template. Profiles allow you to bundle SNMP credentials alongside other device settings (such as device info, shared alerts, SNMP sensors, and TCP sensors) into a single profile that can be applied to multiple devices at once.
This approach is especially useful for MSPs or IT teams managing many sites, as it ensures consistent SNMP configurations across all devices without needing to set credentials individually.
To learn more about creating, configuring, and applying Device Profiles, see the full guide: Device Profiles.
Related resources
Want to learn more about the differences between SNMP versions? Check out our SNMPv2 vs SNMPv3 article for a detailed comparison.
Already familiar with SNMP? Learn how our Pre-Configured SNMP Sensors feature can help you work faster and simplify your monitoring setup.