
Purpose
By default, Domotz sees devices based on their MAC address, meaning that if a device has two network interface cards, we’ll identify two different devices.
This article covers grouping two or more network interfaces into one Domotz device.
In summary, grouping network interfaces allow you to monitor a device’s status based on all its interfaces. If an interface is online, that device will be marked online, and only if all its interfaces are offline will it be considered offline.
Group device interfaces from the Inventory Dashboard
Access the Inventory Dashboard, select the devices (to be grouped into one), and click on “Group Network Interfaces Cards”:
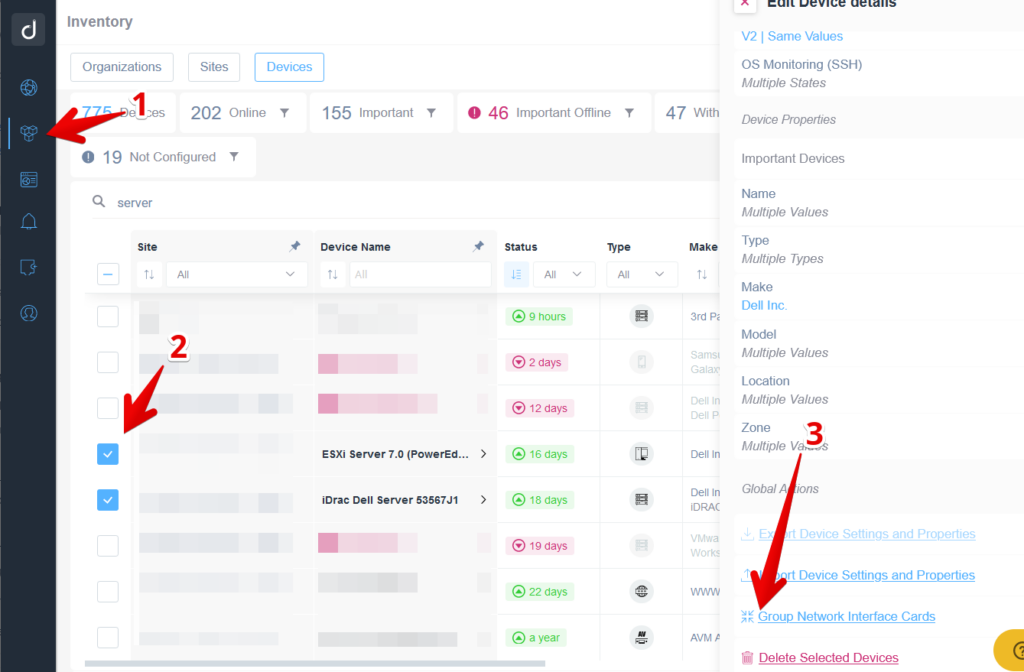
Deleting Selected Devices from the Inventory Dashboard.
1. Navigate to the "Devices" tab in the Inventory section to view a list of all devices.
2. Select the devices you want to delete by checking the boxes next to their names in the device list.
3. Open the "Edit Device Details" panel and scroll to the bottom to click on "Delete Selected Devices" to remove them from the inventory.
Select the primary network interface, and click the button “Group.” All the configurations done on the “Primary Network Interface” (excluding Alerts) will be inherited by the new device:
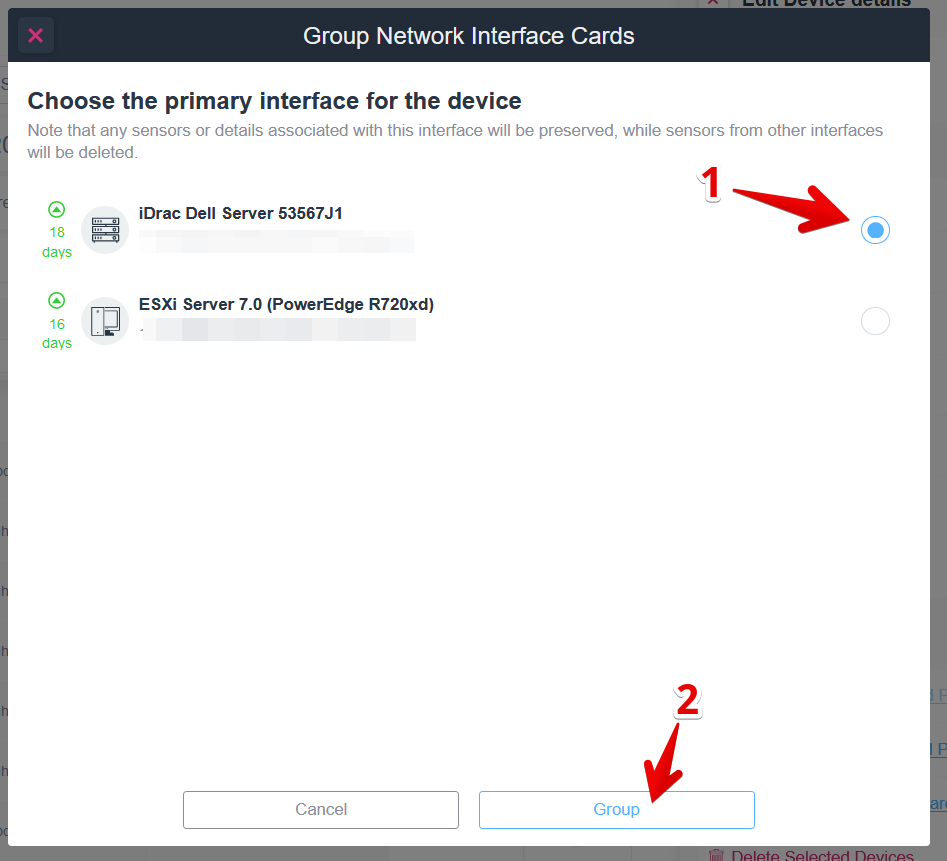
Choose the primary network interface for a device.
1. Select the radio button next to the desired server option: "iDrac Dell Server 53567J1" or "ESXi Server 7.0 (PowerEdge R720xd)." Selecting one determines the primary network interface.
2. Click the "Group" button at the bottom to confirm your selection. This action groups the network interface for the device.
In this example, the “ESXI Server 7.0 (PowerEdge R720xd)” device will disappear from the device list, and if you access the “IDrac Dell Server 5356J1” device, you be able to see its grouped NICs section with both the MACs and IP addresses:
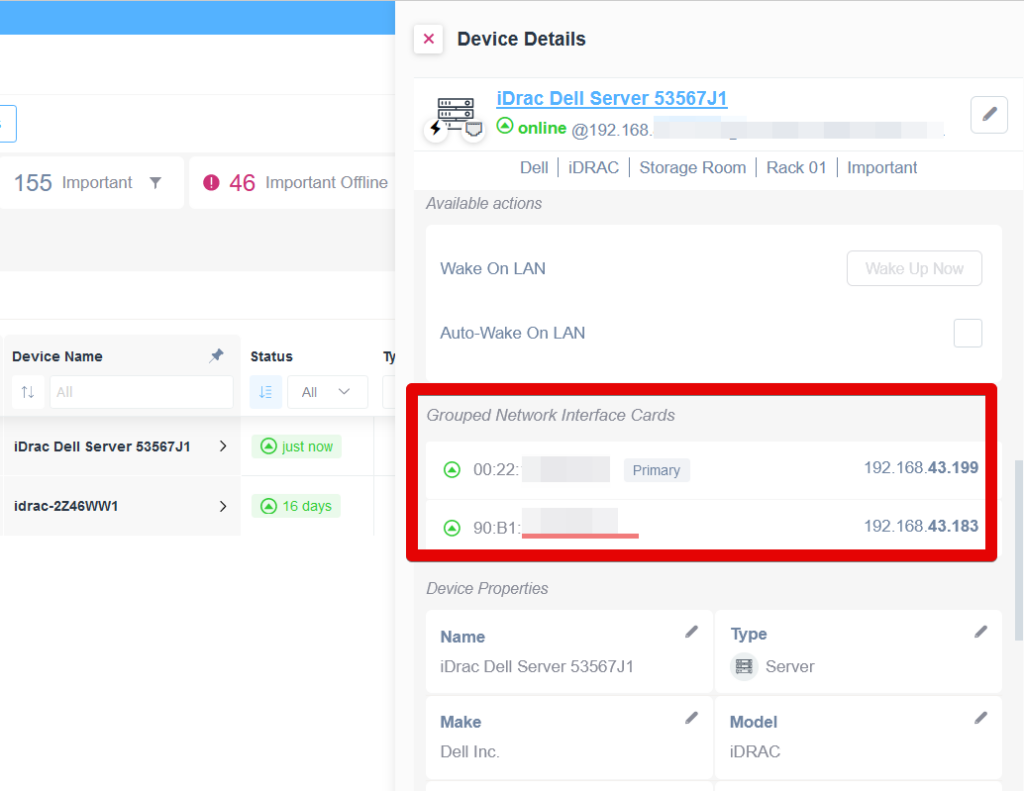
Device Details and Network Interface Configuration
1. In the "Device Details" section, the iDRAC Dell Server 53567J1 is shown as online. The details include device name, status, and associated options like Dell, iDRAC, Storage Room, and Rack 01.
2. The "Available Actions" area allows for Wake On LAN and Auto-Wake On LAN configurations, though the "Wake Up Now" button is currently inactive.
3. Under "Grouped Network Interface Cards," two entries show with MAC addresses and IPs. The first entry is marked as "Primary" with IP 192.168.43.199, while the second has IP 192.168.43.183.
4. In "Device Properties," the Name, Make, Type, and Model attributes are listed. The device is a Dell Inc. iDRAC server.
In the above example, if the “Primary” network interface entity already had sensors configured (e.g., SNMP Pre-Configured sensors, TCP Sensors, Custom Integrations, etc.), those sensors will be inherited on the new device. Moreover, we’ll perform all the advanced capabilities (e.g., SNMP monitoring, Configuration Management, Custom Integrations, etc.) on the “Primary” network interface address.
On the other hand, we evaluate the device’s status (Online/Offline) using all the grouped Network Interface Cards. For instance, if the Primary does not answer ICMP Ping, but the secondary still answers ICMP Ping, the new device will still be reported as online. For devices (which are the result of grouping two or more NICs), there is no longer a concept of Heartbeat Lost. This concept is no longer relevant because a heartbeat can be lost on one of the interfaces but not all.
Group device interfaces from the Device List
Access your site Device List, and select the devices you want to group:
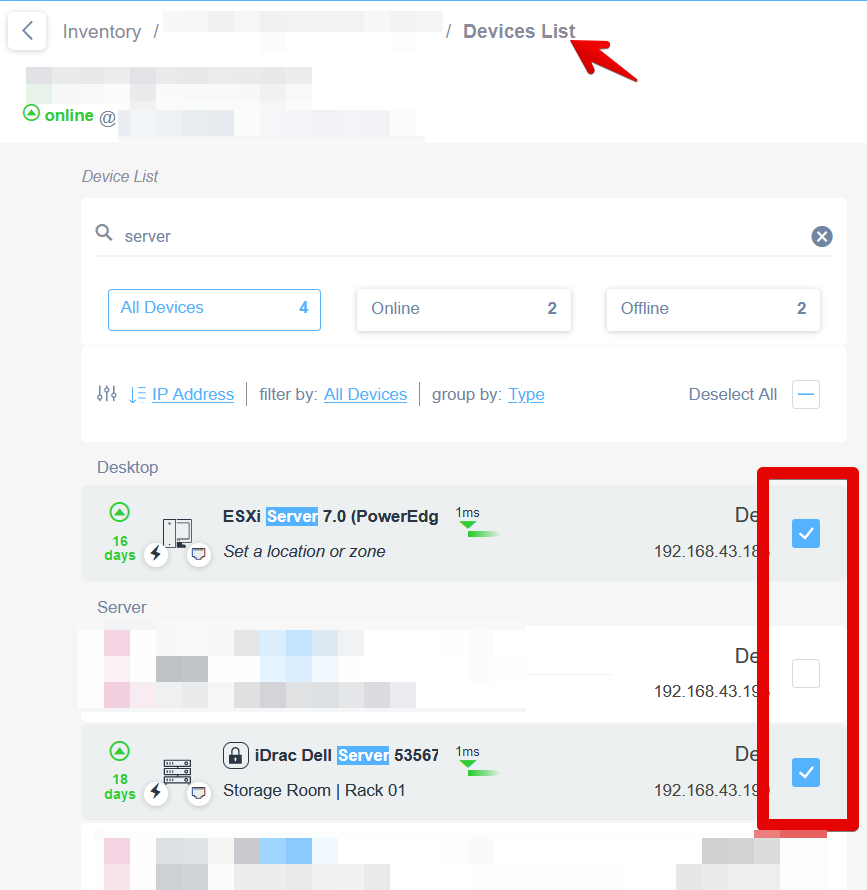
Managing Devices in the Devices List
1. Access the "Devices List" from the navigation path at the top.
2. Use the search bar to find devices by typing keywords like "server."
3. View and filter devices by their status: "All Devices," "Online," or "Offline," with the corresponding number of devices displayed adjacent to each category.
4. Additional filter options include sorting by IP Address, device type, and group type, with a "Deselect All" option available.
5. Review the list of devices under categories like "Desktop" and "Server." Each entry shows details like the device name, model, uptime, location, and IP address.
6. To select devices for actions, tick the checkbox next to each device name in the list.
Scroll down and select the “Group Network Interface Cards”:
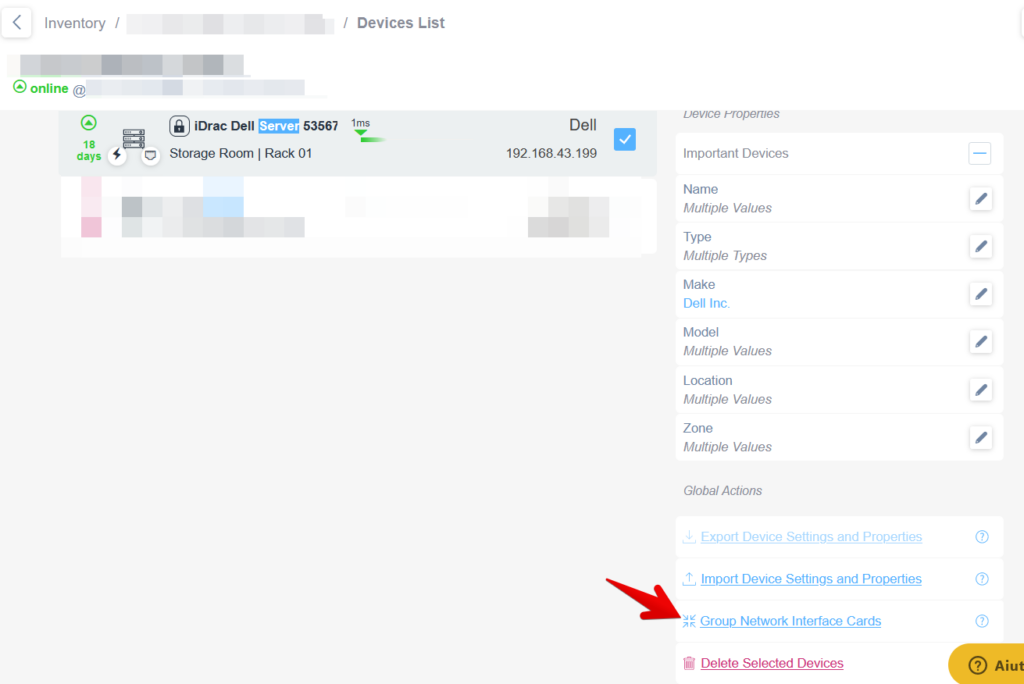
Managing Devices in the Inventory List
1. The image displays the Devices List section from an inventory management interface.
2. A device is shown as online, identified as "iDrac Dell Server" with a unique ID and location noted as "Storage Room | Rack 01."
3. Device details such as name, type, make, model, location, and zone are accessible, with fields for editing next to each value.
4. In the Global Actions section, options include exporting or importing device settings, grouping network interface cards, and deleting selected devices.
5. To delete a device, click the "Delete Selected Devices" option.
Ungroup device interfaces
To “Ungroup” interfaces, you can do it from the Device page -> Info tab:
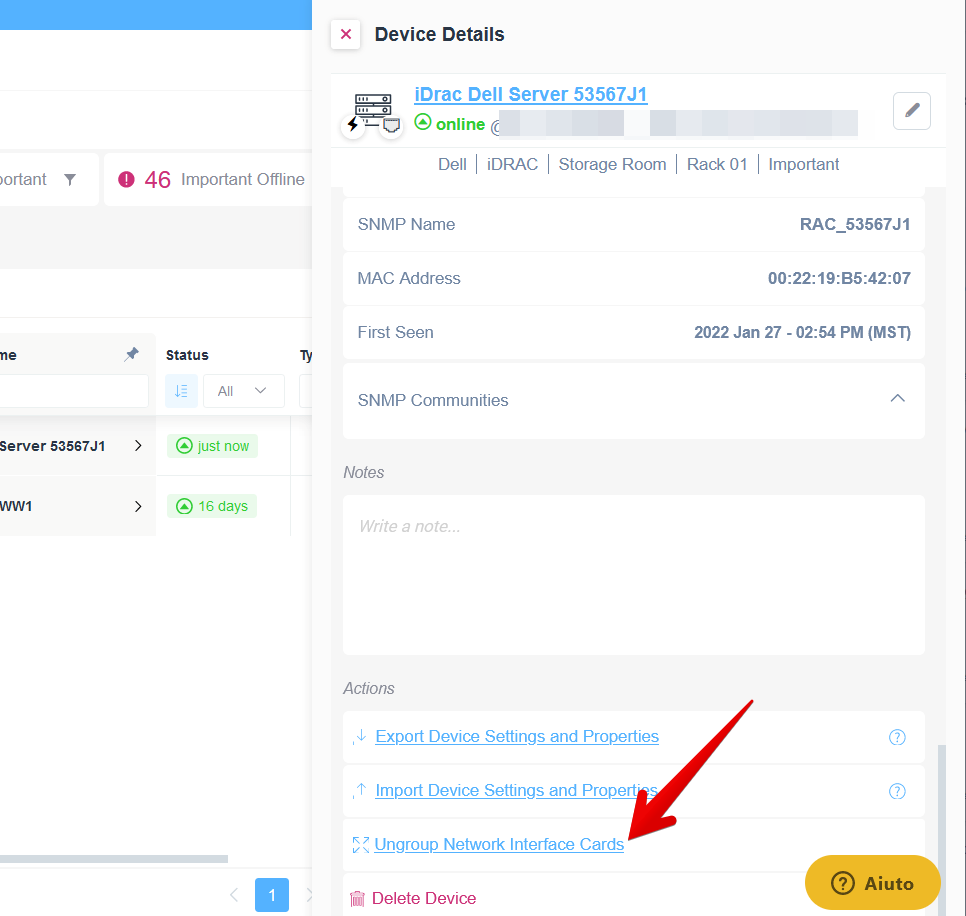
Ungroup Network Interface Cards in Device Details
1. Navigate to the "Device Details" section for the selected device.
2. Verify the device status is "online" and check relevant information such as SNMP Name, MAC Address, and the date and time it was first seen.
3. Scroll to the "Actions" section at the bottom.
4. Select "Ungroup Network Interface Cards" to manage your network configurations.
5. Confirm any changes as instructed by on-screen prompts.
Performing this action removes the grouped device and displays its interfaces as single devices. We preserve all the data, configurations, and sensors (except for alerts) from the Primary interface device (excluding any configured alert).