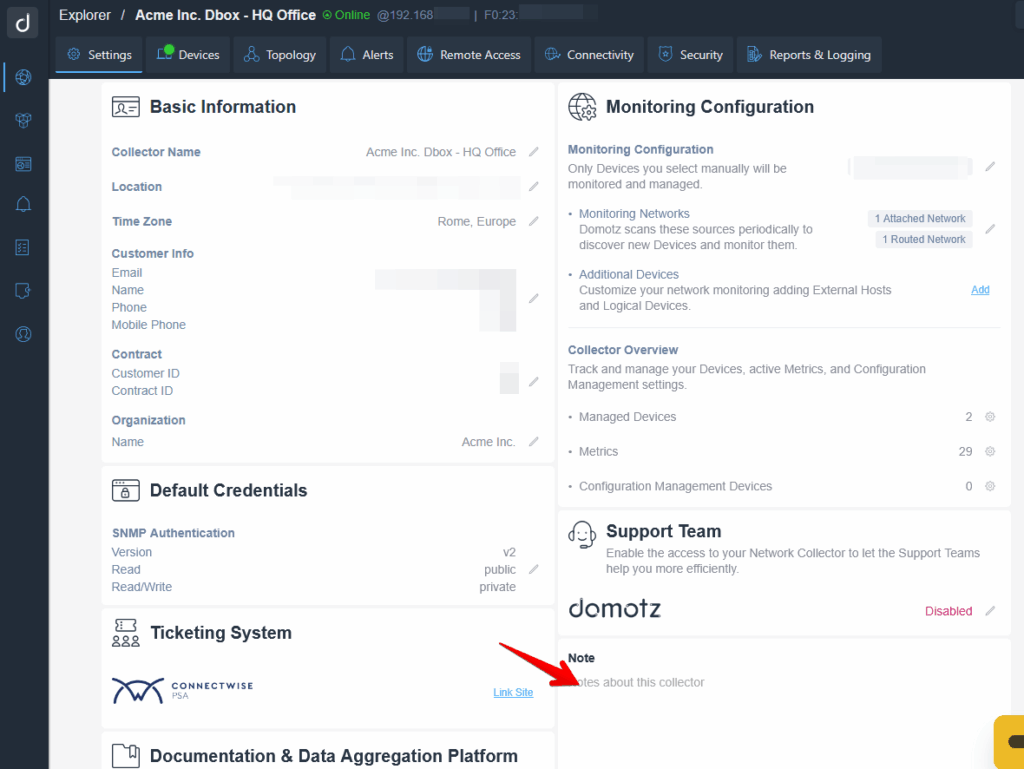
This section provides detailed insights on your Domotz Collector’s general information and settings and allows you to:
- View and edit the Collector Basic Information (Collector’s Name, Location, Time Zone, etc.)
- Configure the Collector Monitoring Settings such as:
- Monitoring Configuration
- Monitored Networks
- Physical and Virtual Networks
- Routed networks
- External Hosts
- Logical devices
- Default Credentials
- Manage pairing with external Documentation & Data Aggregation Platforms
- Other
- Notes
How to access the Collector Settings section
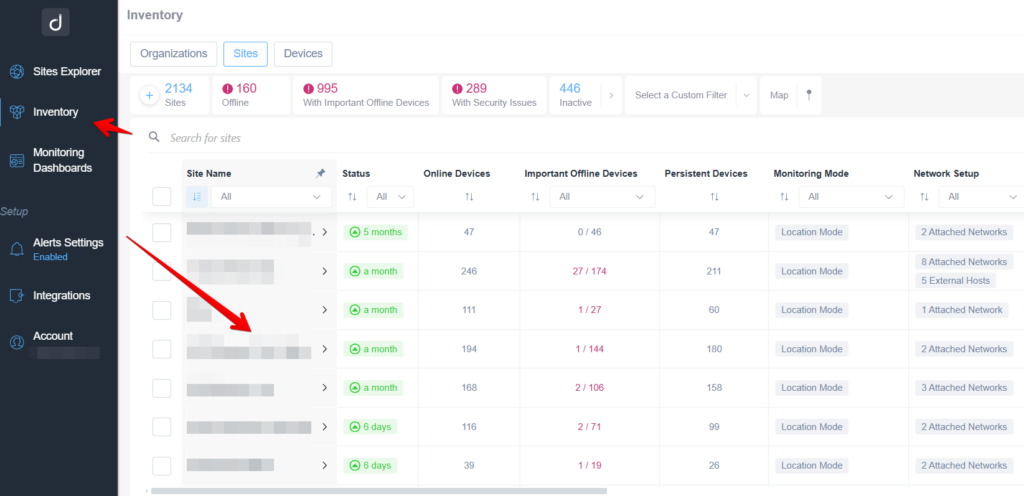
From the ‘Inventory’ Dashboard select the Domotz Collector you would like to configure:
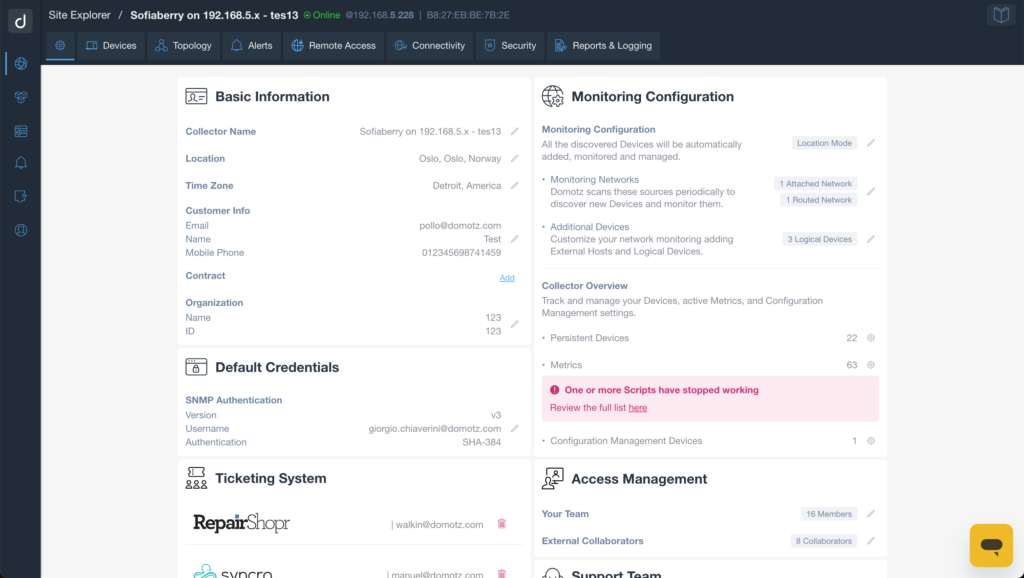
Once in the Domotz Collector main view, select the ‘Collector Settings’ (the cogwheel on the top left) button:
Basic Information
In the ‘Basic Information’ section you will be able to access/edit the following information:
- Collector Name
- Site Location
- Site Time Zone
- Customer Information
- Organization Name/ID

Monitoring Configuration
In Domotz you have the ability to manually select the devices you would like to monitor and manage.
All available assets are displayed in the left column, and a search feature is provided for easy navigation. You can select individual devices or use the “Select All” option for bulk selection.
Once you’ve made your selection, simply click the arrow between the columns to add the assets to the Managed Devices list (Right column). To confirm the list of monitored assets, simply click the “Save Changes” button.
Devices can be moved back and forth using the arrow in the center. After saving, you also have the option to remove devices from the Monitored Assets list as needed.

Following the scanning properties which can be fined-tuned:
- Physical and Virtual Networks (Also called “Attached Networks” which are scanned at Layer 2)
- Routed networks (Scanned at Layer 3)
- IP Address Range (Scanned at Layer 2)
- IP Address List (Scanned at Layer 2)
- External Hosts (Public hosts/ip – Scanned at Layer 3)
- Logical Devices – (also called Dummy Devices)

Default Credentials
Default Credentials – the current SNMP default authentication.

Here, you can edit the used SNMP version (v1, v2 or v3), the read/write communities and you can apply these settings to all devices within the collector:

Manage integrations with Ticketing Systems
Ticketing System integrations and their settings along with editing options will be shown here.

Manage pairing with Documentation & Data Aggregation Systems
This section displays and allows managing your existing integrations with Domotz’s partner platforms. If no integration is present, it will forward you to the Integrations section.

Other Settings
In this section other collector settings are available.
If you collector is a Domotz Box, you will be able to disable its local web interface, improving the security of your Domotz Agent. As a matter of fact, this prevents other users on the same local network from accessing the Domotz Box configuration.
In order to disable it, please click on the pencil icon and disable it:

Support Management
From this section, you can enable access to your Collector for Domotz’ support team. You’ll have to click on the pen icon and enable it.

Notes
Note – You may enter your personal notes about this Collector in the Note section.
