Purpose
This kb article, explains how to configure WinRM to unlock Domotz os monitoring feature on all your windows endpoints from the AD: in a few words, how to launch the enable_winrm_os_monitoring.ps1 script on all your windows endpoint using an Immediate Task.
Instructions
Prerequisites:
- Ensure you have an AD Global group available (e.g. “Remote_WMI_Access”) and an AD user member of that group. Both created for this specific purpose.
If you are not sure on how to create the group, please see here: https://learn.microsoft.com/en-us/windows/security/threat-protection/windows-firewall/create-a-group-account-in-active-directory
- Download this script:
https://github.com/domotz/support_scripts/raw/main/os_monitoring/enable_winrm_os_monitoring.zip
Unzip it in a share the target computers can access, in our example we copied the script in the AD domain NETLOGON share (\domotzlab.com\Netlogon)
- Copy the script in a share the target computers can access, in our example we copied the script in the AD domain NETLOGON share (\\domotzlab.com\Netlogon)
- Open the Group Policy Management console (gpmc.msc)
- expand “Forest: <YOURDOMAIN>” (tree item)
- expand “Domains” (tree item)
- expand “<YOURDOMAIN> ” (tree item)
- select “Group Policy Objects” (tree item)
- right click on “Group Policy Objects” (tree item) and select “New” (menu item)
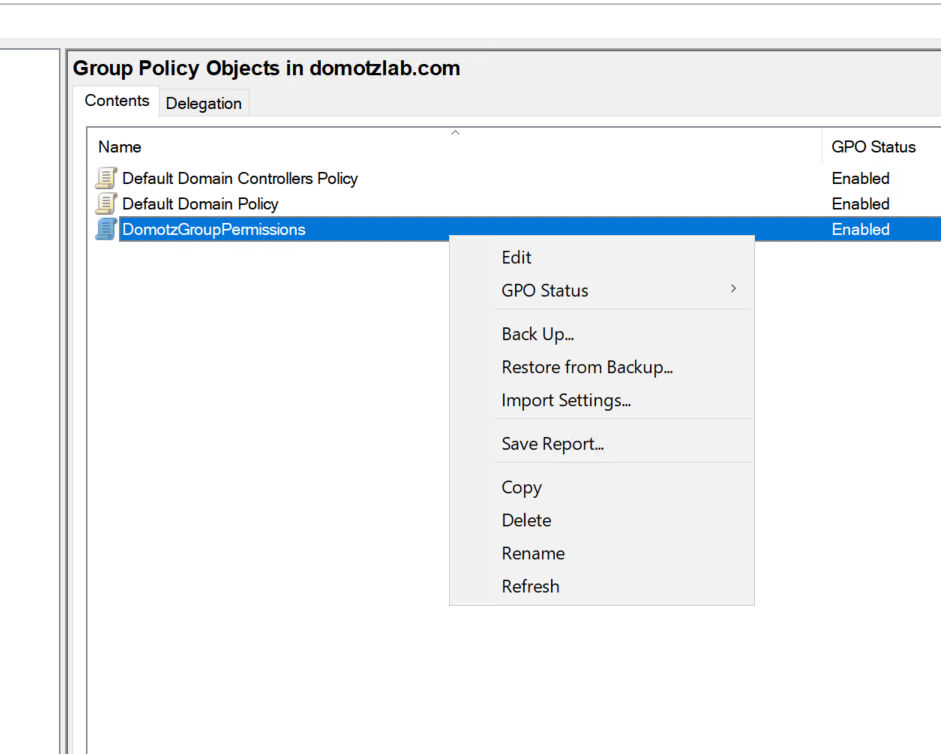
- Type a name for your GPO, in this example we use ‘DomotzGroupPermissions’
- click on “OK”
- select “DomotzGroupPermissions “
- right click on “DomotzGroupPermissions “
- click on “Edit” (menu item)

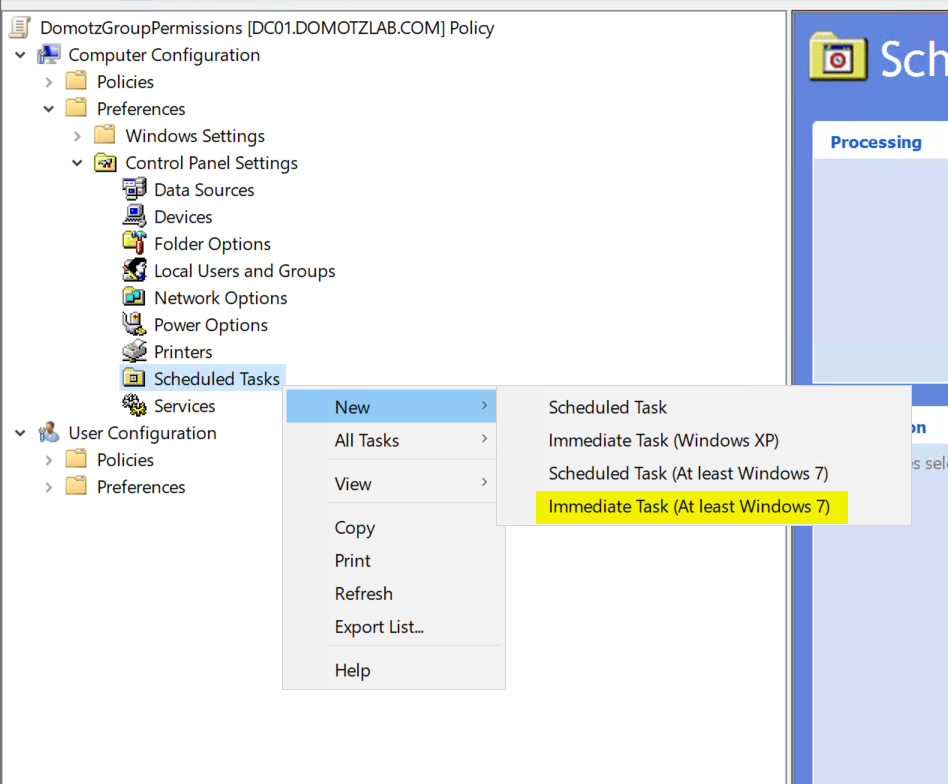
- Expand “Preferences” (tree item)
- Expand “Control Panel Settings” (tree item)
- Select “Scheduled Tasks” (tree item)
- right click on “Scheduled Tasks” and select ‘New’
- click on “Immediate Task (At least Windows 7)” (menu item)

- Type a name for your immediate task
- click on “Change User or Group…” and select the ‘SYSTEM’ account
- check “Run whether user is logged on or not (radio button)”
- check “Run with highest privileges (check box)”
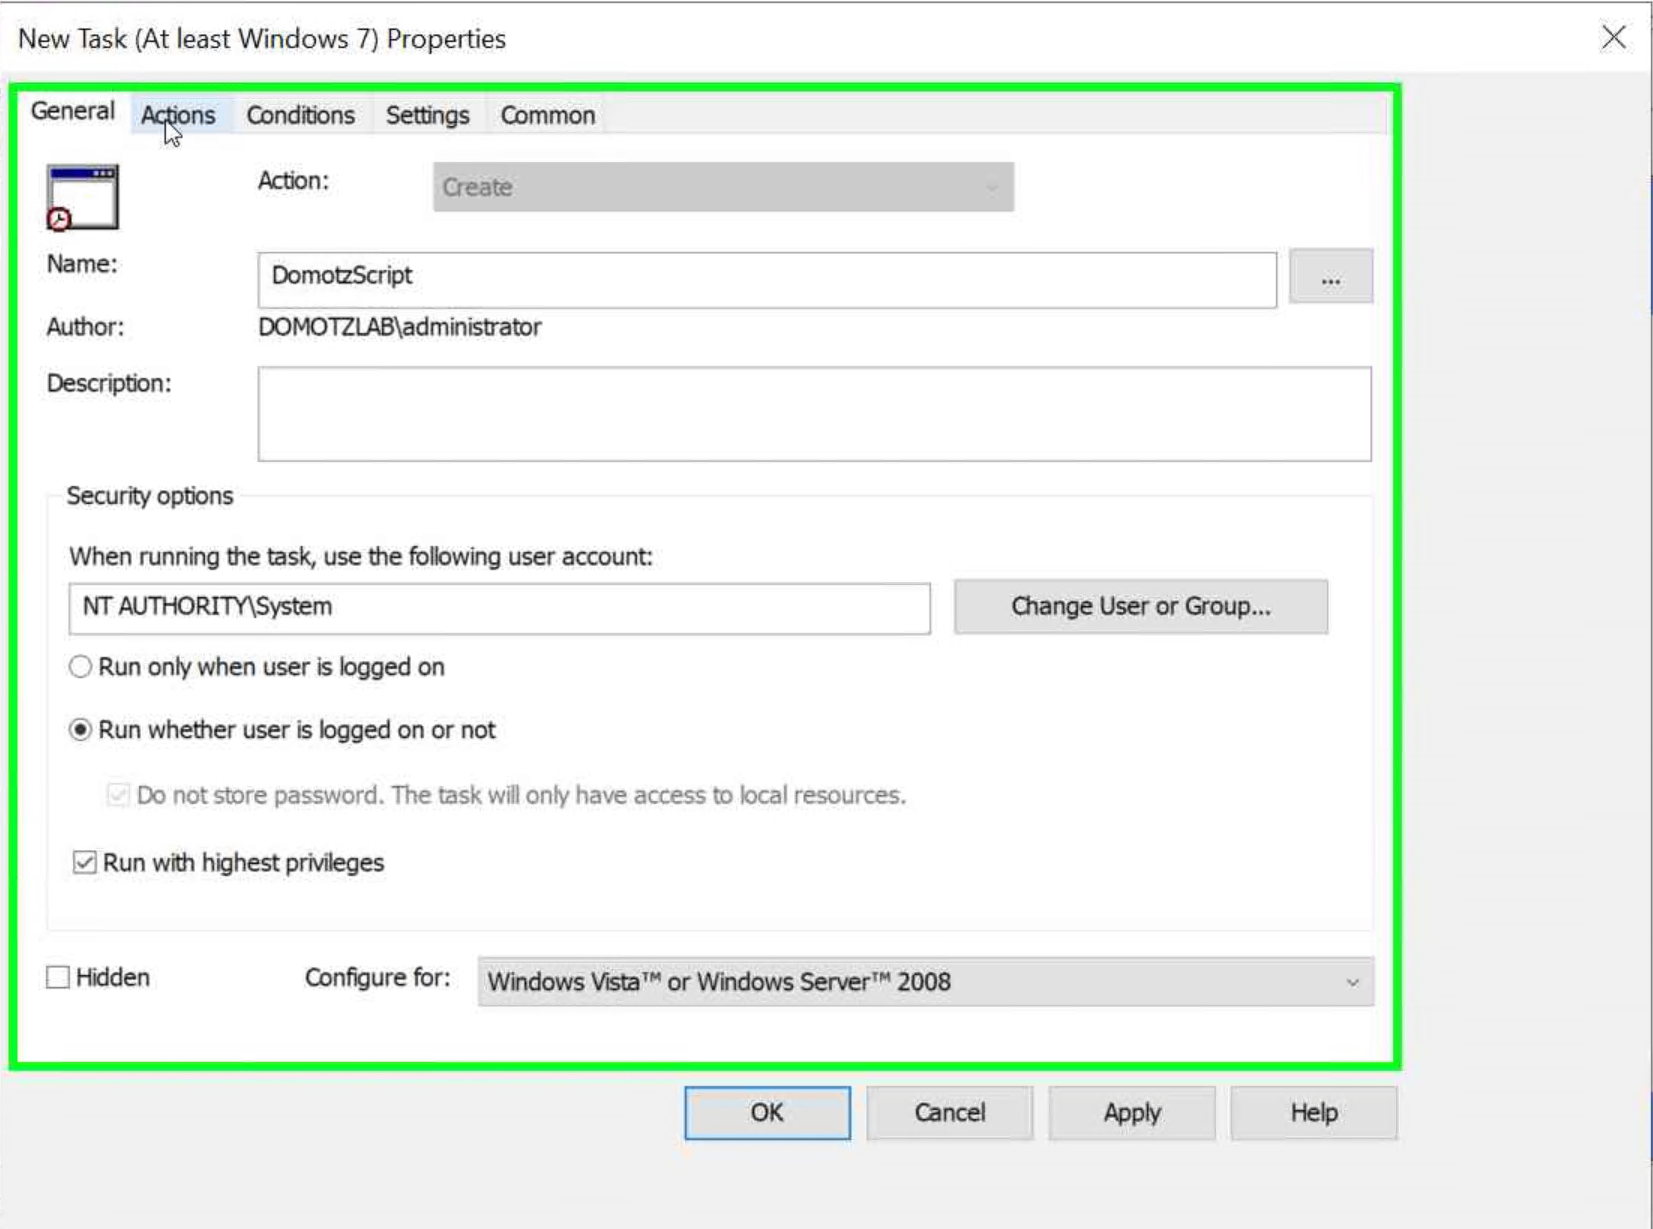

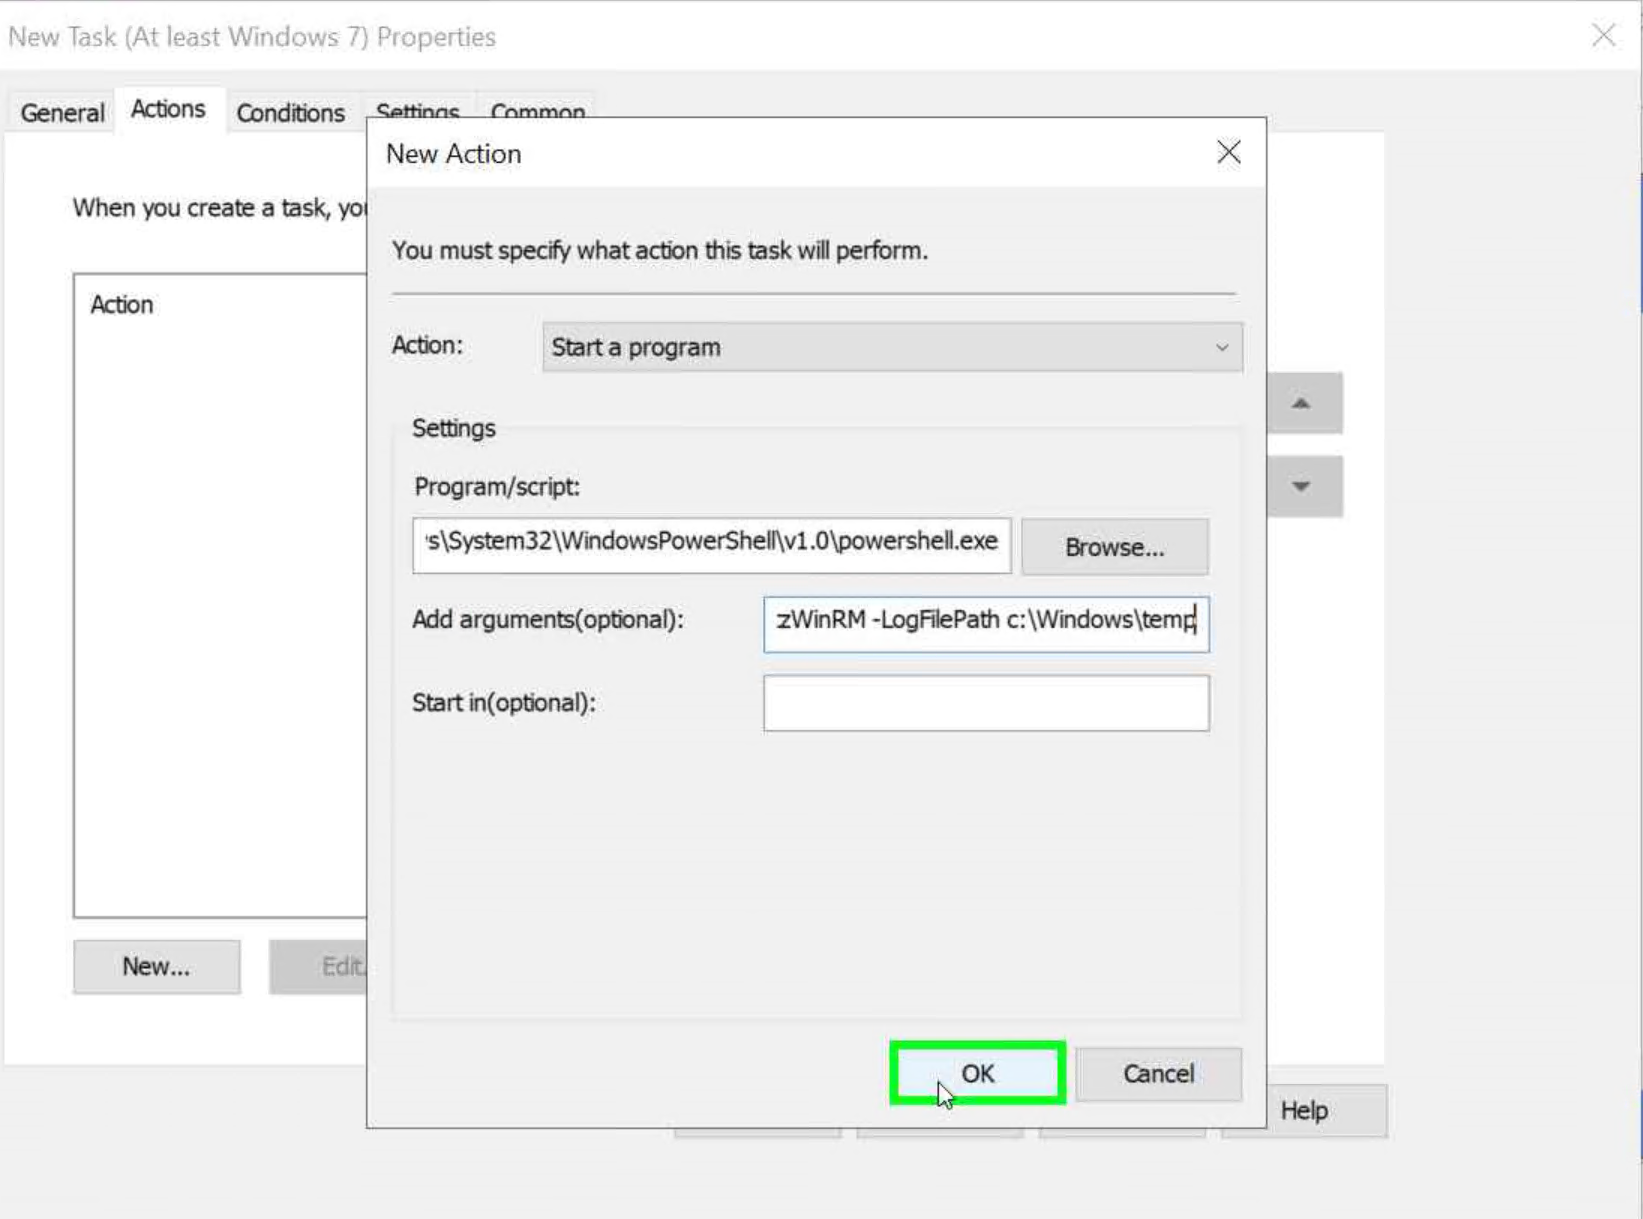
- click on “Actions (tab item)”
- click on “New…”
- Verify that ‘Start a Program’ is selected in the drop-down menu.
- click on “Program/script: ” and add the following
C:\Windows\System32\WindowsPowerShell\v1.0\powershell.exe - click on “Add arguments(optional)” and add the following:
-noprofile -executionpolicy bypass -f <YOUR_SHARE_PATH>\enable_winrm_os_monitoring.ps1 -Username <DOMAIN\USER> -GroupName <DOMAIN\GROUP> -LogFilePath c:\Windows\temp
- Note that <DOMAIN\USER> must exist and be a member of <DOMAIN\GROUP>
- Example:
-noprofile -executionpolicy bypass -f \\domotzlab.com\NETLOGON\enable_winrm_os_monitoring.ps1 -Username DOMOTZLAB\DomotzAgent -GroupName DOMOTZLAB\DomotzWinRM -LogFilePath c:\Windows\temp
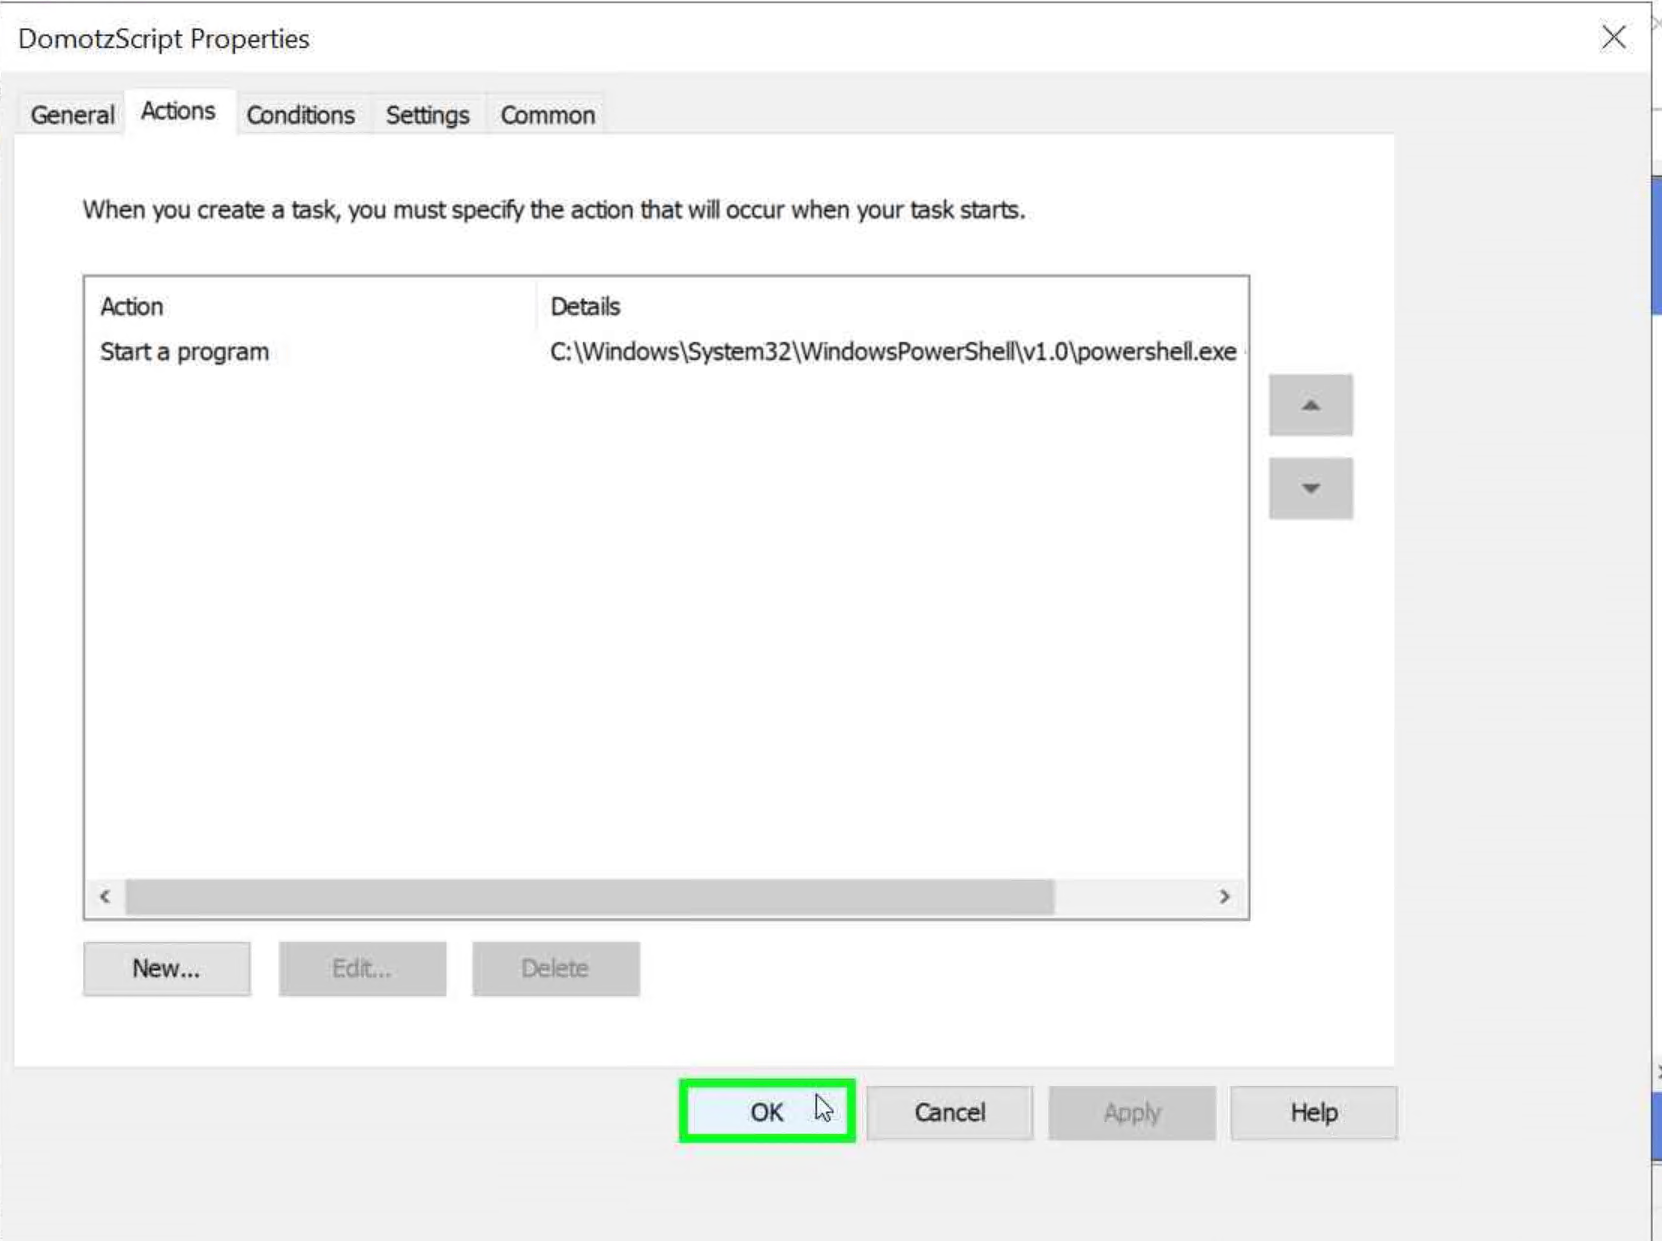
- click on “OK” on the action

- click on “OK” on the task

- Close the GPO editor
- Link the newly created GPO to the OU containing the computers you want to grant access to the user you selected in #25, the permissions are actually granted to the group, that’s why the user must be a member. You can rant permissions to different users just by adding them to the group.