
Domotz has developed a specialized set of features for Sony Bravia/Android 10 TV.
Configuring the Domotz Sony Bravia/Android TV
In order to monitor BRAVIA, you must first configure the Device itself.
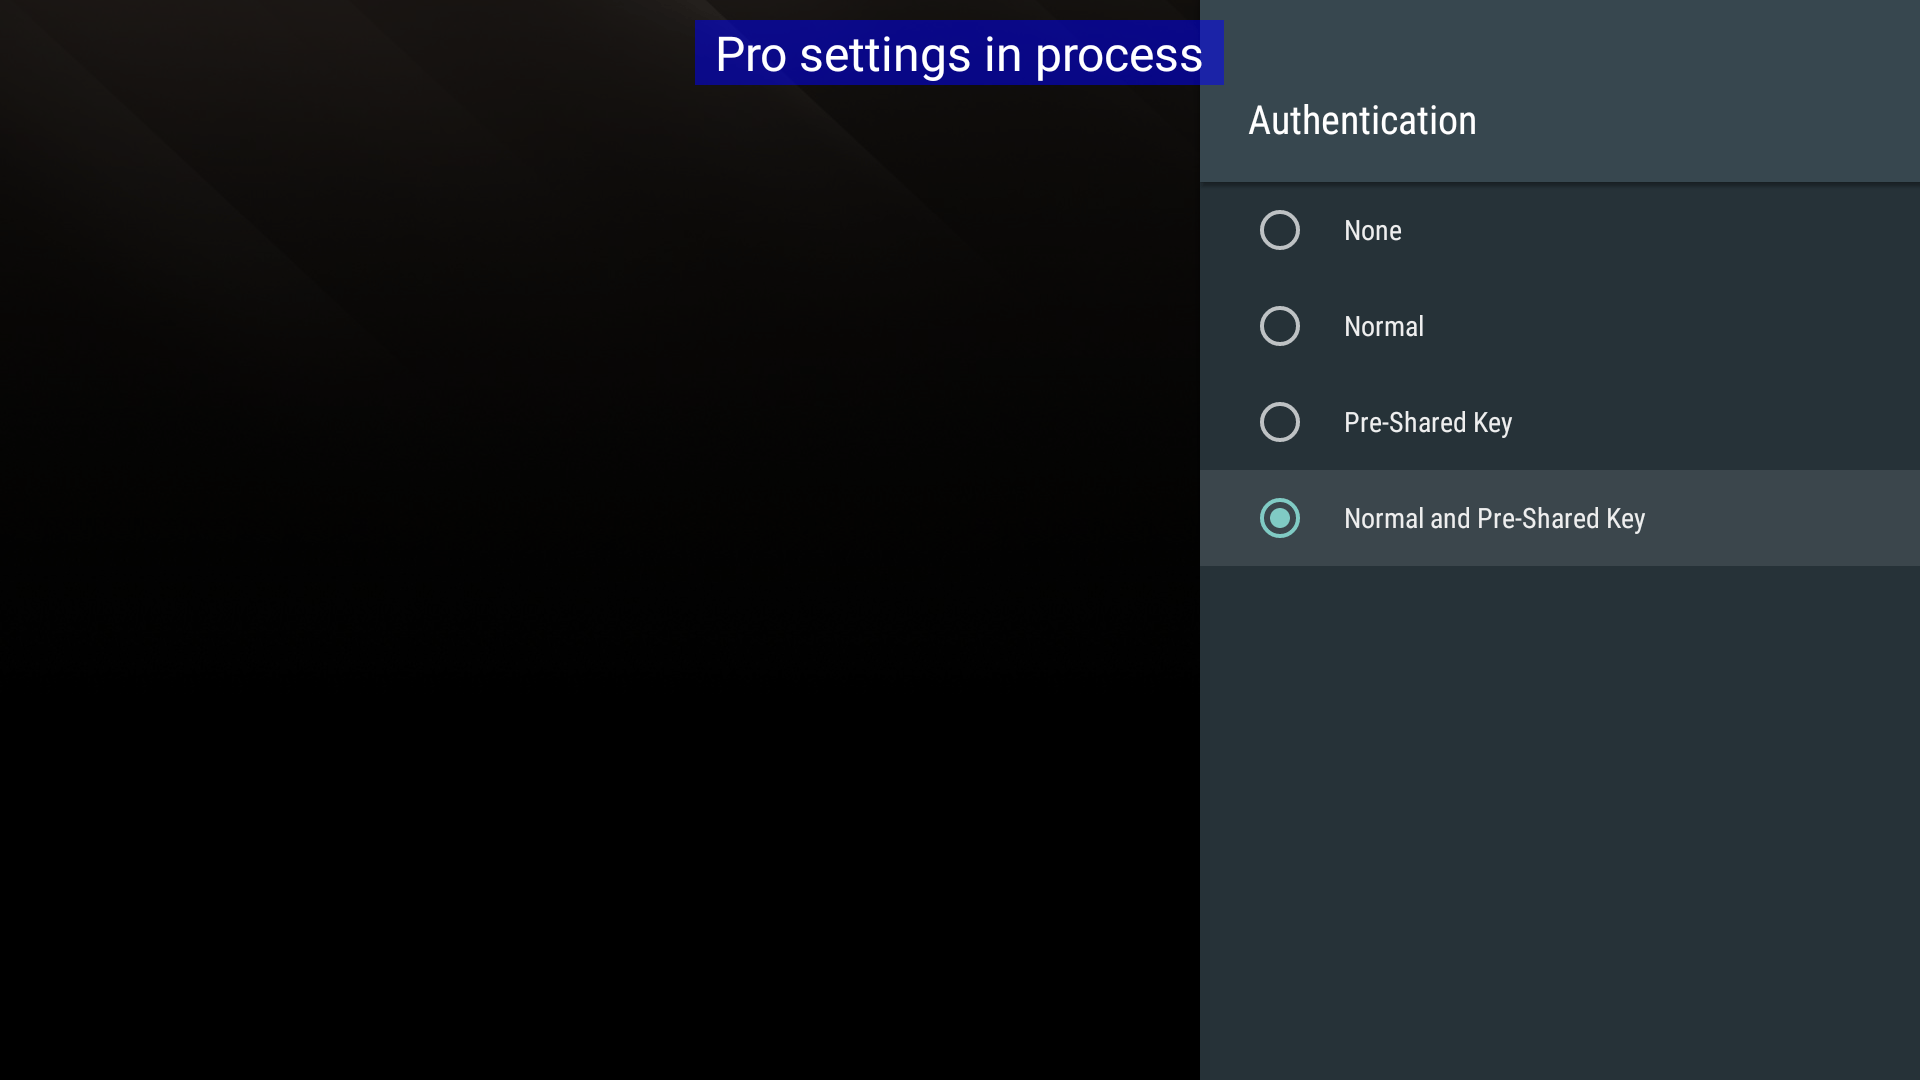
Enabling authentication
To enable authentication and to create a pre-shared you should use access the TV Settings in your TV Screen:
[HOME] Settings > Network and Internet > Home network setup > IP control > Authentication
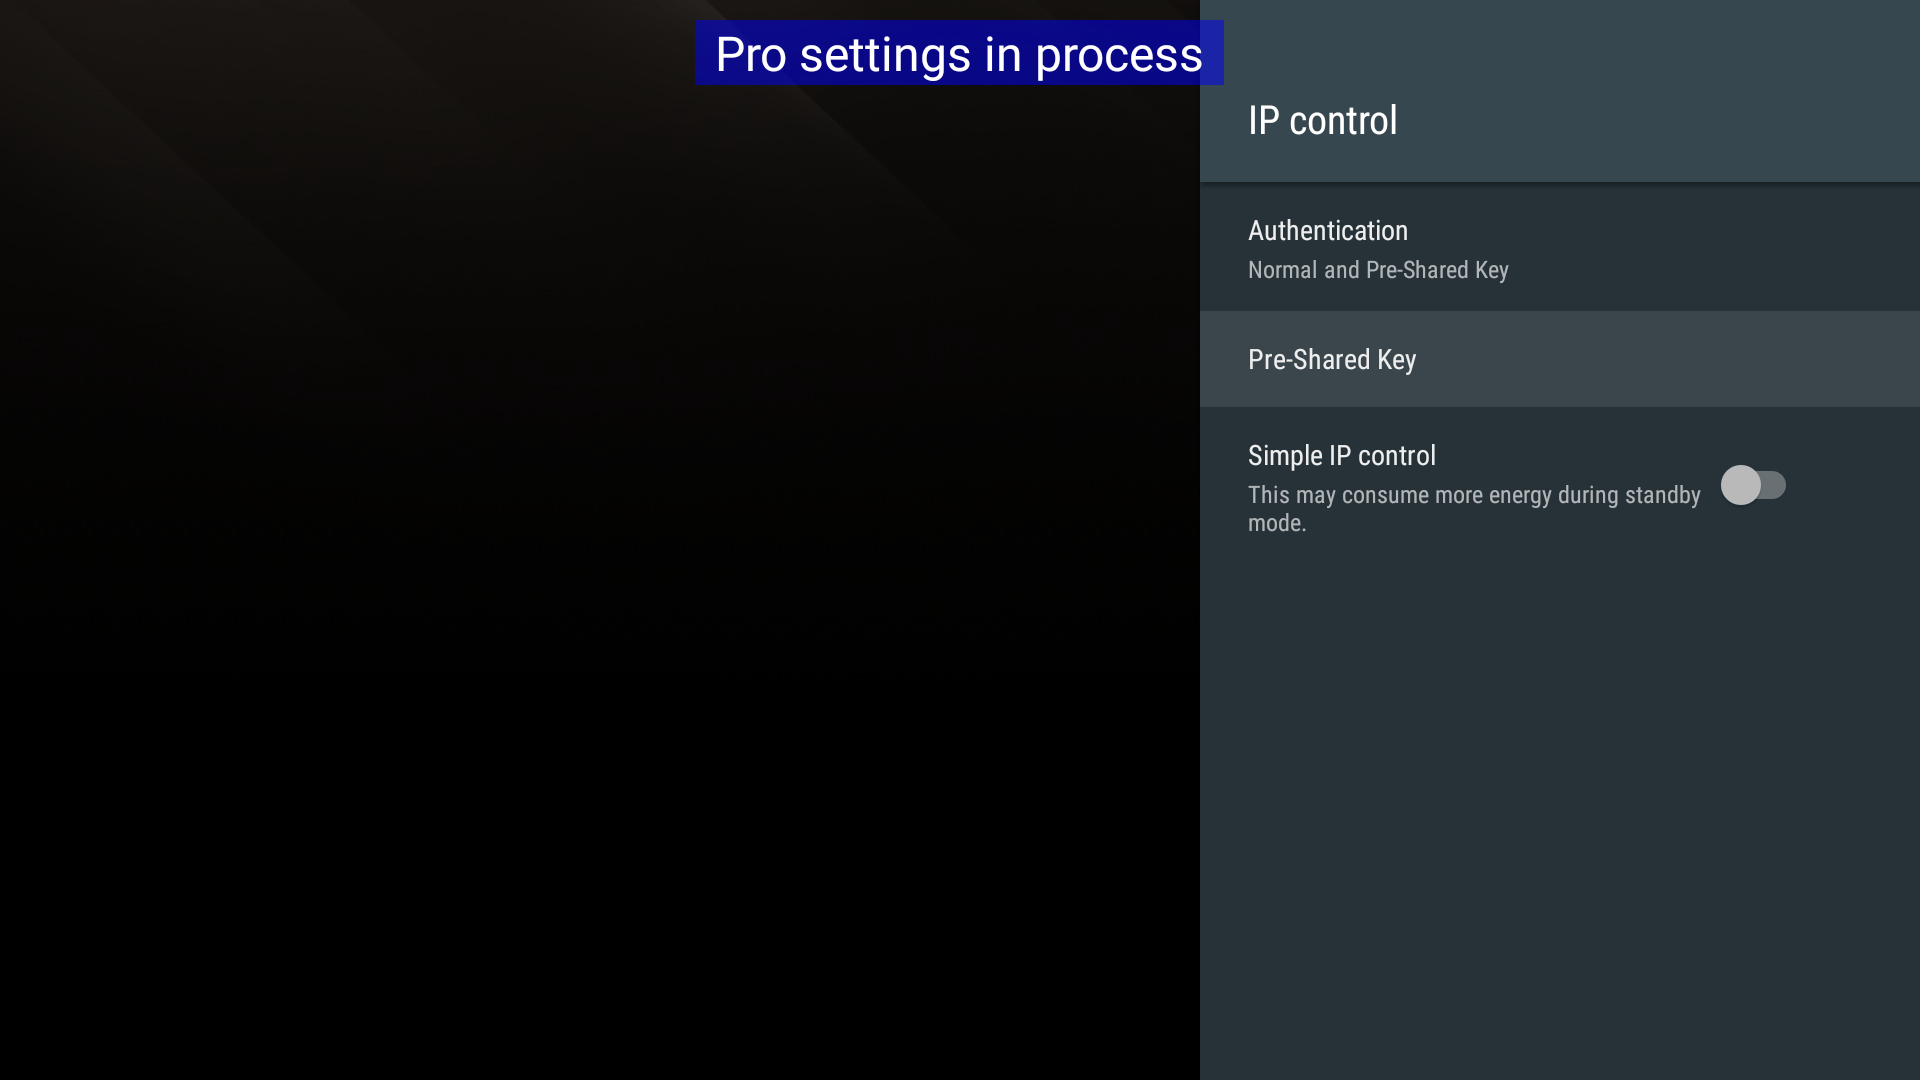
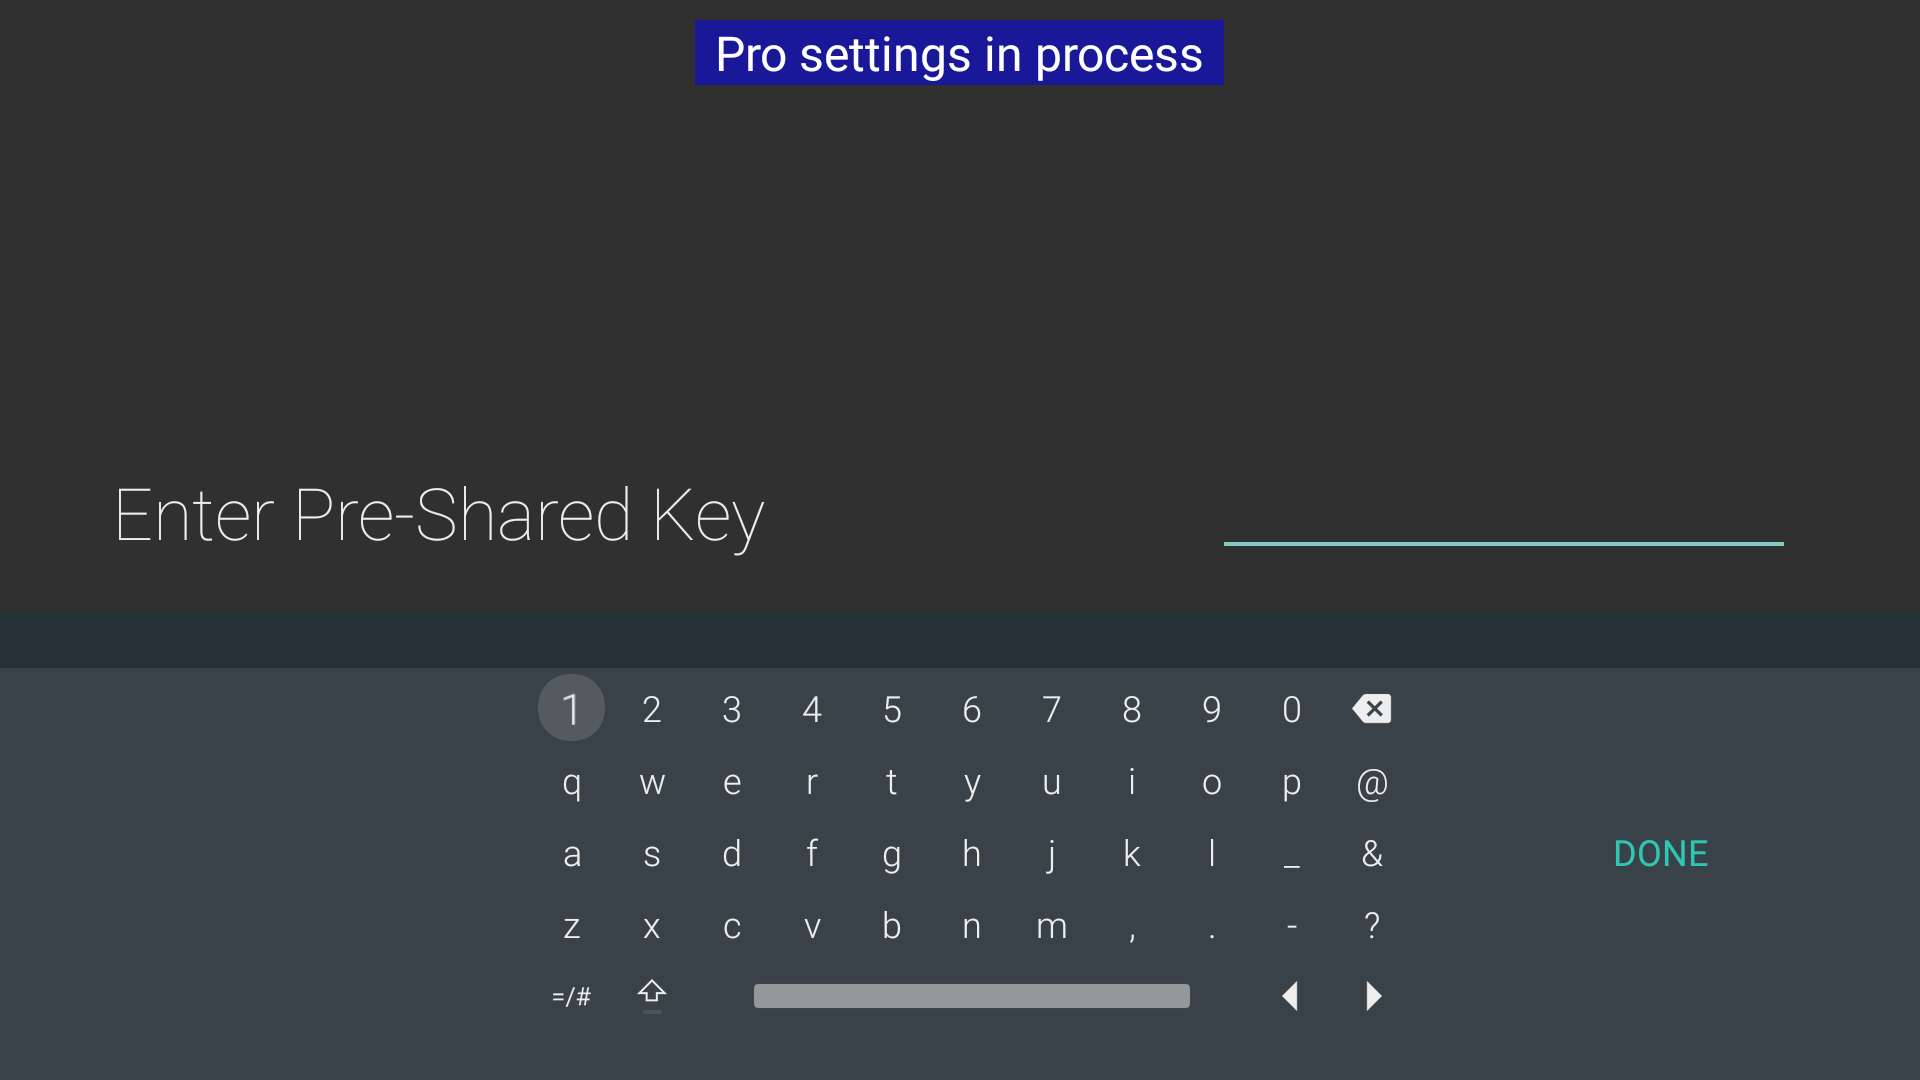
Creating the Pre-Shared key
[HOME] Settings > Network and Internet > Home network setup > IP control > Pre-Shared Key
Power on/off the device
In order to power on/off the device from Domotz you should also enable remote device control in the Device Web Configuration.
To do that please to go to:
[HOME] Settings > Network and Internet > Remote device settings > Control remotely > Enable
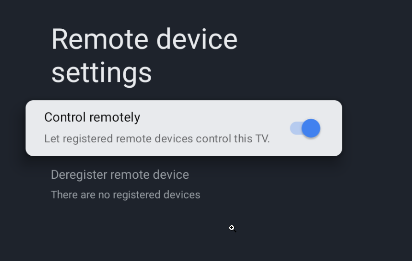
Remote Device Settings Interface
1. Control Remotely: A toggle switch allows you to enable or disable remote device control of the TV. Switch it on to let registered devices control the TV.
2. Deregister Remote Device: Indicates that no devices are currently registered. This option becomes relevant when there are devices to manage or remove.
For more detailed information on the above, please visit this website: https://pro-bravia.sony.net/develop/integrate/ip-control/
Unlock the Sony Bravia/Android TV in Domotz
After that, please access the Access Manager on your device:
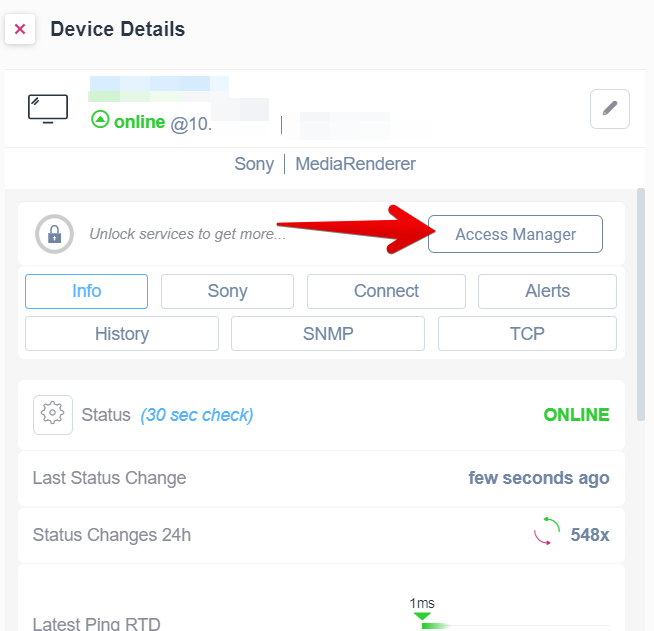
Device Details Screen Overview
1. At the top, the device status is indicated as "online" with a green icon.
2. Below the status, device specifics such as the make "Sony" and type "MediaRenderer" are listed.
3. To unlock additional services, click the "Access Manager" button.
4. Below the Access Manager, tabs are available for various options: "Info," "Sony," "Connect," "Alerts," "History," "SNMP," and "TCP."
5. The status section displays the current status as "ONLINE" and mentions the last status change occurred a "few seconds ago."
6. Additional statistics show the number of status changes in the past 24 hours and the latest ping response time.
And click on “Device is locked” to unlock it:
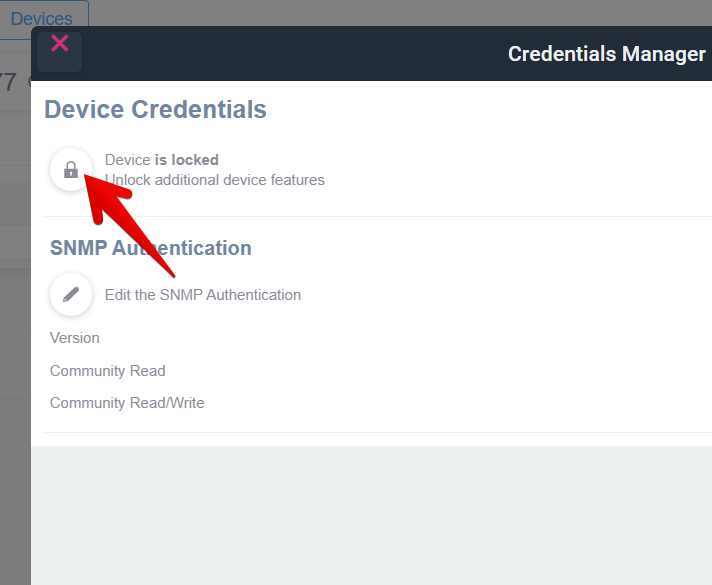
Device Credential Management Overview
1. In the Credentials Manager window, locate the "Device Credentials" section to verify device status. A message indicates "Device is locked" with an option to "Unlock additional device features."
2. Under "SNMP Authentication," you can edit SNMP settings. Options include "Version," and fields for "Community Read" and "Community Read/Write."
And insert here your Pre-Shared key:
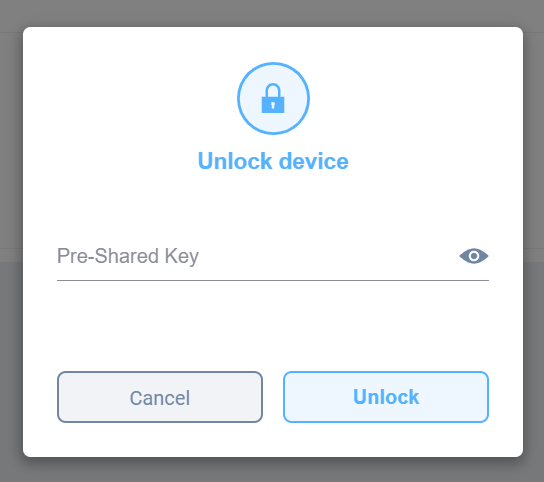
Device Unlock Prompt
1. Enter the Pre-Shared Key in the provided text field to unlock the device.
2. To reveal the key as you type, click the eye icon next to the text field.
3. Select "Unlock" to proceed once the key is entered.
4. Choose "Cancel" to exit without unlocking the device.
The Sony tab and the Info tab
The Sony tab
Once unlocked the new “Sony” tab will be available in the Device Details page:
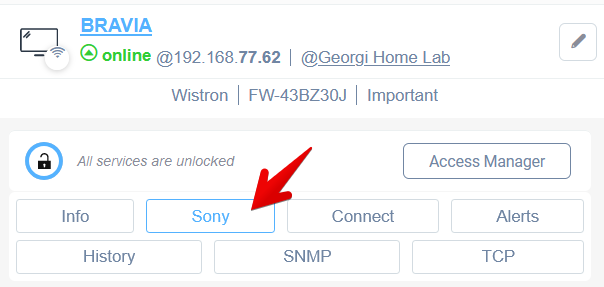
Accessing Sony Services on a BRAVIA Device Interface
1. Identify the device as a BRAVIA, shown as online with the IP address 192.168.77.62 and linked to Georgi Home Lab.
2. Ensure that all services are unlocked, as indicated.
3. Locate the "Sony" button among several service options.
4. Use the "Sony" button to access Sony-specific services.
5. Other available options include Info, Connect, Alerts, History, SNMP, and TCP.
6. An "Access Manager" button is available for additional management tasks.
In this tab, you will be able to:
– control the TV power
– see its major properties, such as Name, Model, and serial number
– adjust its volume and input source
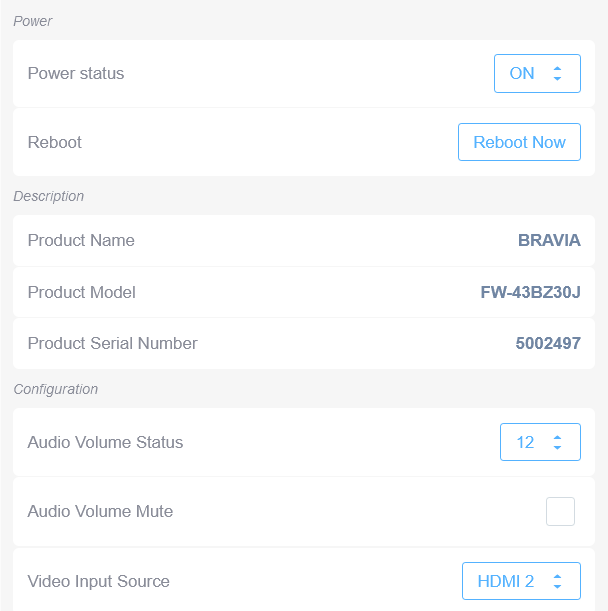
Device Control Interface Overview.
1. Under Power, you can view and change the Power Status, currently set to "ON". Use the dropdown to adjust. The Reboot section allows you to restart the device using the "Reboot Now" button.
2. In the Description section, the Product Name is "BRAVIA", the Product Model is "FW-43BZ30J", and the Product Serial Number is "5002497".
3. The Configuration section displays the Audio Volume Status, currently set to "12", adjustable via a dropdown menu. There is an option to mute the audio. The Video Input Source is set to "HDMI 2", with the option to change using the dropdown.
The Info tab
In the Info tab, also many information will be available and also you will have a quick access the reboot action:
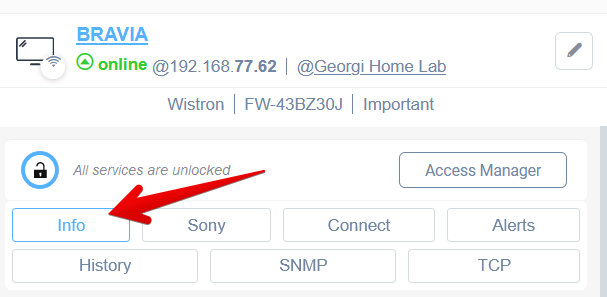
Device Information Navigation Guide
1. Verify the device name appears as "BRAVIA" with an online status indicator.
2. Note the IP address listed next to "online."
3. Observe the label indicating that all services are unlocked.
4. To view device details, select the "Info" button within the services section.
5. Additional options available include "Sony," "Connect," "Alerts," "History," "SNMP," and "TCP."
6. Use the "Access Manager" button for managing service access settings.
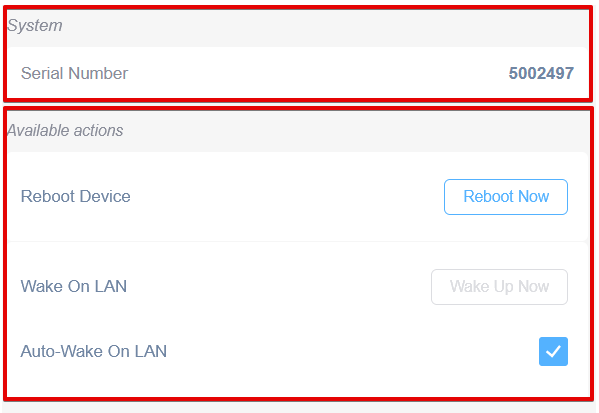
Serial Number and Available Actions for Device Management
1. View the serial number of the device, listed as 5002497 under the "System" section.
2. To reboot the device, select "Reboot Now" in the "Available actions" section.
3. The "Wake On LAN" option is available but currently disabled.
4. Enable "Auto-Wake On LAN" by ensuring the checkbox next to it is checked.