
Connect to the NetGear switch web server and proceed as explained in the following screenshot:
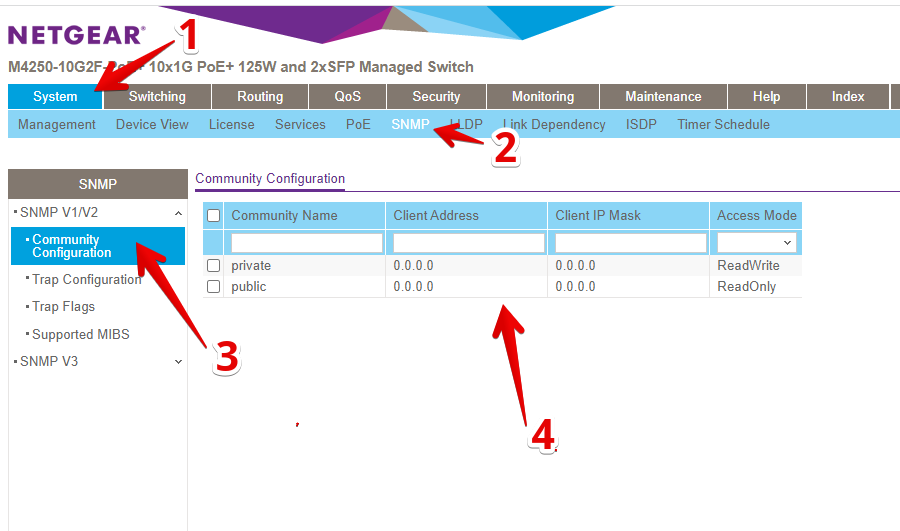
Configuring SNMP Community Settings in NETGEAR Switch Interface
1. Start by clicking on the "System" tab at the top left of the interface.
2. Next, select the "SNMP" option from the horizontal menu bar to open SNMP settings.
3. In the left sidebar, click on "Community Configuration" under the "SNMP V1/V2" section to manage SNMP communities.
4. The main panel displays community configuration options. You can enter details in fields such as "Community Name", "Client Address", "Client IP Mask", and choose the appropriate "Access Mode" (e.g., Read/Write, ReadOnly) for each entry. Adjust these settings according to your network management needs.
1) Click on System
2) Click on SNMP
3) Click on Community Configuration
4) Add/Modify the SNMP community strings
In case you would like to configure SNMP v3, please when on step 3, click on SNMP v3 and configure it.