
Prerequisites
Before proceeding, ensure the Domotz Box is connected to a trunk port on your switch, configured as follows:
- Untagged (native VLAN): The network that provides internet access to the Domotz Box
- Tagged: Any additional VLANs you want the Domotz Box to monitor
Example — Cisco switch trunk port configuration:
interface GigabitEthernet1/0/1
 description Domotz Box
 switchport mode trunk
 switchport trunk native vlan 10
 switchport trunk allowed vlan 55,58,666
Adding VLANs from Web App
1. Login into the Domotz Web App (https://portal.domotz.com/webapp/)
2. From the Explorer select the Domotz Box collector you want to add VLANs
3. At the Left Menu (Setup Review panel) click on the pen icon next to the VLANs.
Configuring VLANs in the Network Interface 1. Navigate to the "Network Configuration" section under the "Devices" tab.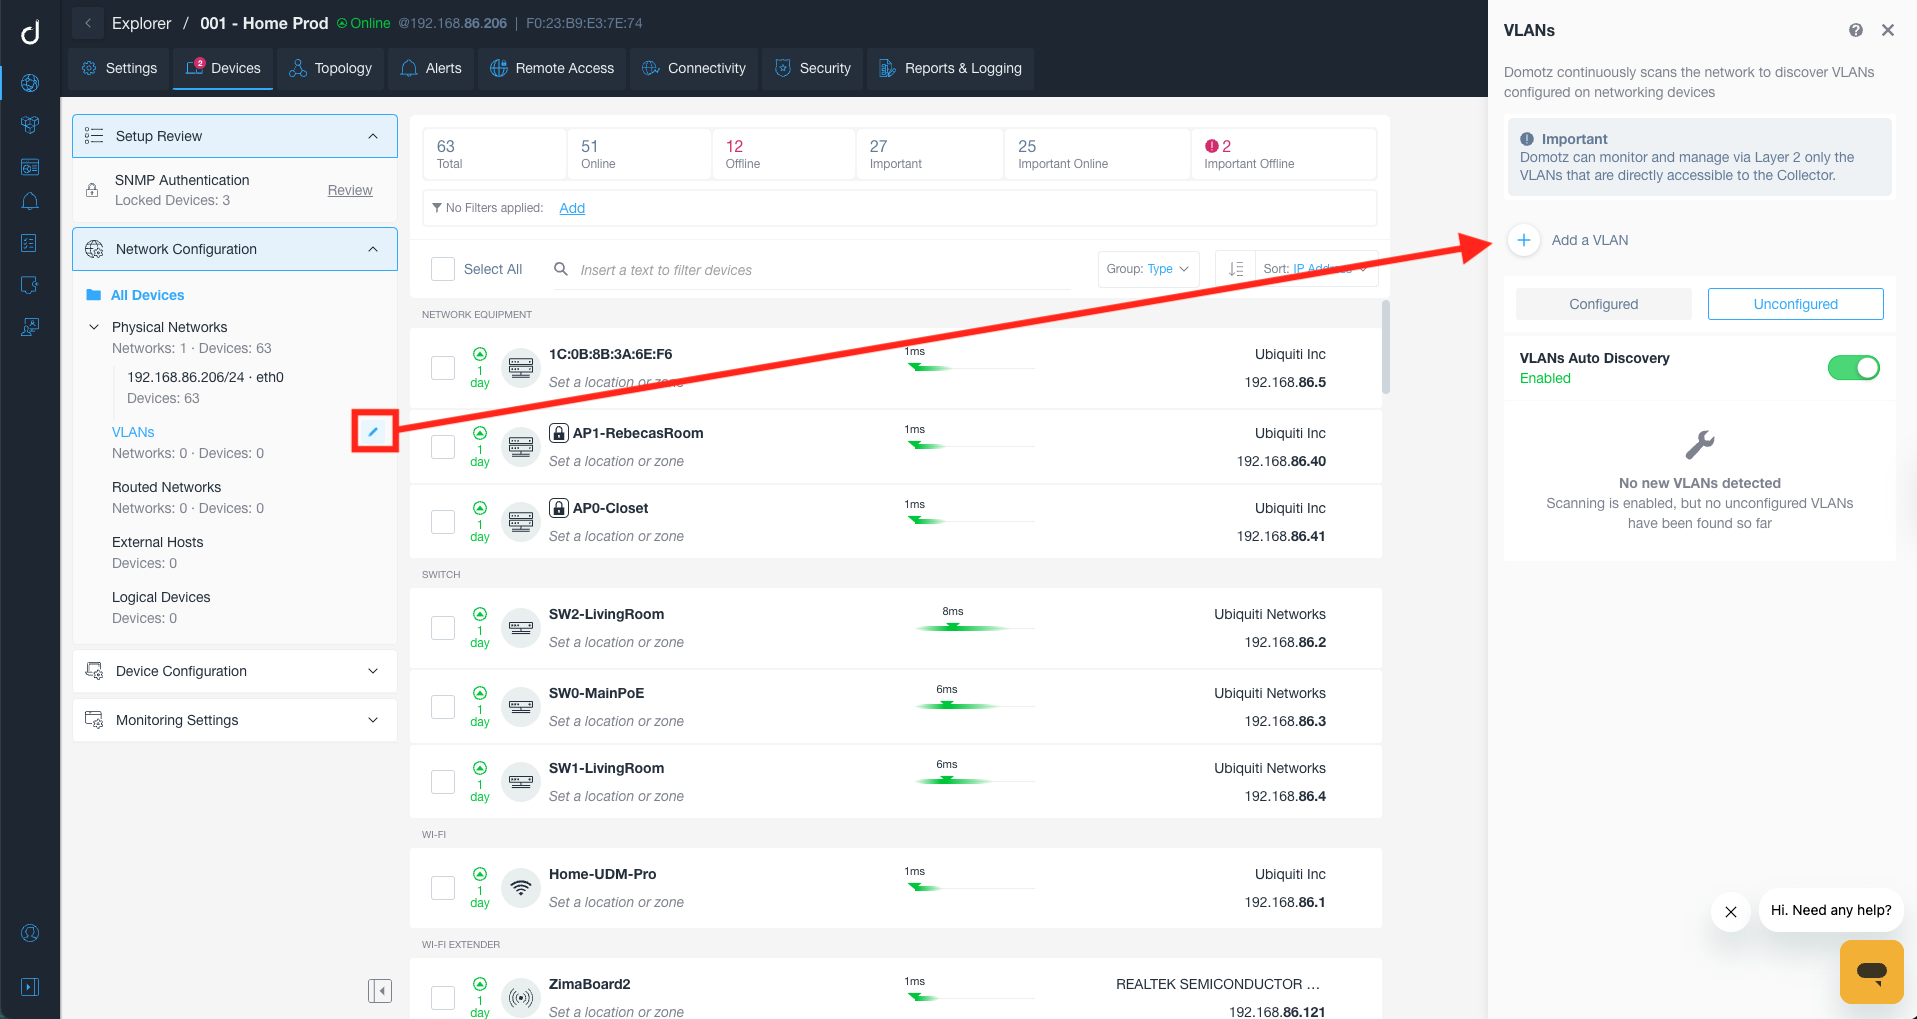
2. Select "VLANs" from the left menu. An editing icon is accessible for further configuration.
3. View the right panel labeled "VLANs," which shows VLAN management options.
4. To add a VLAN, click "Add a VLAN." Ensure "VLANs Auto Discovery" is toggled to "Enabled."
5. Note: VLANs can be monitored and managed only if accessible to the Collector via Layer 2.
6. The network equipment list displays devices with associated IP addresses and latency.
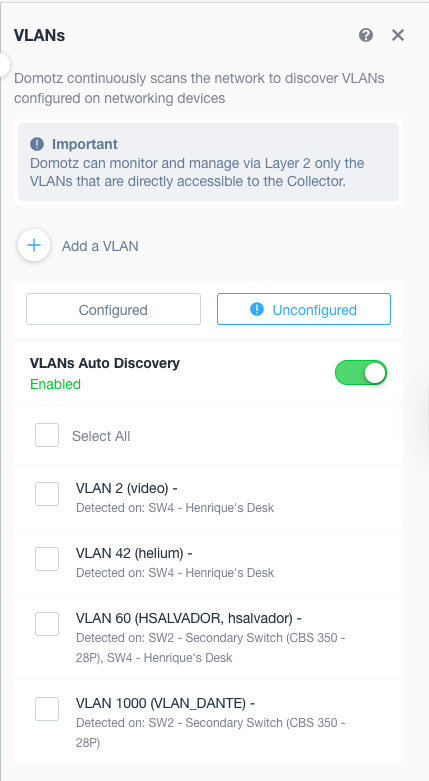
4. Click Add a VLAN, and fill in the VLAN ID and the IP Address/CIDR Notation you want the Domotz Box to use to communicate with other devices on that VLAN (e.g., 192.168.55.80/24). Ensure the address is not already in use, and avoid using the reserved network address of the subnet — on a /24 network, do not use 192.168.0.0/24; use a valid host address such as 192.168.0.10/24 instead.
Add a VLAN to Your Network 1. Enter the VLAN ID in the "ID" field. Example values include 55, 666, and 58.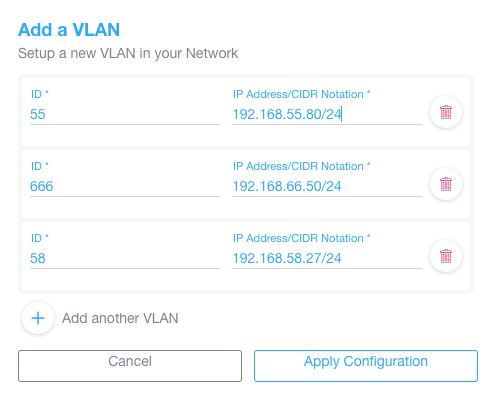
2. Enter the IP Address in CIDR Notation in the "IP Address/CIDR Notation" field. Example values are 192.168.55.80/24, 192.168.66.50/24, and 192.168.58.27/24.
3. To delete a VLAN entry, use the trash icon next to the specific entry.
4. To add another VLAN, click “Add another VLAN.”
5. After configuring, click "Apply Configuration" to save changes.
6. Use "Cancel" to discard changes.
5. Click Apply Configuration and wait a few minutes for the changes to be applied to the Domotz Box. Once complete, any devices on the new VLAN will begin appearing in your Devices list.
Adding VLANs from Local Configuration Page
Open a browser and navigate to the HTTP service running on port 3000 of your Domotz Box:
http://[Domotz_Box_IP_Address]:3000 (e.g., http://192.168.0.100:3000)
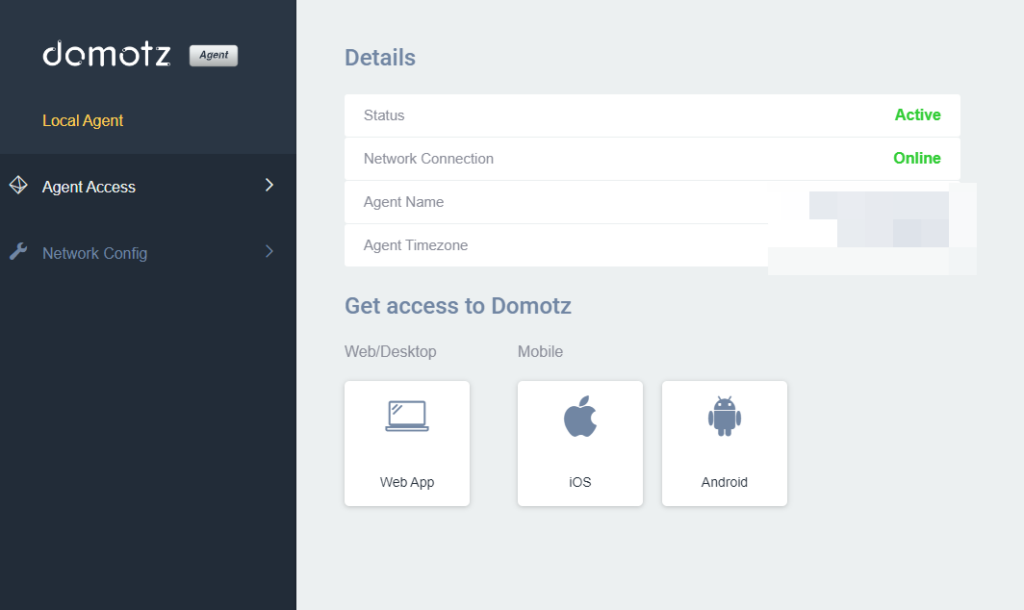
Domotz Agent Access and Status Overview
1. In the left sidebar, under "Local Agent," select "Agent Access" to view details.
2. The "Details" section lists the following:
- "Status" shows "Active," indicating the agent is active.
- "Network Connection" is "Online," confirming a successful network connection.
- "Agent Name" and "Agent Timezone" are also displayed.
3. To access Domotz, choose your platform under "Get access to Domotz":
- "Web App" for browser access.
- "iOS" and "Android" for mobile app access.
Once on the page, click Network Config to open the network configuration panel, then click the Config button next to the VLAN label.
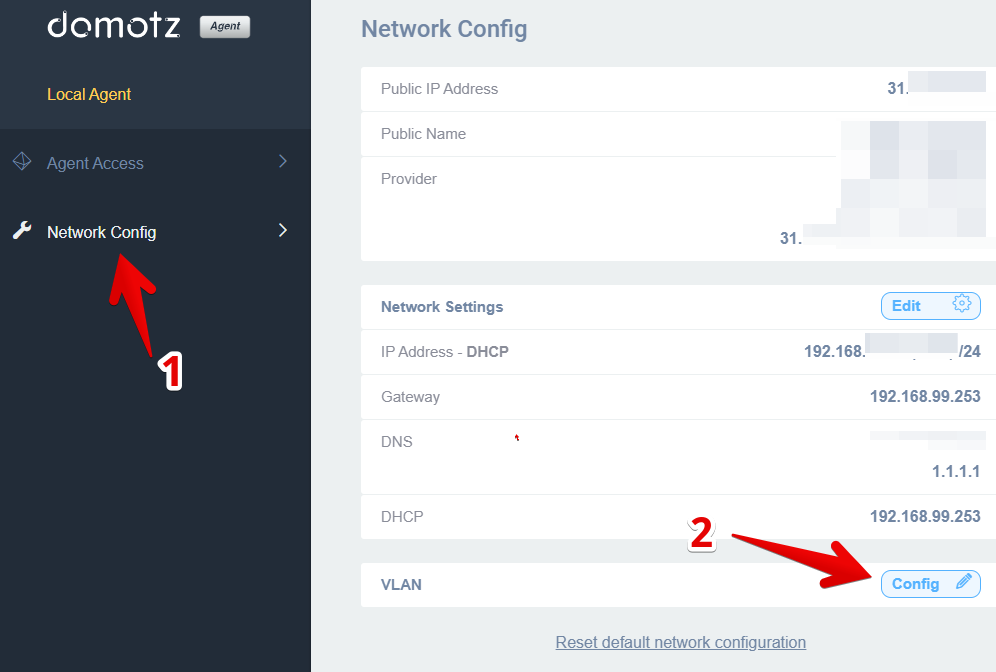
Accessing and Configuring Network Settings in Domotz.
1. In the Domotz interface, locate and select "Network Config" from the left-hand menu under "Local Agent."
2. In the "Network Config" section, find the "VLAN" row and click the "Config" button to modify VLAN settings.
Use this area to adjust network settings such as IP address, gateway, DNS, and DHCP.
The VLAN configuration screen will appear.
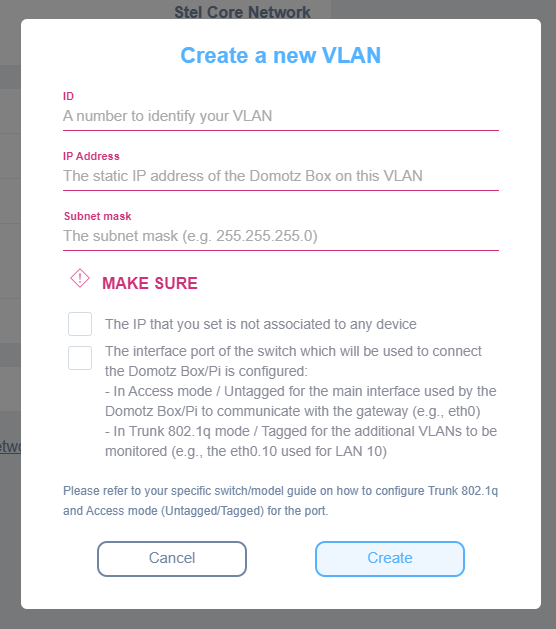
Creating a New VLAN Configuration
1. **ID**: Enter a number to identify your VLAN.
2. **IP Address**: Input the static IP address of the Domotz Box on this VLAN.
3. **Subnet Mask**: Provide the subnet mask (e.g., 255.255.255.0).
**Checklist**:
- Ensure the entered IP is not associated with any device.
- Configure the switch port connected to the Domotz Box/Pi:
- Use Access mode (Untagged) for the main interface to communicate with the gateway (e.g., eth0).
- Use Trunk 802.1q mode (Tagged) for additional VLANs (e.g., eth0.10 for LAN 10).
Refer to your switch/model guide for instructions on configuring Trunk 802.1q and Access modes.
At the bottom, there are two buttons: "Cancel" to discard changes and "Create" to save the new VLAN configuration.
For each VLAN you want to add, provide the following three values:
1) VLAN ID — The tag/identification number of the VLAN you want to add.
2) Static IP Address — The IP address to assign to the Domotz Box’s network interface on that VLAN. Ensure the address is not already in use, and avoid using the network address of the subnet (e.g., on a /24 network, do not use 192.168.0.0 — this is the reserved network address; use a valid host address such as 192.168.0.10 instead).
3) Subnet Mask — The subnet mask corresponding to that VLAN.