Domotz Agent Installation on Virtual Box (VM)
This section contains a few tips and tricks on how to get started with the Domotz Agent on your Virtual Box.
Installing the Domotz Agent
Step 0 – Download the VM Image:
1.Download the VirtualBox image from here:
- US Mirror: domotzpro-ubuntu-24.04.2-x64-4.9.2-7.4.2-b001-204-virtualbox_2025.zip
- EU Mirror: domotzpro-ubuntu-24.04.2-x64-4.9.2-7.4.2-b001-204-virtualbox_2025.zip
2. Unzip it in a location of your choice.
Step 1. Import Appliance:
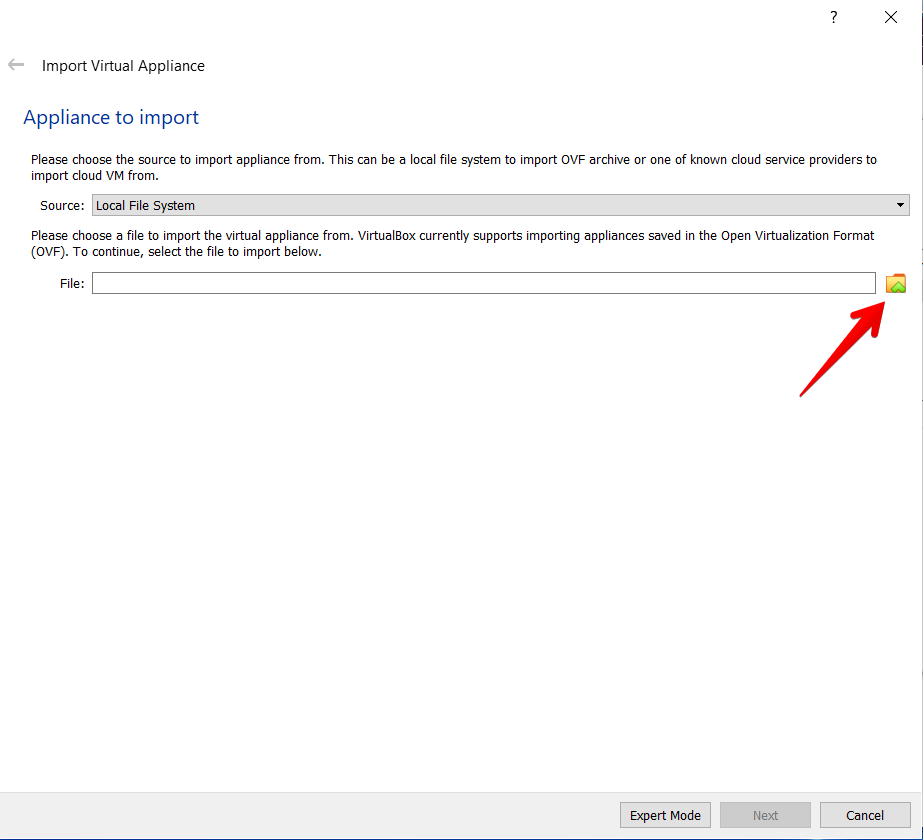
After the download has finished, open Oracle VM VirtualBox Manager (which you need to have previously installed on your system), and from the File menu select Import Appliance:

Search for the downloaded file:
Select the downloaded .ova file:
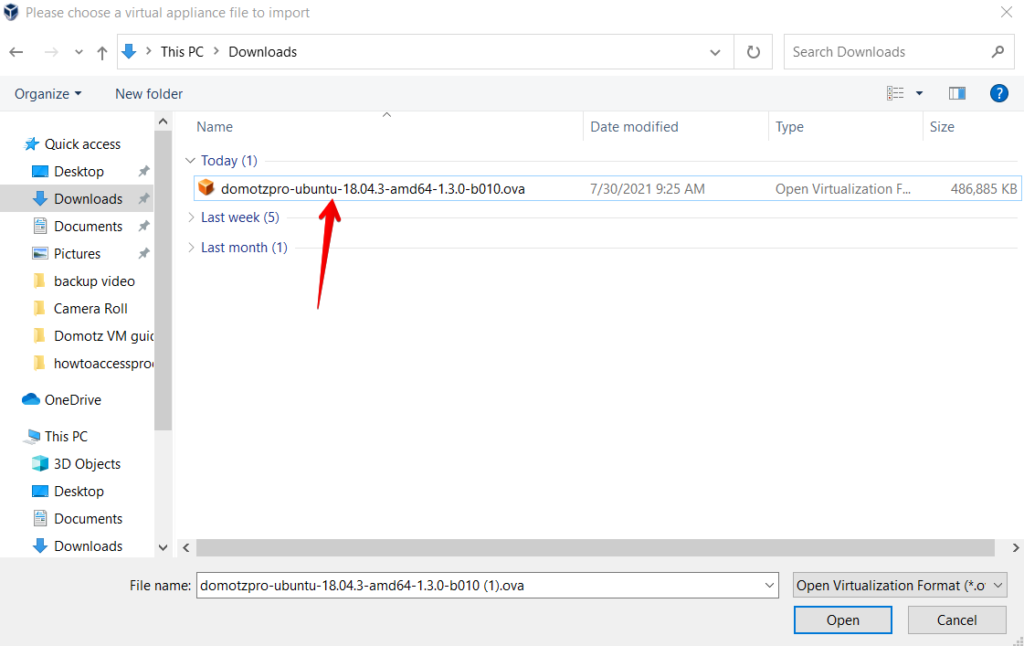
and import the Domotz Agent Virtual box image and click Next:

Step 2 – Edit the VM settings:
When the import process is finished, please edit the VM settings:

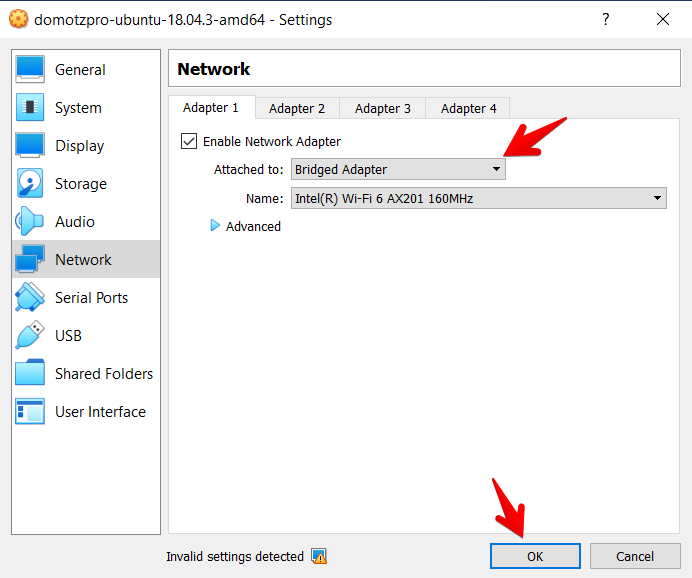
Select the Network settings:

Change the NAT network to Bridge and click OK:
In case you want to monitor Windows TAP L2VPN configured interfaces, please jump to the NAT setup paragraph.
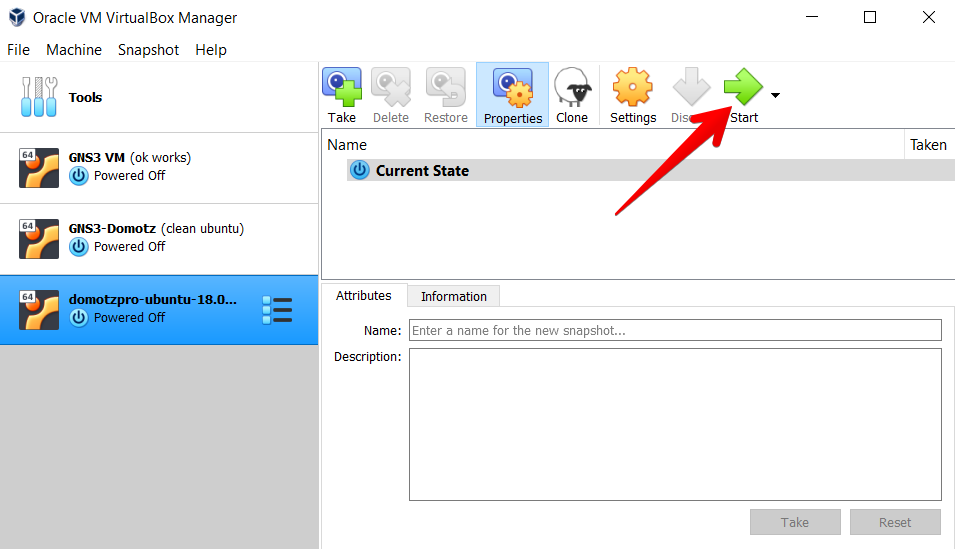
Now you can start the VM:
Step 3 – Setting up the IP address:
After the VM has started login as
username: domotz
password: domotz
and issue the ifconfig command in order to see the IP address of your Domotz Agent:

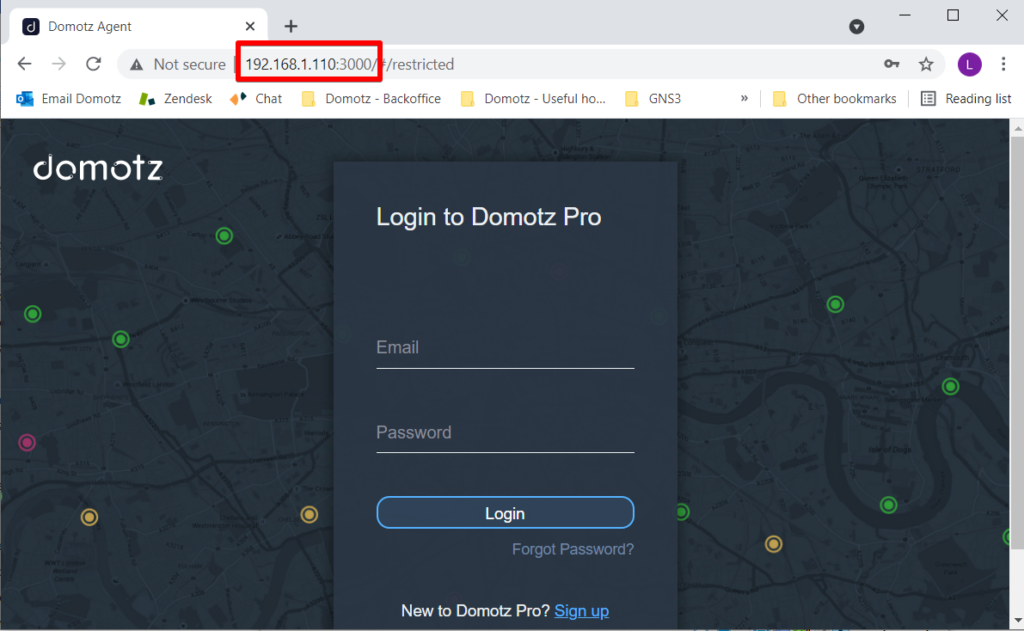
Now you can connect to the Domotz Agent using your browser using the IP you got with the ifconfig command followed by the 3000 port.
In this case, we will use the address http://192.168.1.110:3000/
NAT setup: Configuration for Windows TAP L2VPN
In case you have windows based TAP Layer2 VPNs you should use the NAT network in order to have Domotz scan your connected VPNs.
Step 1:
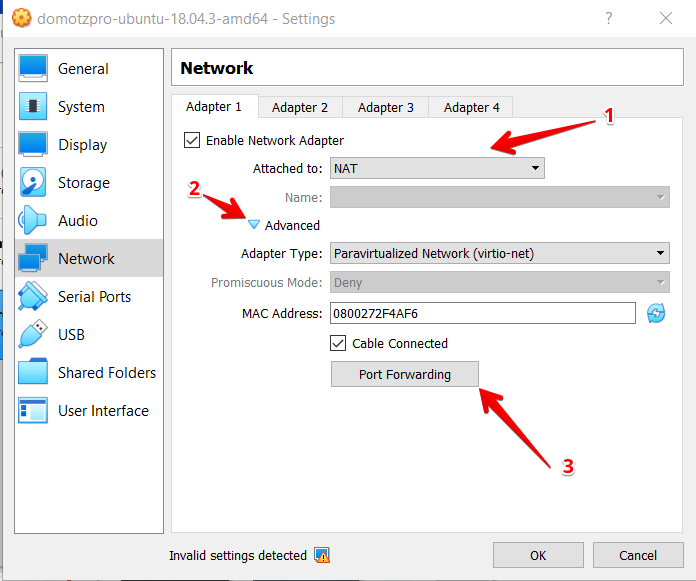
To do this go to the Network settings of your virtual machine and please select Attached to NAT (1), then Advanced (2), then click on the Port Forwarding (3) button:
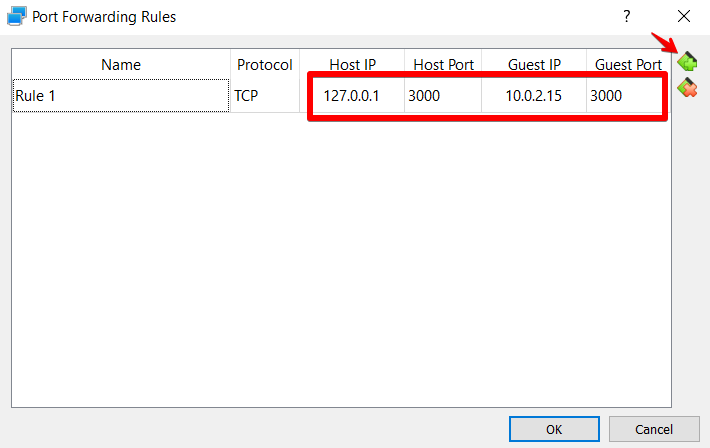
Then insert these values by clicking on the + button at your right:
Step 2:
Start the VM and you will be able to access the Domotz Agent at http://127.0.0.1:3000
