Purpose
Thanks to the integration, we can quickly create a spreadsheet that fetches, modifies, and updates the device data from a Domotz Agent with just one click – directly from Google Sheets.
In just a matter of minutes, by following these simple steps, using the Domotz Public API allows you to easily connect Domotz with Google Sheets.
STEP 1: Create a New Google Sheet
First of all, we need to open a new Google Spreadsheet. To do that, we can easily go to https://spreadsheet.new and automatically create a new Spreadsheet file using our Google Account.
STEP 2: Create an API Key in Domotz
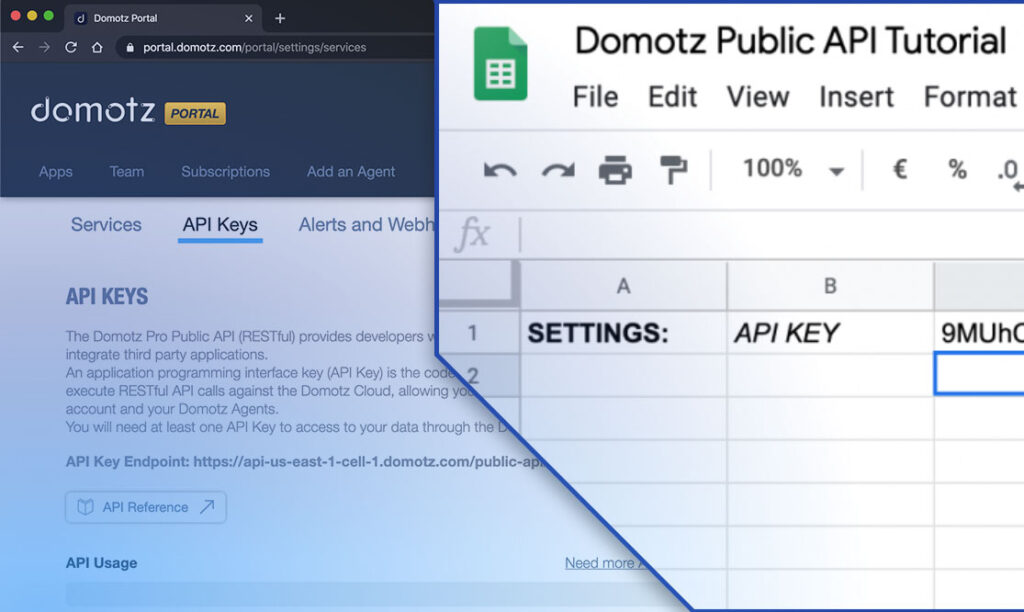
In order to fetch data using Domotz Public API, we need to create an API Key. The idea is to store the generated API Key in the spreadsheet itself so as to reference it whenever we need.
To generate a new API Key, go to Domotz Portal (http://portal.domotz.com) > Settings (Top Right Corner) > API Keys > Create an API Key. Enter your password and write a name to remember why you created the API Key (i.e. Google Spreadsheet).
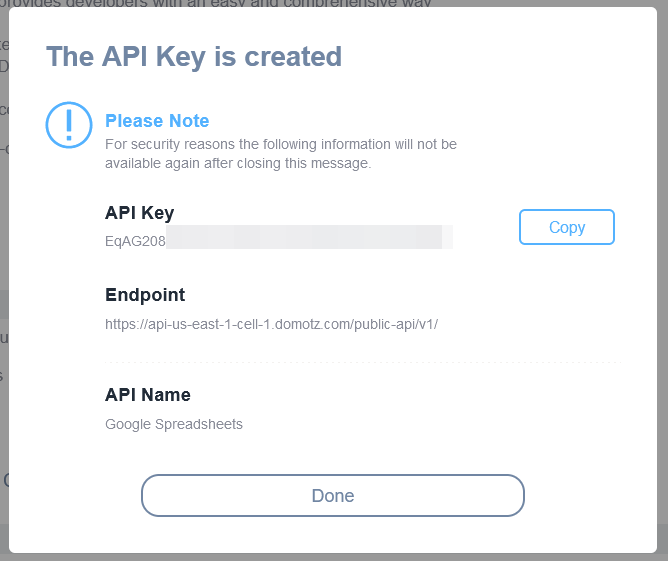
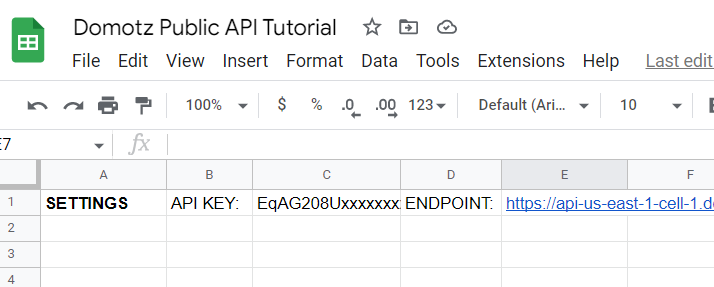
Copy the API Key and paste it in the Spreadsheet wherever you prefer (for this tutorial I’m going to use the cell `C1`).
You’ll do the same for the endpoint field… copy and paste it into another cell (in this tutorial I’m going to use the cell `E1`).
STEP 3: Let’s code a Google Apps Script!
Now that we have all the elements to play with, we can start the Google Apps Scripts! We have to write a script to fetch the data and render it in Google Sheets.
Open the Apps Script Editor (Extensions -> Apps Script) and rename the default file in `utils.gs`. In this file, we are going to write some essential functions needed:
– A function to customize our menu
– A function to fetch the data from Domotz
– A function to write the data down into the Spreadsheet file
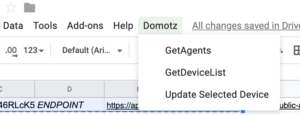
Google Sheets permits to add a custom field in the main menu. To do that we need to insert the following lines into the script file:
function onOpen(){ // Invoked everytime the Spreadsheet is open
   var ui = SpreadsheetApp.getUi();
   ui.createMenu('Domotz')
  .addItem('GetAgents', 'getAgents')
  .addItem('GetDeviceList', 'getDeviceList')
  .addItem('Update Selected Device', 'updatedevice')
  .addToUi();
}
Add a function to fetch the data
Now we need a function that helps us to invoke the Domotz API. I defined the function below that automatically adds the API Key in the request reading it from the spreadsheet. This function can be extended as you want but keep it simple for this tutorial.
var API_KEY = SpreadsheetApp.getActiveSheet().getRange('C1').getValue(); // Edit the cell to fetch the correct value from the spreadsheet
function domotzFetch(url){
  return UrlFetchApp.fetch(url, {
    headers: {
    'X-Api-Key': API_KEY,
    'Accept': 'application/json'
    }
  })
}
Add function to write the JSON into the file
Now we need to find a way to render our JSON into the Spreadsheet table. This can be tricky stuff since JSON has, potentially, a huge amount of nesting levels instead of the table… is just a table.
To convert a JSON into a table, I defined a function that has two input parameters: the JSON with the data (it is an array of object in our case) and a map used to convert the JSON (maybe nested) field into a flattened array. The result of the function is an array of arrays containing all our fields defined in the map.
function createTableFromJSON(jsonObject, keys){
  var result = [];
  var header = [];
  for(var key in keys){
    header.push(keys[key]);
  }
  result.push(header);
  jsonObject.map(function(agent){
    var agentArray = [];
    for(key in keys){
      var prop = key.split('.').reduce(function(o, i){ return o ? o[i] : null }, agent)
      agentArray.push(prop);
    }
    result.push(agentArray);
  });
  return result;
}
The functions can be used in this way:
var object = JSON.parse(fetchedDataFromDomotz);

var keys = {
 'id': 'DeviceId',
 'display_name': 'Name',
 'importance': 'Importance',
 'ip_addresses': 'IP Addresses',
 'hw_address': 'MAC Address',
 'user_data.vendor': 'Make',
 'user_data.model': 'Model',
 'details.zone': 'Location',
 'details.room': 'Room'
};

var result = createTableFromJSON(object, keys);
Write data into the table
These two functions are pretty easy. The `writeTable` gets a cell coordinate and an Array of Array as input (the result of the function above) and start to write down the values into the file.
function writeTable(startingRow, startingColumn, values) {
  values.map(function(value, index) {
    writeRow(startingRow+index, startingColumn, value);
  });
}

function writeRow(row, startingColumn, values){
  const fn = function (v) {
    return [v];
  }

  SpreadsheetApp.getActiveSheet().getRange(row, startingColumn, 1, values.length).setValues([values.map(fn)]);
}
STEP 4: Fetch the agents
If all the functions above are clear, we can now proceed in writing the function to fetch data from Domotz. Let’s start with fetching the Agent List.
var BASE_URL = SpreadsheetApp.getActiveSheet().getRange('E1').getValue();

function getAgents(){
  var fetchUrl = BASE_URL+'agent?page_size=4000'; // API Resource to retrieve the Agent List
  var jsondata = domotzFetch(fetchUrl);

  var response   = JSON.parse(jsondata.getContentText());
  var keys = {
    'display_name': 'Name',
    'creation_time': 'Creation Time',
    'id': 'Id',
    'access_right.api_enabled': 'Can use API', // The Agent specific API can be used only by the premium agents
    'status.value': 'Status'
  };

  var result = createTableFromJSON(response, keys);

  var cell = SpreadsheetApp.getActiveSheet().getCurrentCell(); // Get the selected cell

  writeTable(cell.getRow(), cell.getColumn(), result);
}
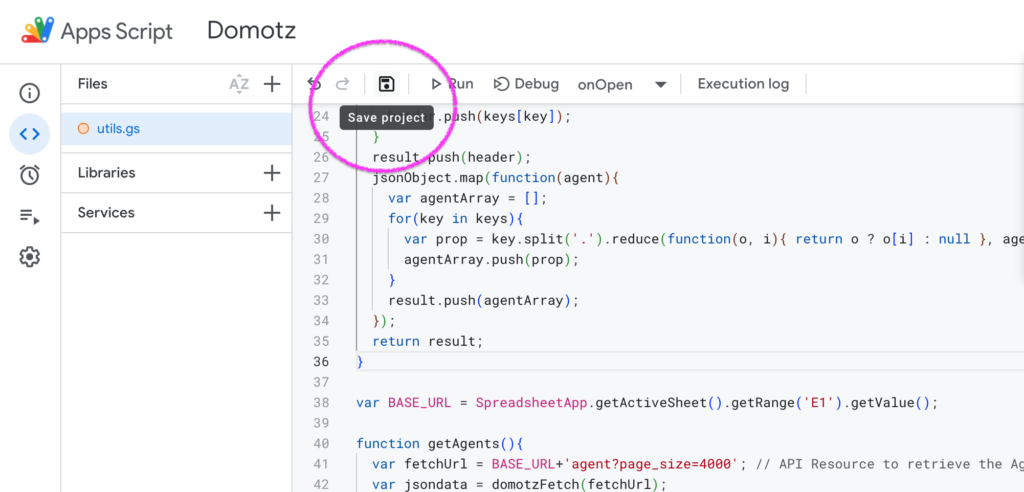
Once done, click on “Save” button to save the project:
You will the be ready to use the new functions. Refresh the Google Sheet.
STEP 5: Run it and test the Domotz Public API + Google Sheet integration
This is a good point to try to execute your code. Go to the main Spreadsheet tab, reload it (press Command + R on your keyboard). Then select the first empty cell, wait until the Domotz label appears in the menu, select GetAgents and voilà!… your agents are automatically fetched from your Domotz Account.
NOTE: you will be required to allow the scripts to be executed on your Google Sheet.
STEP 6: Fetch the devices
Let’s continue to implement the functionalities required to fetch and modify our agents.
We have to define a `getAgents`-like function that fetch the device list from a specific agent and render the result into our spreadsheet.
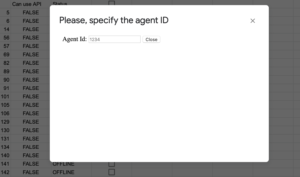
In this case, the implementation is a bit more tricky since we need to specify which agent we want to query. I’ve found this solution: when you request a list of devices, a popup is shown to request the agent ID.
To implement this solution we need, first of all, create a new file called `selectAgentIdPopup.html` and define in it the template of the popup
Agent Id:
    <input id="agentId" type="number" placeholder="1234" />
     <input type="button" value="Close" />
And then, create the function to fetch the devices. If the agentId is not specified (as it is when you invoke it clicking on the menu item), this function opens the popup, otherwise, if you pass a deviceId (as happens when it is invoked by the popup itself), it fetches the data. Even in this case the login to fetch and render the data is similar to the previous one, except the mapping object between the devices fields and the table values.
function getDeviceList(agentId, cell){
  if(!agentId){
    var html = HtmlService.createHtmlOutputFromFile('selectAgentIdPopup');
    SpreadsheetApp.getUi() // Or DocumentApp or SlidesApp or FormApp.
      .showModalDialog(html, 'Please, specify the agent ID');
    return;
  }

  var fetchUrl = BASE_URL+'agent/'+agentId+'/device';
  var jsondata = domotzFetch(fetchUrl);

  var object = JSON.parse(jsondata.getContentText());

  var keys = {
    'id': 'DeviceId',
    'display_name': 'Name',
    'importance': 'Importance',
    'ip_addresses': 'IP Addresses',
    'hw_address': 'MAC Address',
    'user_data.vendor': 'Make',
    'user_data.model': 'Model',
    'details.zone': 'Location',
    'details.room': 'Room'
  };

  var result = createTableFromJSON(object, keys);
  /* Prepend agentId */
  result.map(function(line, index){
    if(index == 0) line.unshift('AgentId');
    else line.unshift(agentId);
  });

  if(!cell){
    cell = SpreadsheetApp.getActiveSheet().getCurrentCell();
  }
  writeTable(cell.getRow(), cell.getColumn(), result);
}
Notice, as in the previous case, the function starts to fill the spreadsheet from the cell you are on, so be sure to don’t select an agent cell otherwise the data will be overwritten.
STEP 7: Edit device field
The final step! After you edit some device information, you want to update the Domotz Device. To help you in this operation I wrote the following functions: the usual handler (as seen before) and a function that, starting from a deviceId cell, read the values (you can extend them as you prefer) and create the JSON object to sent back to Domotz.
function updateDeviceField_(deviceId, agentId, field, newValue){
  var url = BASE_URL+['agent/', agentId, '/device/', deviceId, '/', field].join('');
  Logger.log(url);

  UrlFetchApp.fetch(url, {
    method: 'PUT',
    payload: JSON.stringify(newValue),
    headers: {
      'X-Api-Key': API_KEY,
      'Content-Type': 'application/json'
    }
  });

}

function updatedevice(){

  var deviceIdCell = SpreadsheetApp.getActiveSheet().getCurrentCell();

  var agentId = SpreadsheetApp.getActiveSheet().getRange(deviceIdCell.getRow(), deviceIdCell.getColumn()-1).getValue();
  var make = SpreadsheetApp.getActiveSheet().getRange(deviceIdCell.getRow(), deviceIdCell.getColumn()+5).getValue();
  var model = SpreadsheetApp.getActiveSheet().getRange(deviceIdCell.getRow(), deviceIdCell.getColumn()+6).getValue();
  var zone = SpreadsheetApp.getActiveSheet().getRange(deviceIdCell.getRow(), deviceIdCell.getColumn()+7).getValue();
  var room = SpreadsheetApp.getActiveSheet().getRange(deviceIdCell.getRow(), deviceIdCell.getColumn()+8).getValue();

  // Update every property, one each API call
  updateDeviceField_(deviceIdCell.getValue(), 11822, 'user_data/vendor', make);
  updateDeviceField_(deviceIdCell.getValue(), 11822, 'details/zone', zone);
  updateDeviceField_(deviceIdCell.getValue(), 11822, 'user_data/model', model);
  updateDeviceField_(deviceIdCell.getValue(), 11822, 'details/room', room);
}
Of course, this file is just a small example of what you can do combining Domotz API with Google Spreadsheet and Google App Script. There are tons of other great Domotz Integrations and Features to test.