
Domotz’s multi-tenant management allows you to arrange your sites in a structured hierarchy, which is ideal for monitoring multiple sites belonging to different clients. Here’s how you can configure your Organizations and Sites.
Create your organizations and associate sites
To create your organizations and associate sites with them, follow these steps:
1. Access the Inventory section and click on the Organizations button:
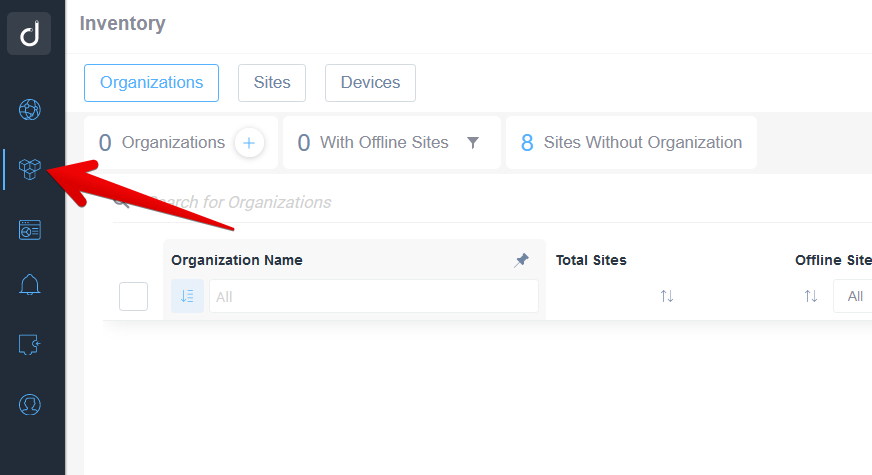
Accessing the Organizations Tab in the Inventory Section
1. Navigate to the sidebar on the left.
2. Click on the icon shaped like a box to open the Inventory section.
3. Select the "Organizations" tab at the top of the page.
4. View the statistics for organizations, such as "0 Organizations," and note the number of "Sites Without Organization" identified as 8.
5. Use the search bar labeled "Search for Organizations" to find specific organization names.
6. The table below will list organization names and details like "Total Sites" and "Offline Sites."
2. Create a new Organization:
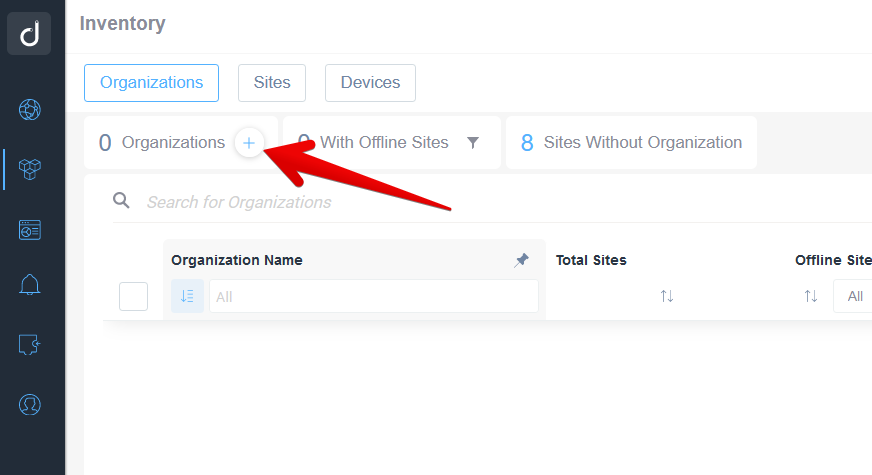
Add a New Organization in the Inventory Section
1. Navigate to the "Inventory" page, which has tabs for "Organizations," "Sites," and "Devices."
2. Ensure the "Organizations" tab is selected.
3. Locate the button labeled with a plus sign next to "0 Organizations" at the top of the page.
4. Click the plus sign to add a new organization to your inventory.
5. Use the search bar to find specific organizations once they are added.
6. View details such as "Total Sites" and "Offline Sites" next to each organization entry.
3. Name the organization after your client:
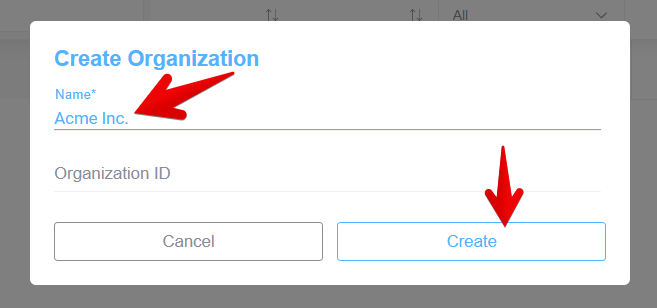
Creating a New Organization in the Software
1. Enter the organization's name in the "Name" field, such as "Acme Inc."
2. Click the "Create" button to finalize and add the new organization.
3. If needed, use the "Cancel" button to exit without saving.
4. Associate the appropriate ‘sites’ with that specific ‘organization’ (client):
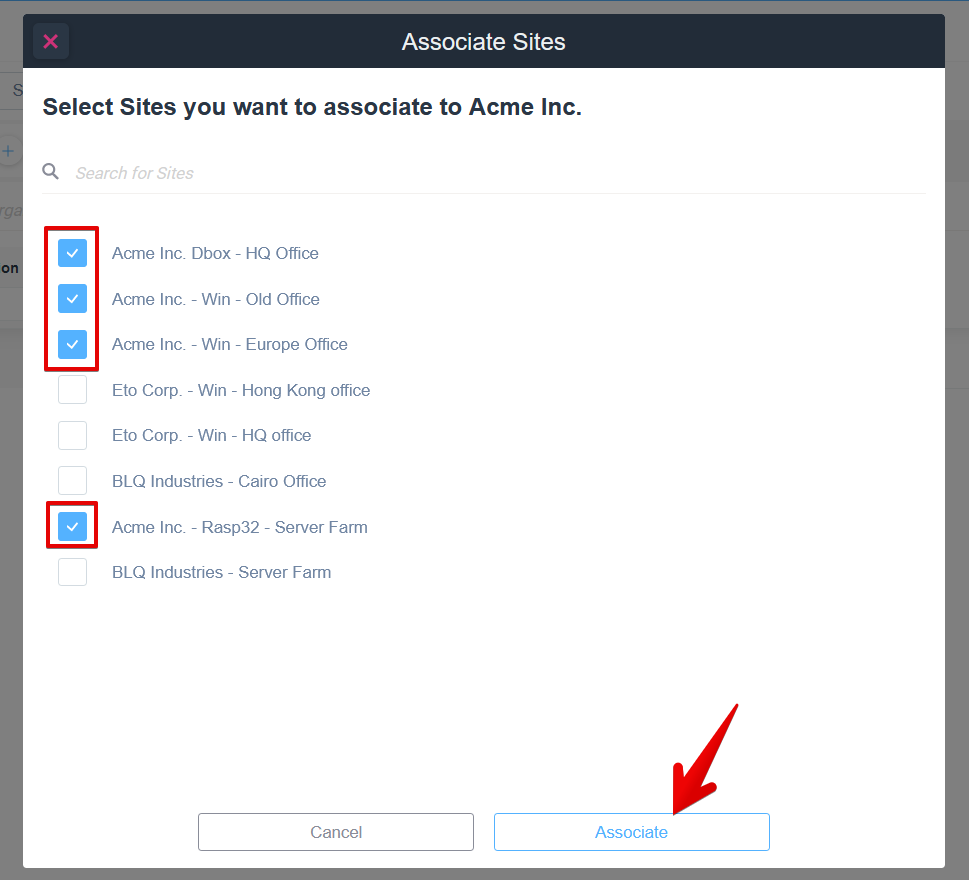
Associating Sites to Acme Inc.
1. In the "Select Sites you want to associate to Acme Inc." window, several site options are listed.
2. Check the boxes next to the sites you want to associate: "Acme Inc. Dbox - HQ Office," "Acme Inc. - Win - Old Office," "Acme Inc. - Win - Europe Office," and "Acme Inc. - Rasp32 - Server Farm."
3. Click the "Associate" button at the bottom right to complete the association.
At this stage, you will be presented with an overview of your sites, organized by customers.
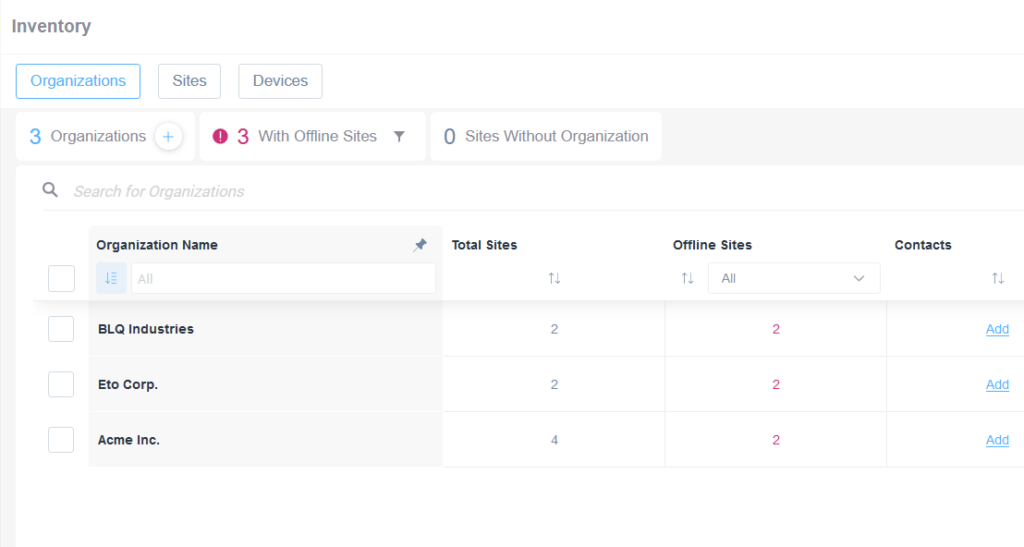
Inventory Management Interface Overview
1. Three tabs at the top allow navigation between Organizations, Sites, and Devices.
2. The top bar displays metrics: 3 Organizations, 3 With Offline Sites, and 0 Sites Without Organization. Use this to quickly assess the status of your inventory.
3. A search bar is available for filtering organizations by name.
4. The table lists organizations with columns for Organization Name, Total Sites, Offline Sites, and Contacts.
5. Each row represents an organization; for example, BLQ Industries has 2 total sites and 2 offline sites. Click "Add" under Contacts to add a contact for each organization.
Use these tools to manage and monitor organizational data effectively.
Filter your sites by organization
In order to effectively manage your clients’ sites, it is highly beneficial to utilize the ‘Organization’ column in the Inventory view under the ‘Sites’ section to filter for your clients.
To accomplish this, follow these steps:
- Go to the ‘Inventory’ view.
- Click on the ‘Sites’ button located in the top left corner to access the ‘Sites’ section.
- Scroll horizontally until you locate the ‘Organization’ column:
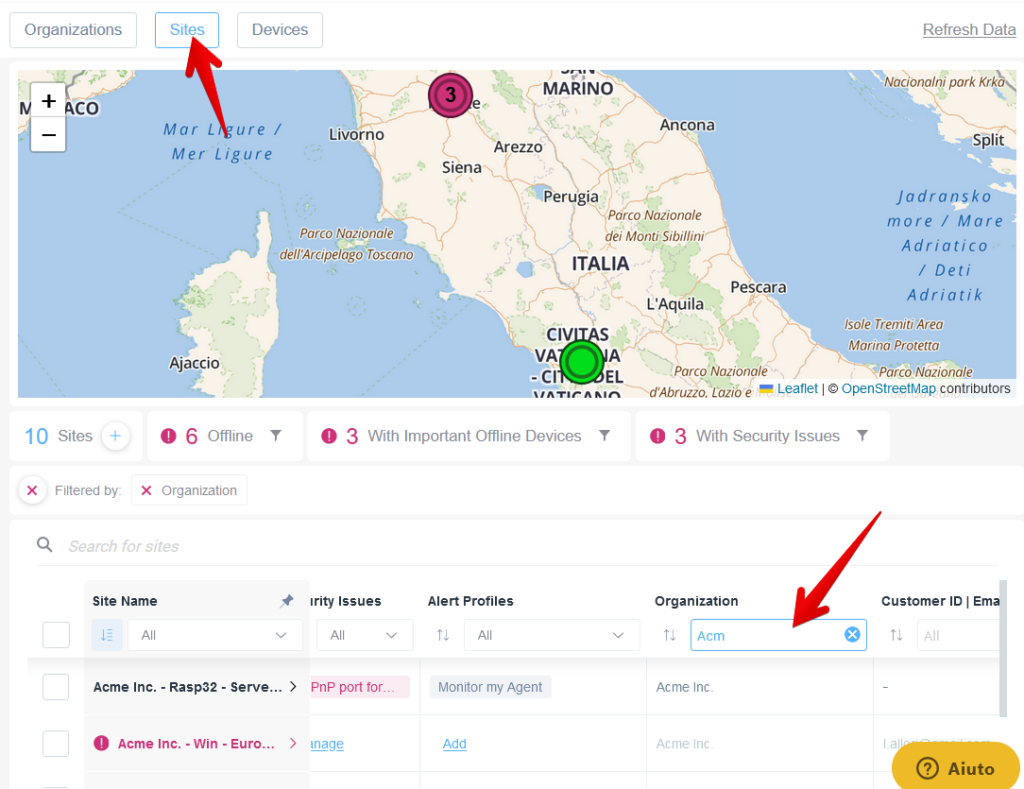
Filtering and Viewing Sites on a Map.
1. Select the "Sites" tab at the top to view site locations on the map.
2. Below the map, see statistics: 10 sites, 6 offline, 3 with important offline devices, and 3 with security issues.
3. A filter is applied by "Organization." In the search bar under "Organization," enter a partial or full name, such as "Acm," to filter results.
4. View the filtered list of sites beneath the filter bar, displaying site details like name, security issues, and alert profiles.
It’s worth noting that you can create a Custom Filter to automate this process. For further details on custom filters, please refer to the appropriate documentation here.