The integration between the ConnectWise PSA platform and Domotz (network and device documentation system), enables you to access real-time information about your customer’s IT infrastructure. Domotz will discover devices including device details like model, MAC address, location, zone, software version, IP addresses, serial numbers (and more), and automatically send these details directly to CW PSA.
By setting up this integration, you can ensure that your asset information (within ConnectWise PSA) is accurate and up-to-date, which is essential for documentation, billing, and maintenance purposes.
This integration allows you to synchronize the following data:
- Domotz Collectors and Devices – when using the Selection Mode (per device plan), only devices listed as Managed will be pushed and kept in sync.
- CW Configurations
On CW PSA: How to set-up the integration
Generate Public and Private Keys
Please see here: https://www.nexnow.net/blog/2017/10/29/setting-publicprivate-api-keys-connectwise-manage/
Security Roles
Security roles and API members are used for connecting Domotz to your ConnectWise PSA account. This must be performed by a ConnectWise PSA administrator with permissions to manage security roles and members. If you don’t have the permissions to do this, please ask your manager.
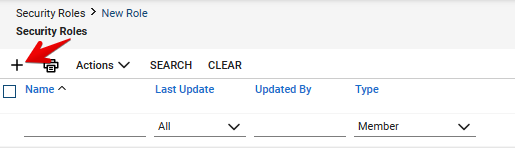
Log into the ConnectWise PSA dashboard and from the navigation menu, click System, then Security Roles.
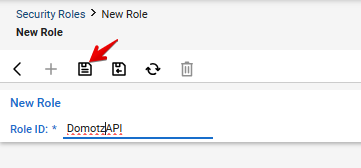
Select “New Role” and click the + button, then add a Security Role named “Domotz API”:
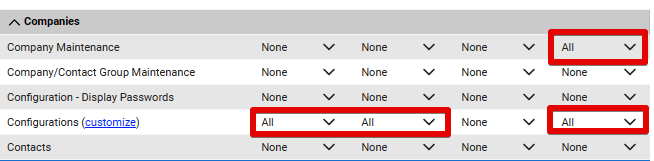
Expand “Companies”, and set:
- Company Maintenance (Inquire Level to “All”)
- Configurations (Add Level, Edit Level, Inquire Level to “All”)
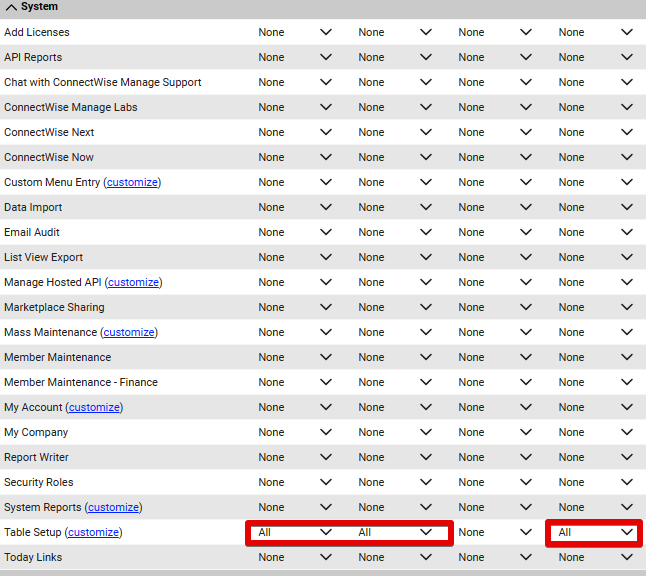
Expand “System”, and set:
- Table Setup (Add Level, Edit Level, Inquire Level to “All”)
HERE WE NEED TO ADD TO CREATE THE API KEY using that security ROLE
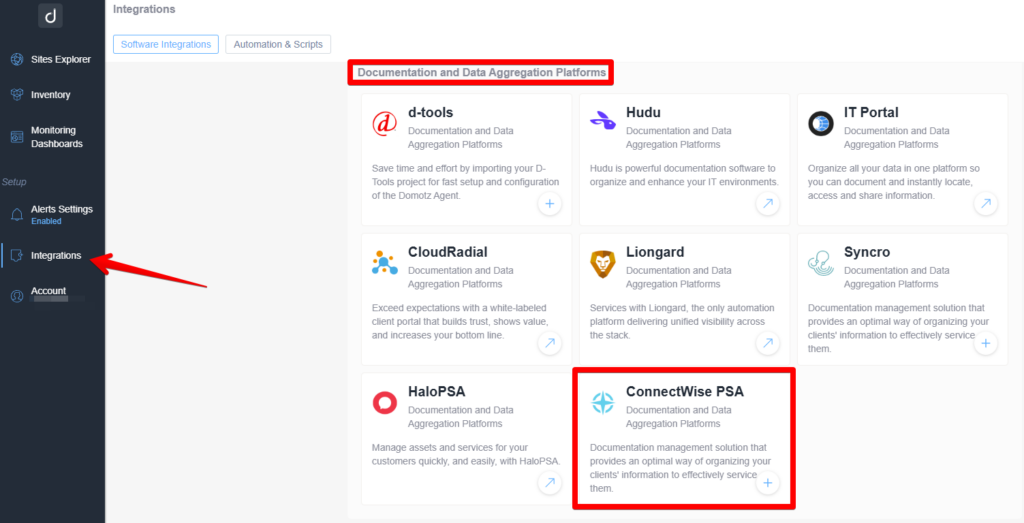
On Domotz: How to set up the integration
Login to Domotz with your account, select the menu Integrations under the Setup section, and select ConnectWise PSA from the list of available documentation platforms you would see on your screen:
Fill in the following screen with the details required and then click ‘Connect’:
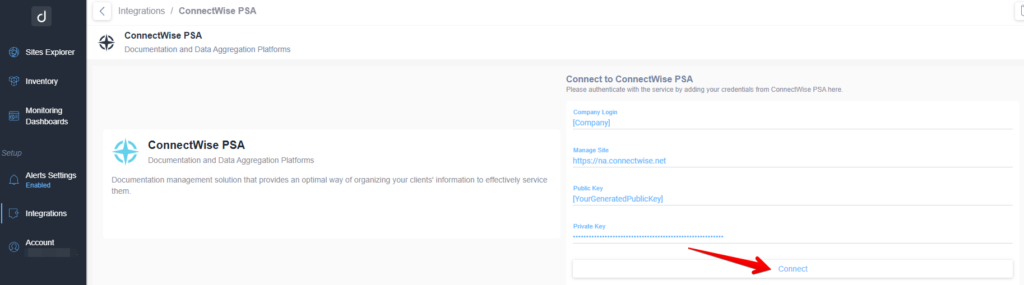
Please note that the ‘Company Login’ is the same that you use when logging in ConnectWise:

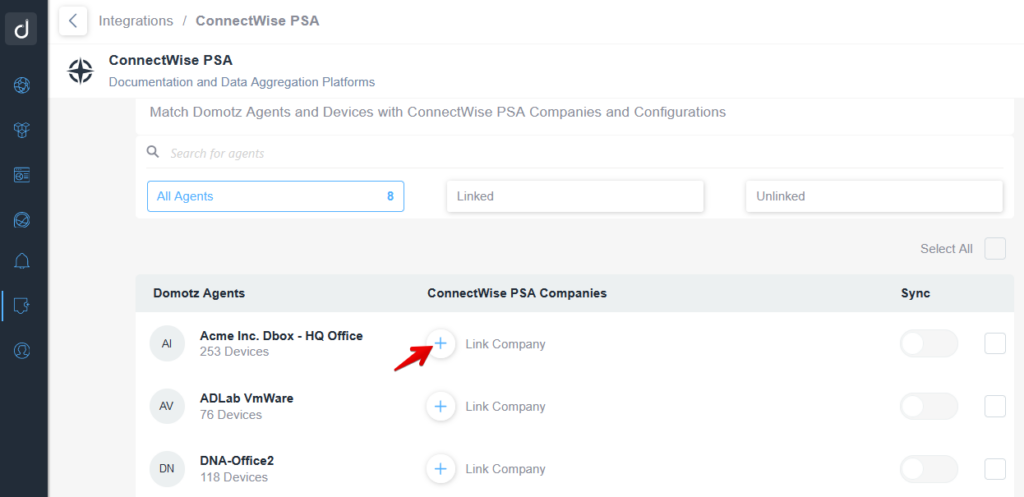
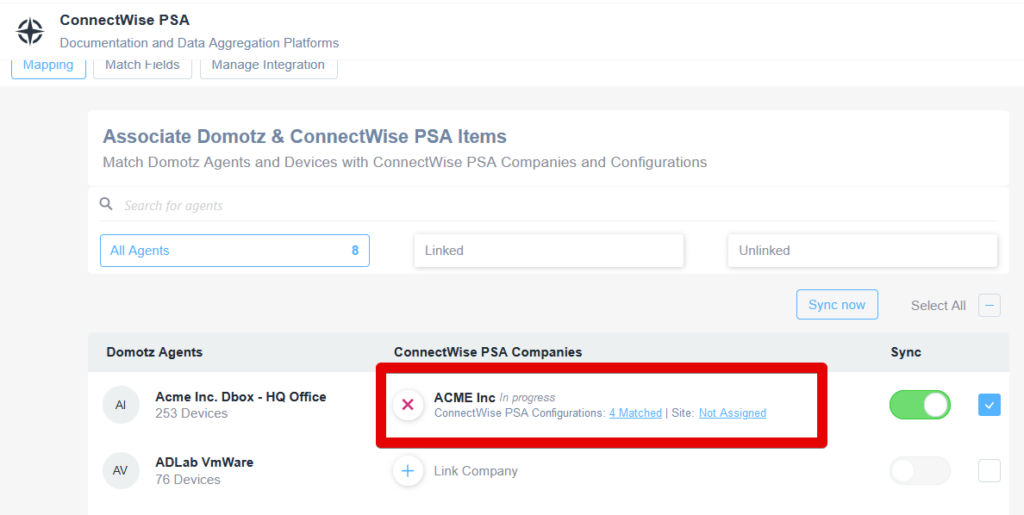
Link Domotz Agents/Collector to CW Companies
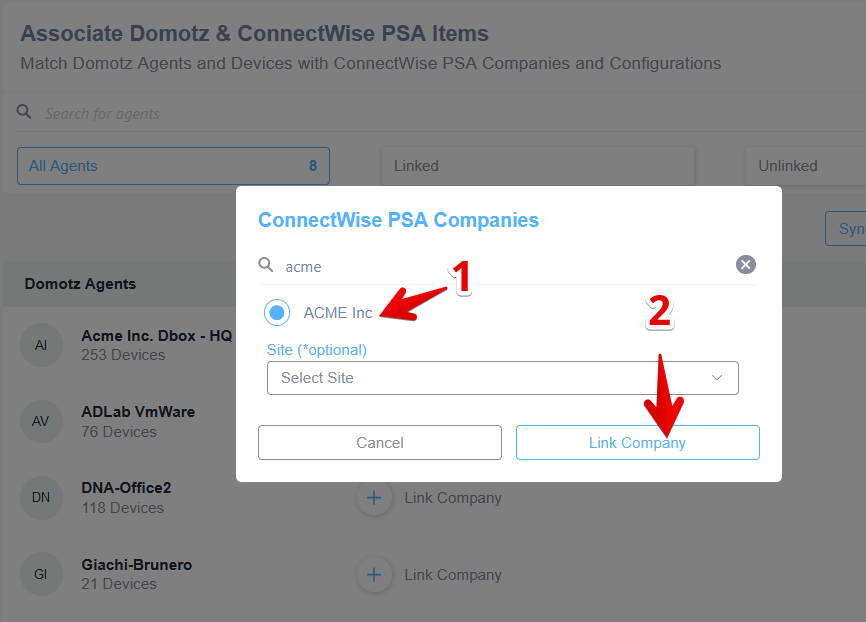
After the connection to CW PSA succeeded, you will need to map each Agent to the specific Companies defined in CW PSA. To do that, please click on the + button next to the “Link Company” label:
A window will appear where you will be able to select a specific site within the Company, or leave it as default:
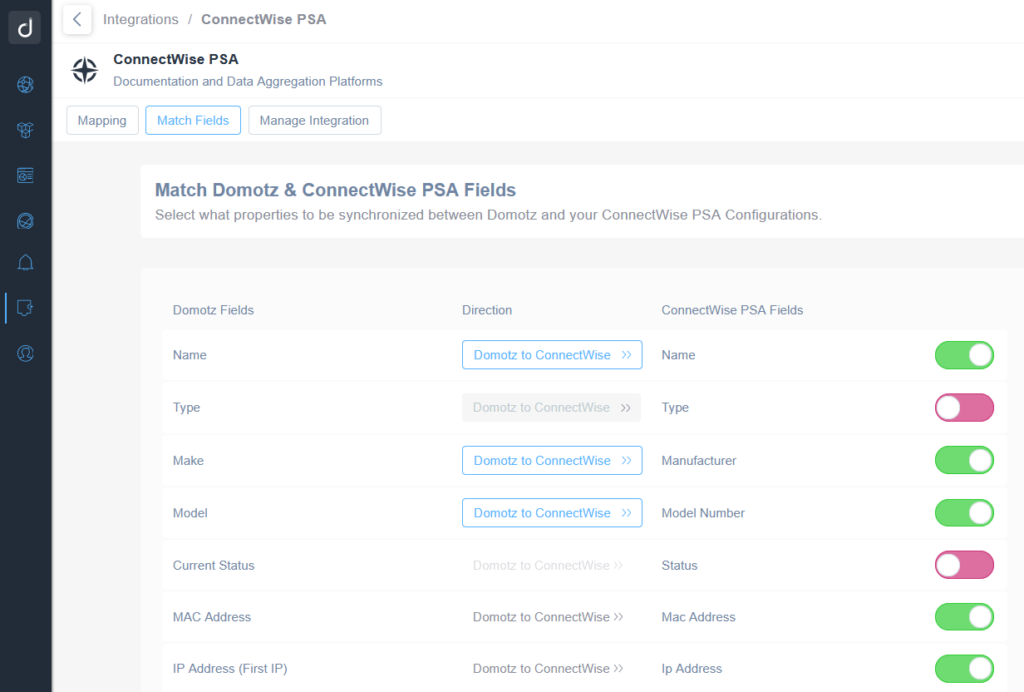
Set up Match Configuration Fields
Since the automatic synchronization is only based on the direction specified for each field between Domotz and CW PSA, you might want to configure the match configuration fields.
To do that, select the ‘Match Fields’ at top left and modify it as you prefer:
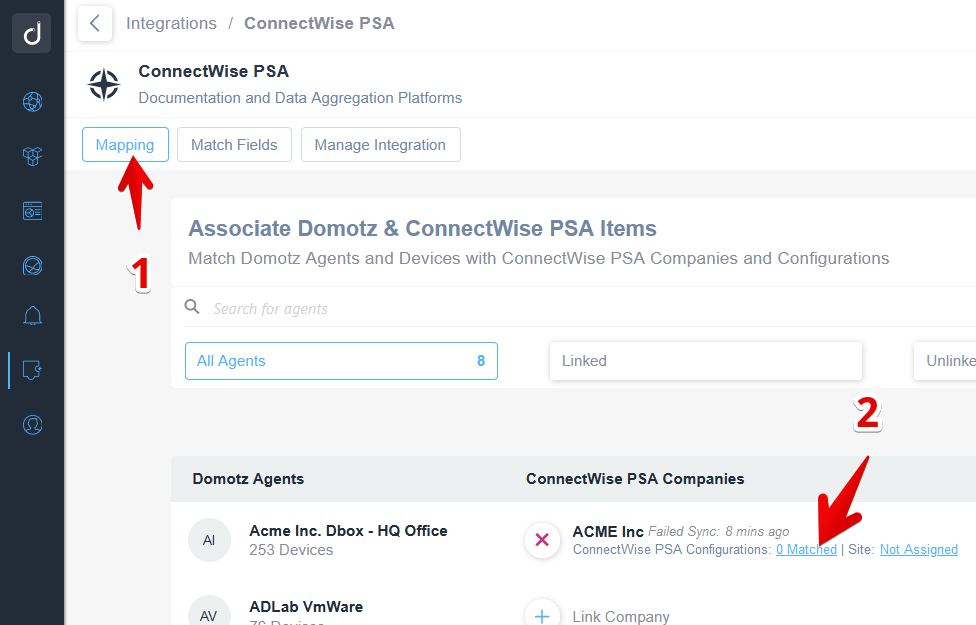
Match Devices to CW Configurations
Go back to the Mapping section and match or create new configurations:
To link a configuration to a Domotz Device that has no match, click on the Match Configuration button:
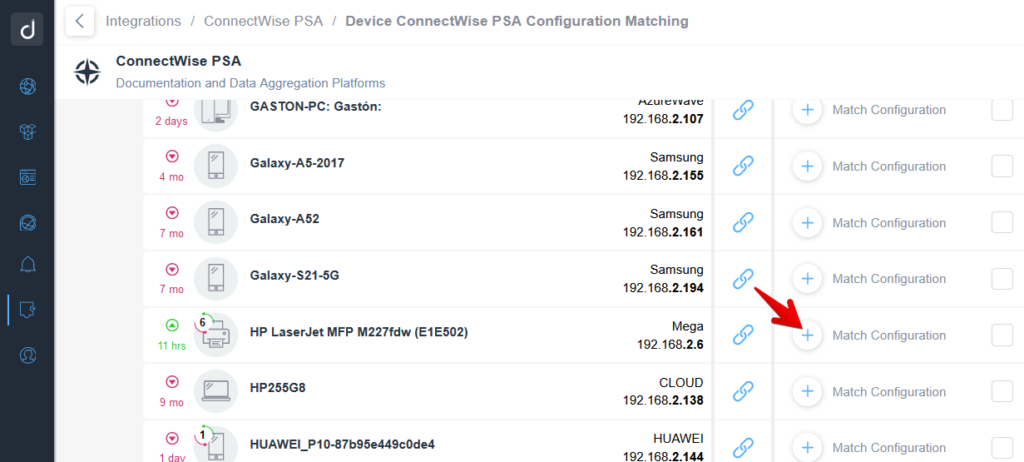
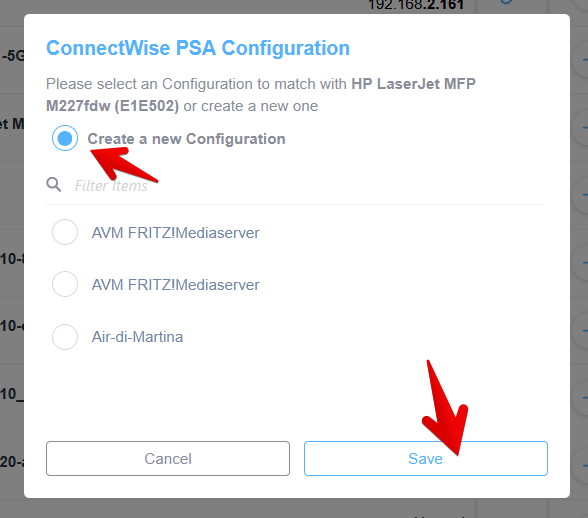
A pop-up window will appear where you will be able to Create a new Configuration or select an existing one and to link it to the Domotz device:
- To allow Domotz to link a Domotz device to a new CW PSA Configuration (created by Domotz itself), select Create New Configuration and then click on Save.
- To link a Domotz device to an existing CW PSA Configuration, select it from the list and then click on Save:
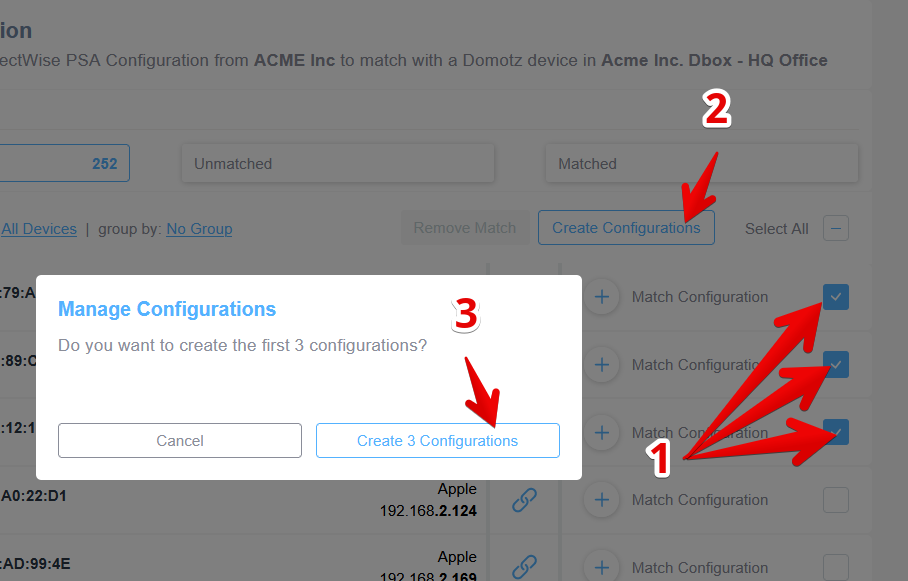
You can also create configurations in bulk (e.g. if Domotz is used to set up an MSP Customer from scratch) by selecting multiple rows and pressing the Create Configurations button:
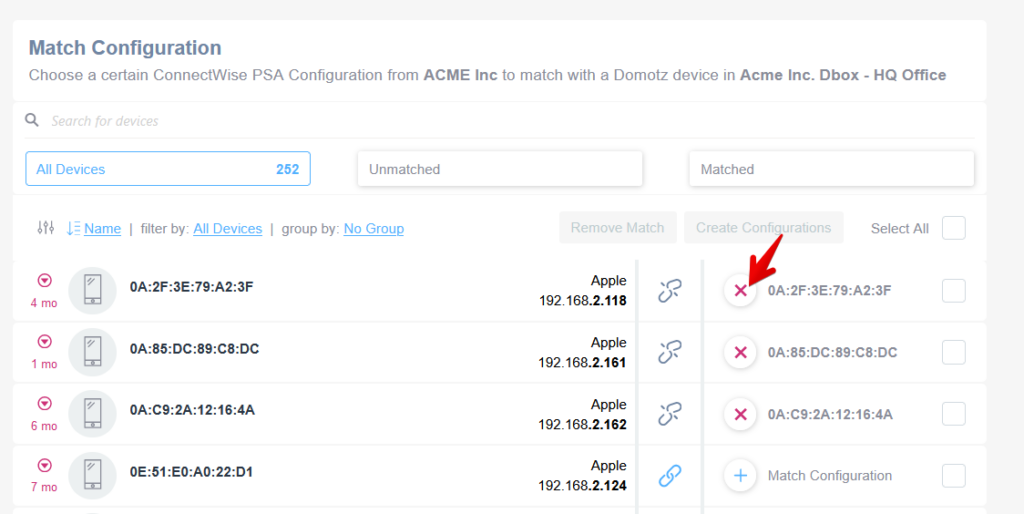
To unlink a configuration, you must click on the x icon next to the configuration:
Synchronization Configurations
Domotz allows you to set an automatic or manual synchronization.
Manual Synchronization
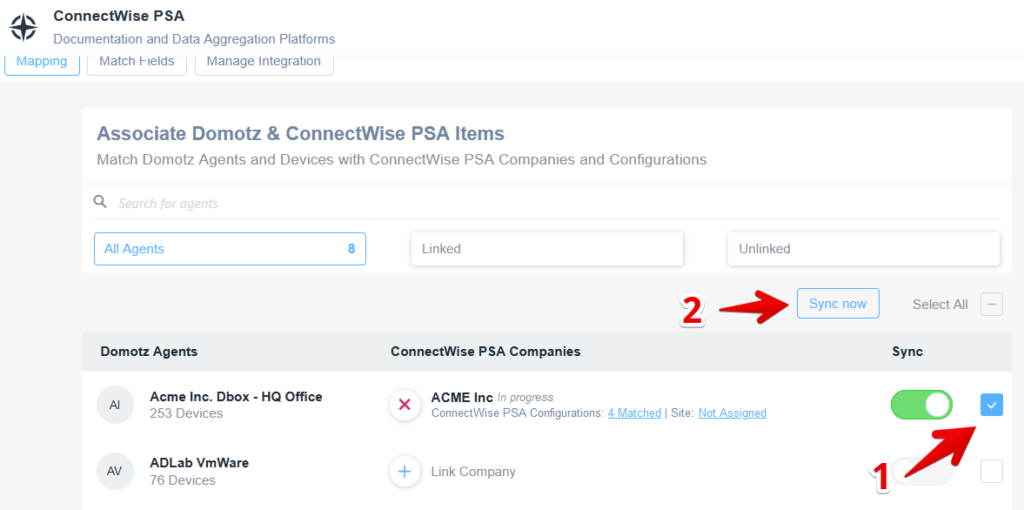
To start the manual synchronization, select the desired Agent and then click on the Sync now button:
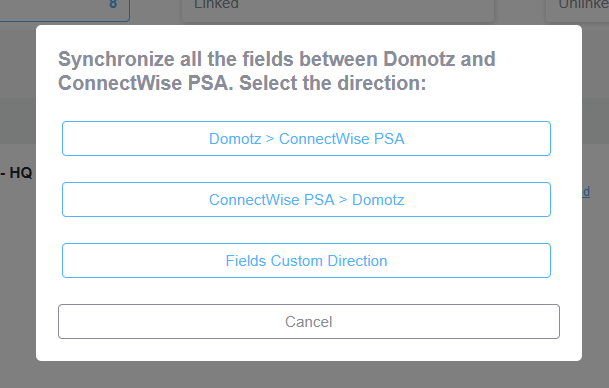
After pressing the “Sync Now” button, a pop-up window will appear and you will be able to select the synchronization mode:
- Synchronization from Domotz to CW PSA: the information stored on the Domotz Devices will override the information on the CW PSA Configuration.
- Synchronization from CW PSA to Domotz: the information stored on the CW PSA Configuration will override the information on the Domotz Devices.
- Customized synchronization: you can choose the synchronization direction for every single field from the Custom Match Fields Configuration window.
As soon as the user chooses an option for the synchronization, a message In progress will appear next to the Company name:
In case of an error during the synchronization, the system will display a message Failed Sync and the time of the last successful synchronization.
Automatic Synchronization
Automatic synchronization occurs every 12 hours. To enable it, toggle the Sync widget:

As soon as the Sync toggle is enabled, the sync will occur in the next 5 minutes.
Note: In case of an error during the automatic synchronization, the system will display a message Failed Sync next to the organization name and the automatic synchronization will be disabled.
How to remove the integration between ConnectWise PSA and Domotz
To completely disconnect the integration between ConnectWise PSA and Domotz, select the Manage Integration tab on the Integrations – ConnectWise PSA section, then click on the Remove Integration button and the integration will be removed:

If you have any questions or encounter any issues, please feel free to reach out to us at support@domotz.com. We’re always here to help!