Domotz network management software includes integration with Syncro Asset Management.
The Domotz Syncro Integration streamlines the Asset Management of networks by automatically sending the device and network details discovered by Domotz to Syncro, and vice-versa.
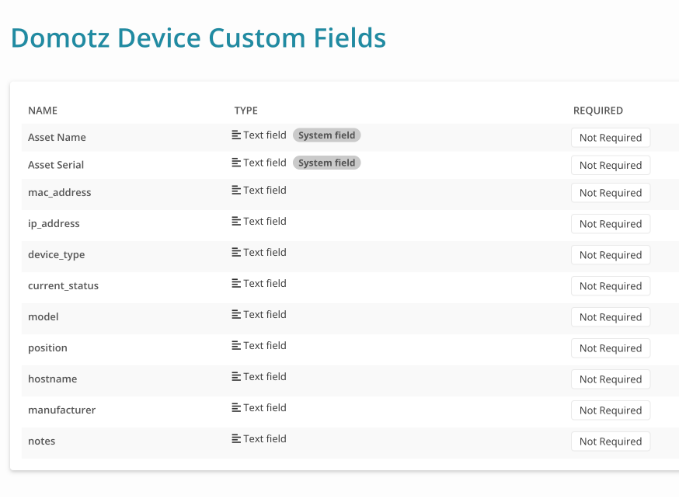
Domotz will discover devices including device details like model, MAC address, location, zone, software version, IP addresses and more and automatically send these details directly to Syncro.
This integration allows you to synchronize the following data:
- Domotz Collectors and Devices – When using the Selection Mode (per device plan), only devices listed as Managed will be pushed and kept in sync.
- Syncro Assets
- 1. On Syncro: How to set-up the integration
- 2. On Domotz: How to set-up integration
- 3. How to associate Domotz and Syncro Items
1. On Syncro: How to set-up the integration
Before starting to connect an integration, you need to generate an API Token on to Syncro.
To do that go to https://[yourcompany].syncromsp.com/api_tokens
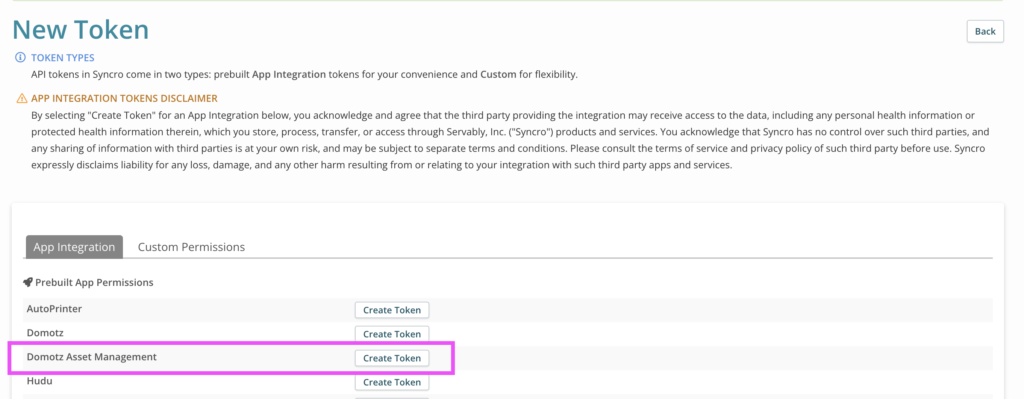
Then click on “+ New Token” on the upper right side of your screen:
Select “Domotz Asset Management” as the “Prebuilt App Permissions” schema:
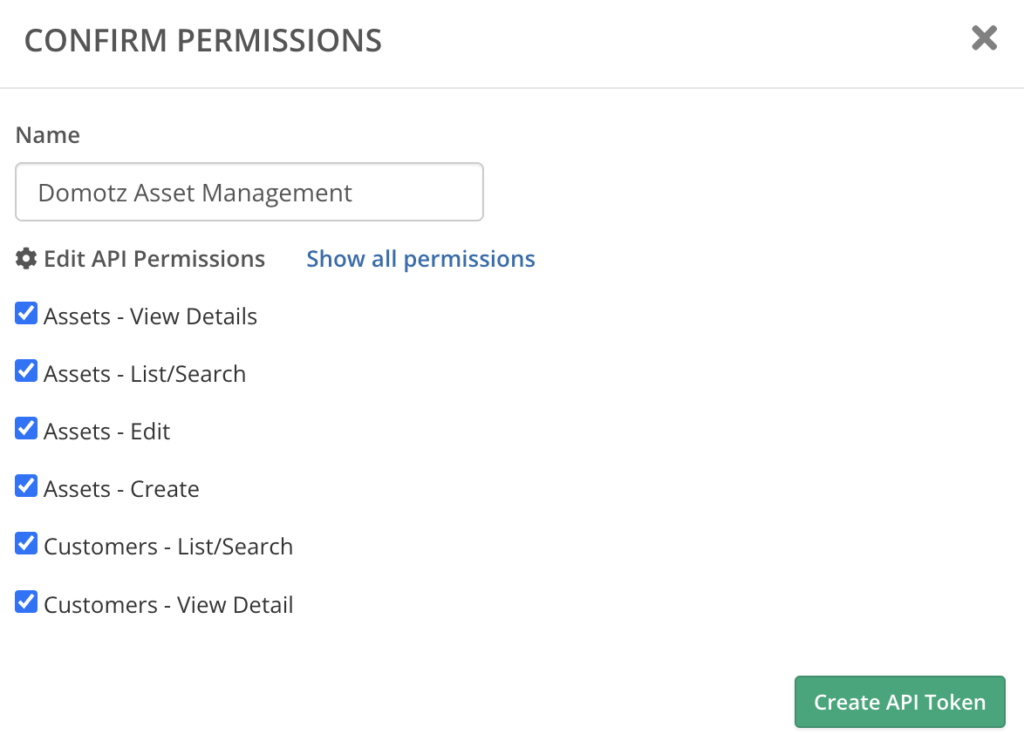
It will basically create a token with the necessary permissions to allow the integration to work:
- Assets – View Details
- Assets – List/Search
- Assets – Edit
- Customers – List/Search
- Customers – View Detail
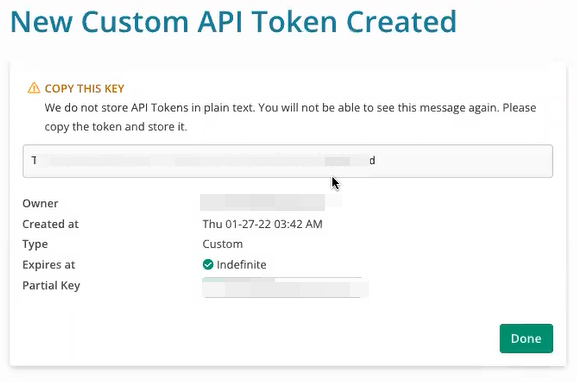
Once the API Token has been created, copy it to your clipboard. You will use it in Domotz:
2. On Domotz: How to set-up integration
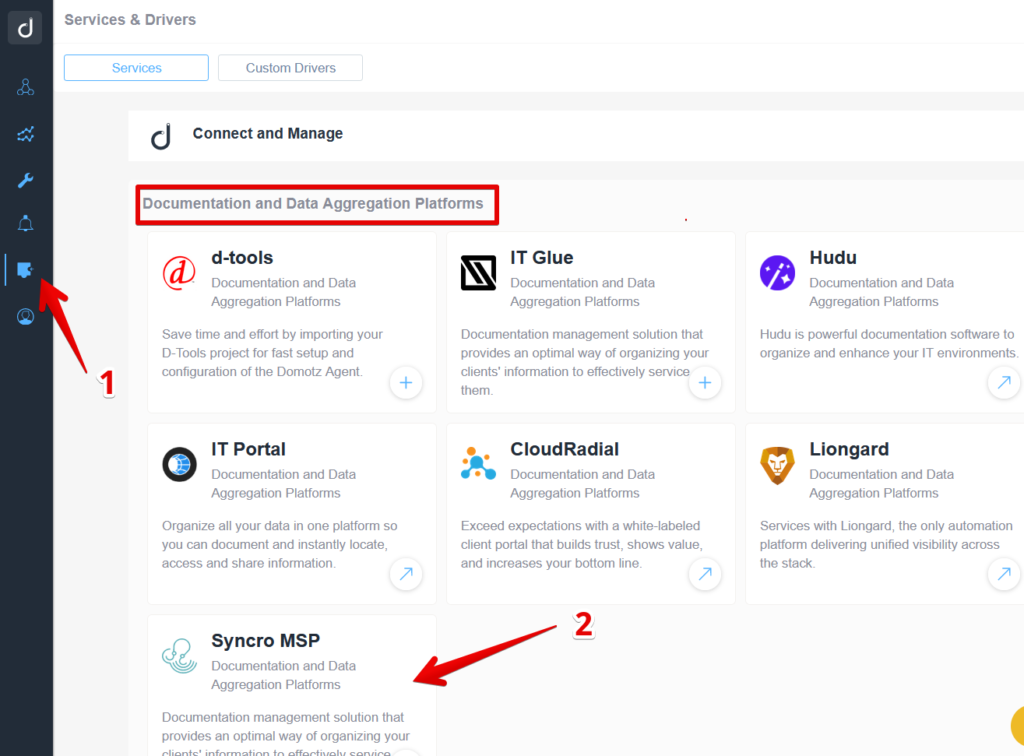
- Login to your Domotz system
- Select Syncro from the list of available documentation services you would see on your screen
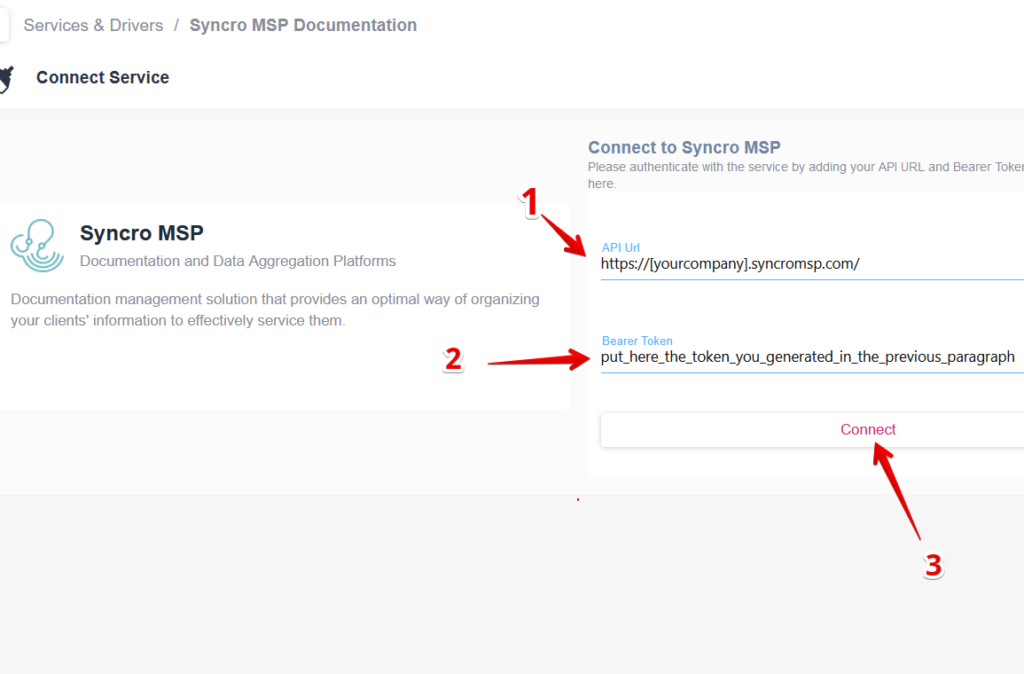
4. Insert the API url and the Token you did generate on Syncro MSP and then click on the Connect button:
3. How to associate Domotz and Syncro Items
a. How to link a Domotz Agent to Syncro Customers
To link a Domotz Agent to a Syncro MSP Customers, click on the + button:
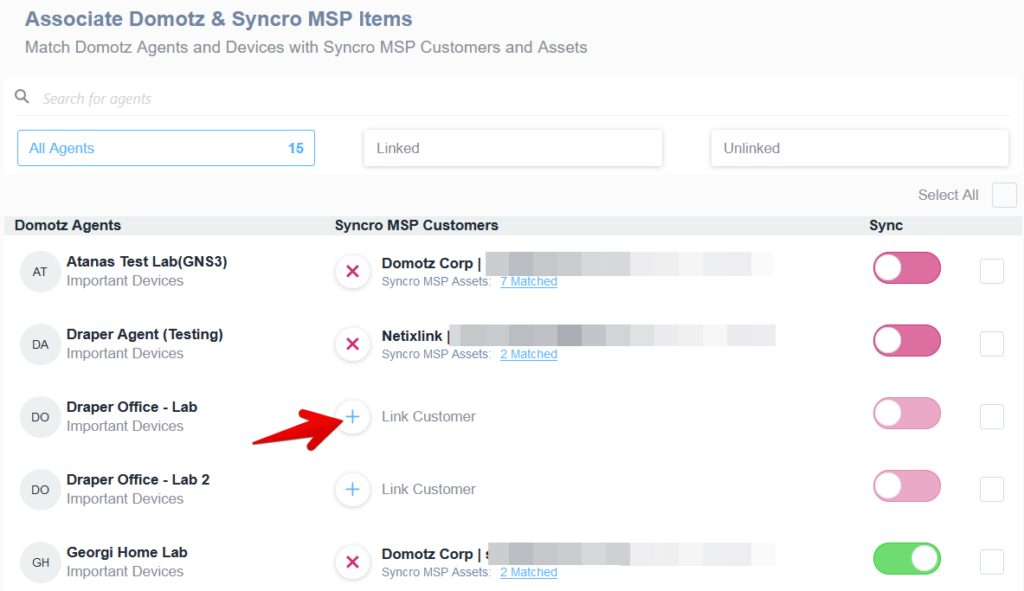
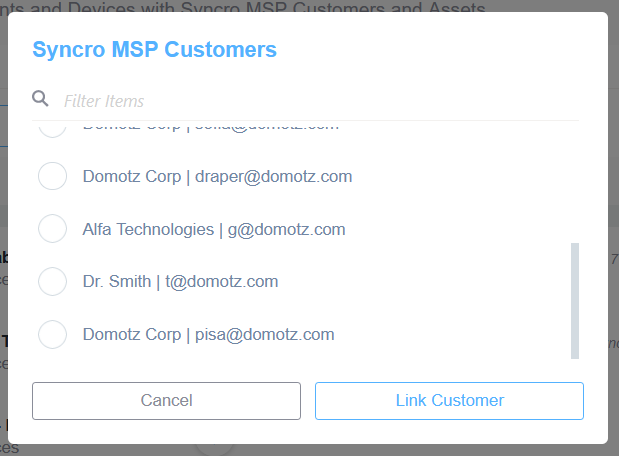
A pop-up window will appear allowing you to search and choose the Syncro MSP Customer to link to the specific Domotz Agent:
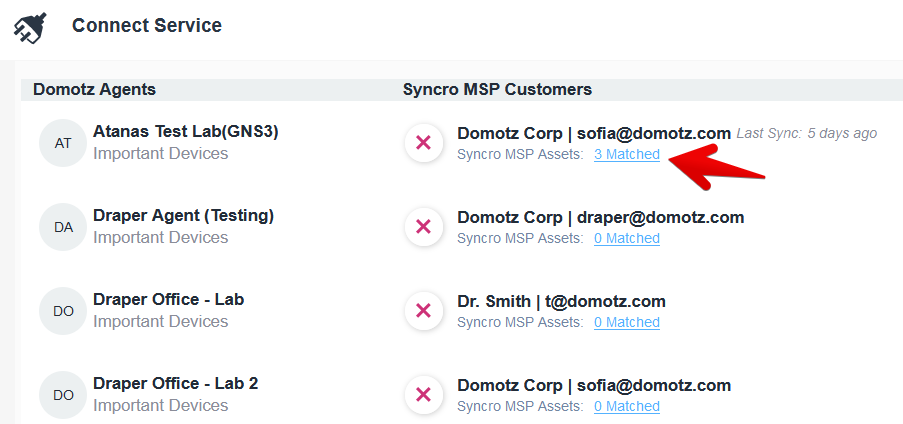
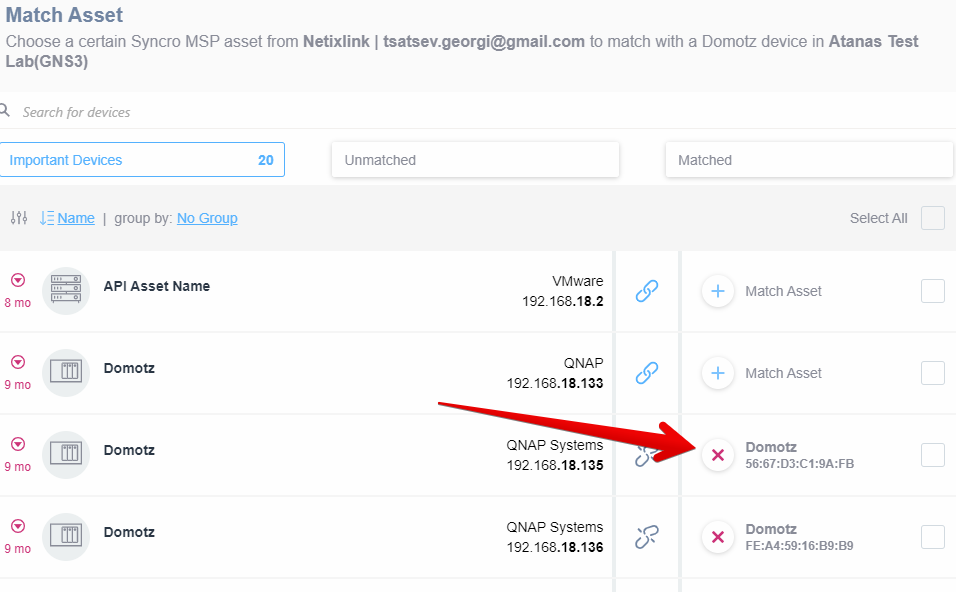
b. How to manage the matching between Domotz Devices and Syncro Assets
To manually match a Domotz device with a specific Asset, click on the number of matched devices:
To link an asset to a Domotz Device that has no match, click on the + Match Asset button:
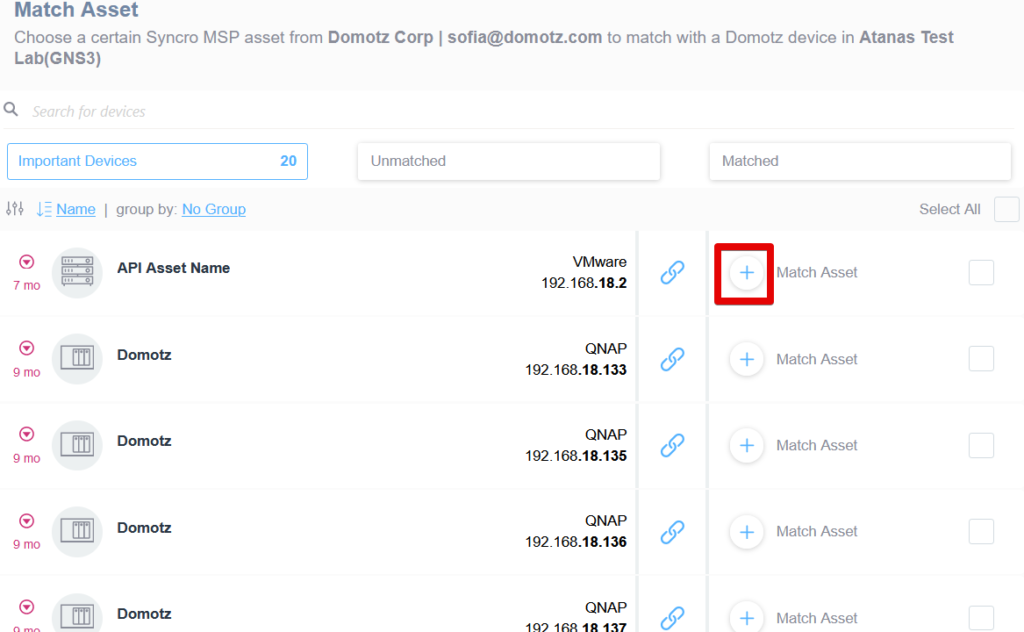
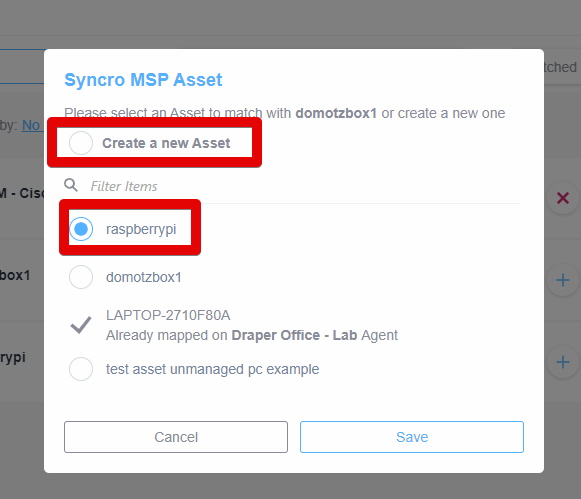
A pop-up window will appear where you will be able to Create a new Asset or select an existing one and to link it to the Domotz device:
- To allow Domotz to link a domotz device to a new Syncro Asset (created by Domotz itself), select Create New Asset and then click on Save.
- To link a domotz device to an existing Syncro MSP Asset, select it from the list and then click on Save:
c. Bulk creation of Syncro MSP Assets
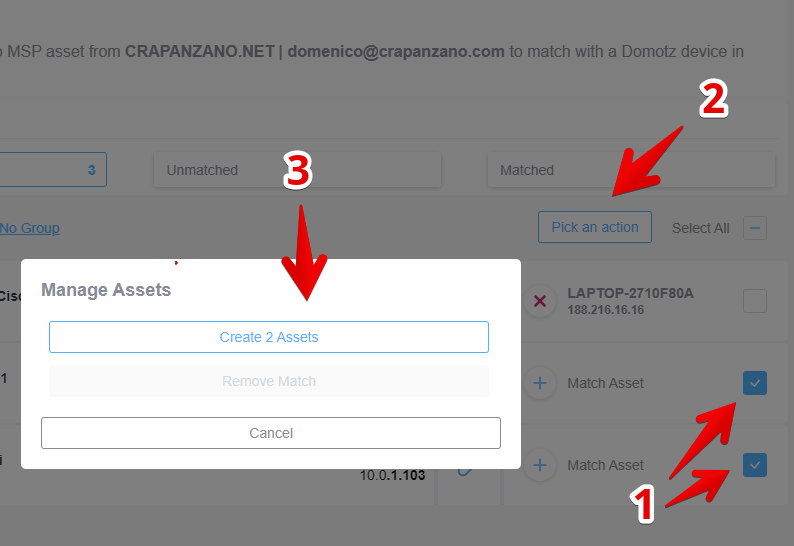
In case more than one MSP Asset has to be created at once, (ex. if Domotz is used to set up an MSP Customer from scratch), you can use the select multiple rows and press the Pick an action button.
d. Unlink the asset
To manually unlink already matched Asset:
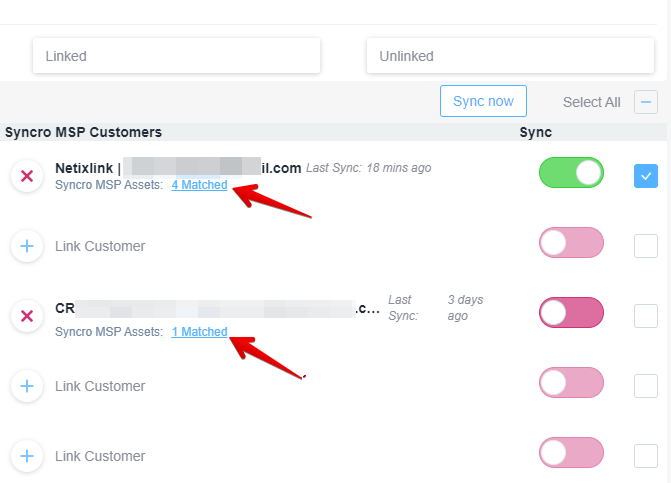
- Click on the link with the matched devices number (ex. 4 Matched – see screenshot below):
e. How to set up the synchronization (automatic or manual)
Manual Synchronization
To start the manual synchronization, select the desired Agent and then click on the Sync now button:
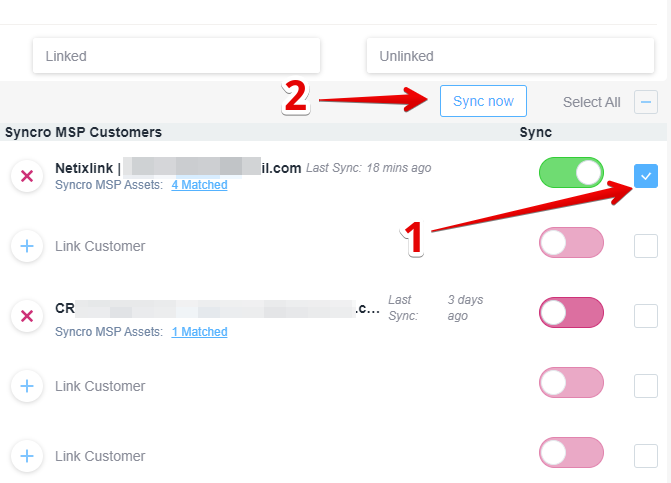
Please note that only a Domotz Agent already linked to a Syncro MSP Customer can be selected.
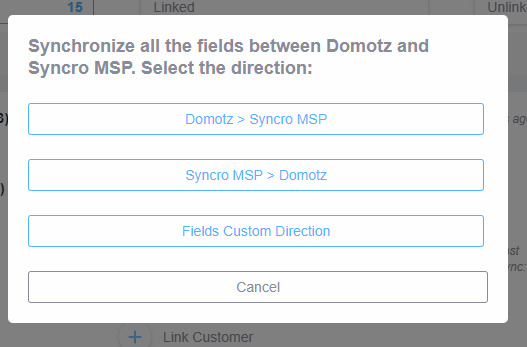
After pressing the “Sync Now” button, a pop-up window will appear and the user will be able to select the synchronization mode:
- Synchronization from Domotz to Syncro MSP: the information stored on the Domotz Devices will override the information on the Syncro MSP Asset.
- Synchronization from Syncro MSP to Domotz: the information stored on the Syncro MSP Asset will override the information on the Domotz Devices.
- Customized synchronization: you can choose the synchronization direction for every single field from the Custom Match Fields Configuration window.
As soon as the user chooses an option for the synchronization, a message In progress will appear next to the Customer name:

- In case of success of the synchronization, the system will display Last Sync time:

- In case of an error during the synchronization, the system will display a message Failed Sync and the time of the last successful synchronization.
Automatic Synchronization
Automatic synchronization occurs every 12 hours. To enable it, please toggle the Sync widget:

As soon as the sync toggle is enabled, the sync, will occur in the next 5 minutes.
Note: In case of an error during the automatic synchronization, the system will display a message Failed Sync next to the organization name and the automatic synchronization will be disabled.
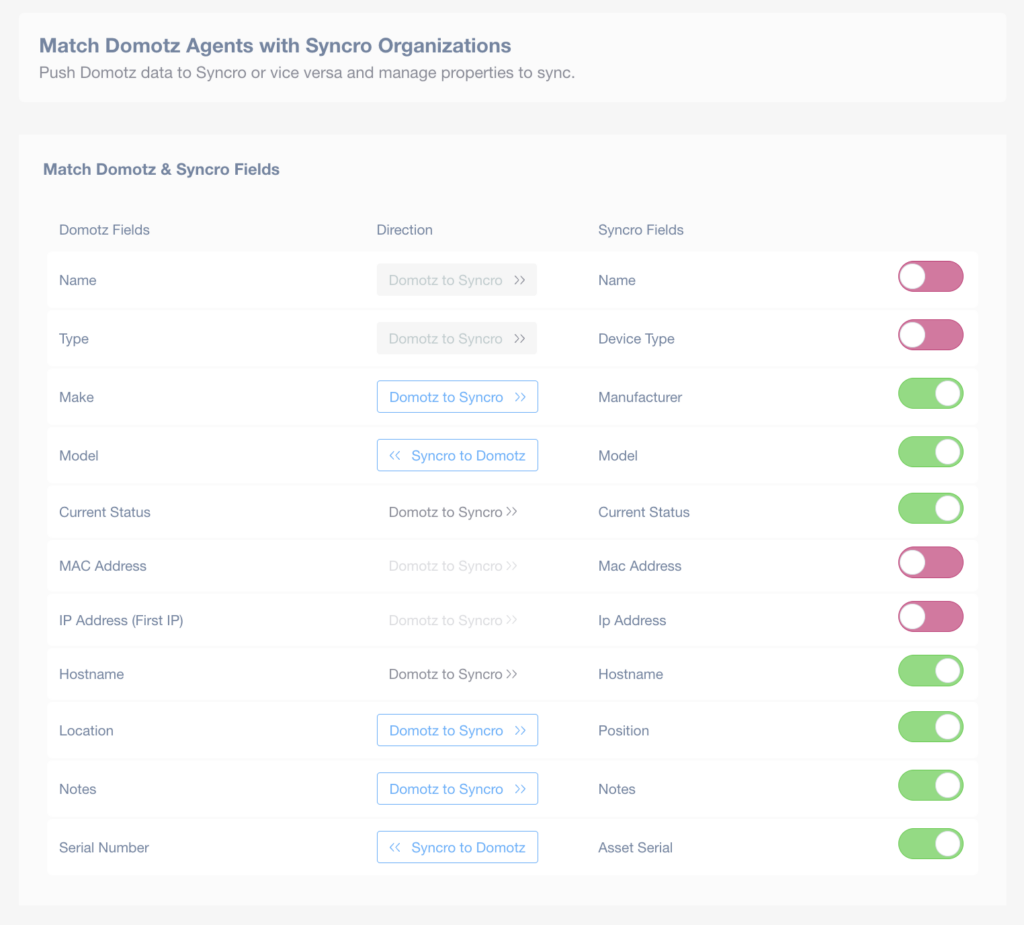
f. Match Fields Asset
The automatic synchronization is only based on the direction specified for each field between Domotz and Syncro MSP.
The user can define the direction of the automatic synchronization from the Match Fields asset section.
- To disable the synchronization between the Domotz and Syncro MSP fields, click on the toggle on the right side of a desired field to switch it off.
However, some of the fields have their mandatory synchronization direction from Domotz to the integration: Current Status, MAC Address, IP Address (First IP), Hostname, which cannot be changed: