Thanks to the Routed Subnet Scan feature, monitoring up to 20 Layer 3 subnets (VPN-connected other connected/routed subnets) is possible.
With the Routed Subnet Scan feature, you can monitor the following:
- Modems and/or routers on different subnets
- Networks and network devices routed on different subnets
- Multiple sites or buildings connected via VPN
How to Configure Routed Network Scan
In order to configure a routed network, once you access your Agent, please:
- Access the “Device List” section
- Click on the “Configure Routed Network Scan” (pencil icon)
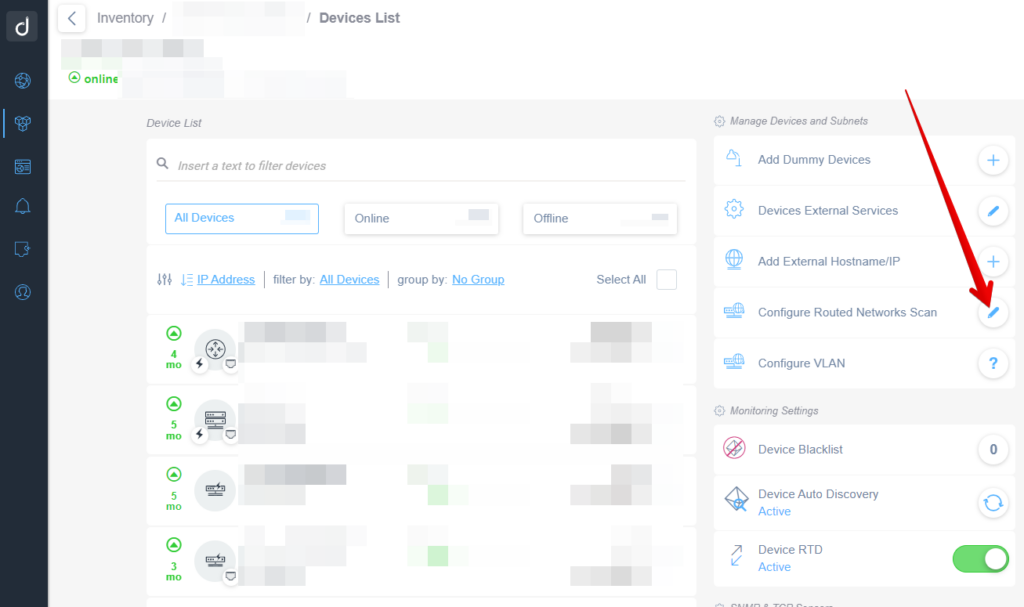
Secondly, use the “+” button to add a new Routed Network:

At this point, for each subnet, you must specify the following:
- Subnet name
- Network address (starting IP address of the subnet)
- Subnet mask
- Whether you want to use the Advanced Scan via TCP
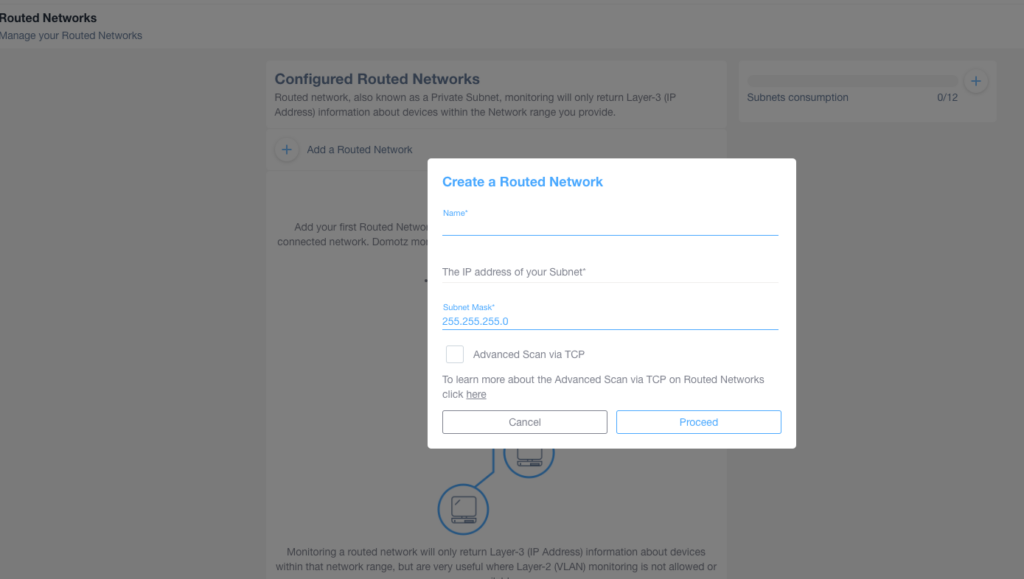
Once you select “Advanced Scan via TCP“, Domotz will perform discovery scans on the specified subnet using both TCP port-based scanning and ICMP (ping). If this option is not selected, only the ICMP mechanism will be used on that subnet.
As a matter of fact, in some cases, devices cannot be identified (and monitored) via simple ping (ICMP mechanism). In those circumstances, it is recommended to use the Advanced Scan via TCP.
Device monitoring includes those services:
- Network Status
- TCP services available
- SNMP sensors
- Remote connection
Read some examples of configuration on the usage of Routed Subnets (Routed Networks) vs the usage of VLANs (Attached Networks). Read more on our Monitoring Networks with Subnets and VLANs blog post.
In conclusion, if you need to know more about Routed Networks, please refer to our Onboarding guide.
