
Domotz gives you the possibility to create a VPN directly from your Domotz Agent, without the need of subscribing to any external service.
The feature is accessible from the Collector Remote Access section. From the Explorer, select your collector, click on Remote Access, and then VPN:
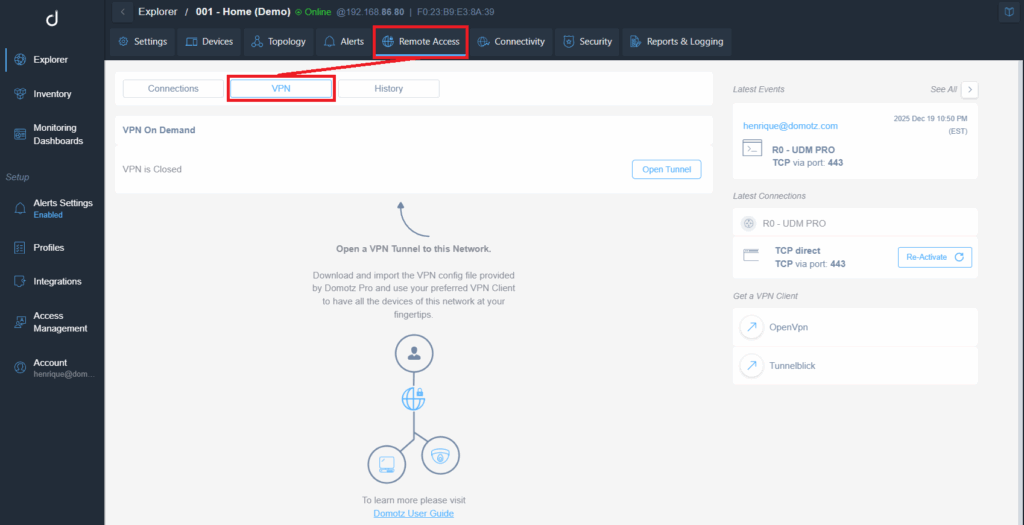
Accessing the VPN Feature in the Remote Access Tab
1. Navigate to the top menu and select "Remote Access."
2. Within the "Remote Access" section, click on the "VPN" tab.
3. The "VPN On Demand" status indicates that the VPN is closed. To open a VPN tunnel, click the "Open Tunnel" button.
4. On the right side panel, view the latest events and connections, including information like the user email, event timestamp, and details about current connections.
5. Under "Get a VPN Client," options such as "OpenVpn" and "Tunnelblick" are available for download.
When opening a VPN Tunnel, you have two different VPN Routing Policies available:
- GLOBAL: using this option all the traffic generated from the PC on which you configure the VPN will be routed through the VPN. This means that you’ll be able to reach all the devices visible to the Domotz Agent (VLANs devices and additional subnets). Moreover all the internet traffic from your PC will pass through the VPN and it will be encrypted. Your global IP address will become the one of the Domotz Agent.
- LOCAL: with this configuration only the devices connected to the same subnet of the Domotz Agent will be reachable from your PC, and your internet traffic won’t pass through the VPN. Your global IP address will remain unchanged.
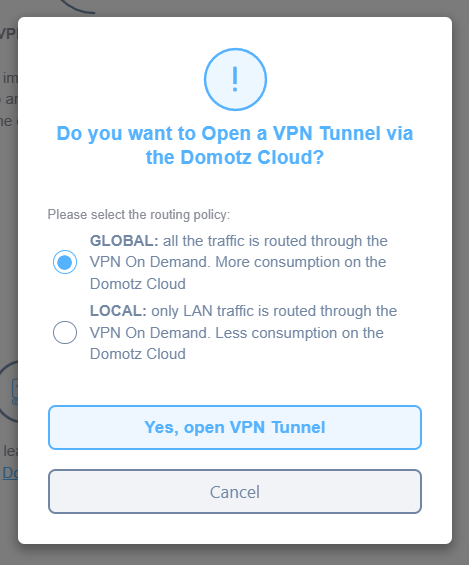
VPN Tunnel Opening Prompt in Domotz Cloud
1. A dialog asks if you want to open a VPN Tunnel via the Domotz Cloud.
2. Choose a routing policy by selecting one of the options:
- "Global": Routes all traffic through the VPN On Demand, which increases consumption on the Domotz Cloud.
- "Local": Routes only LAN traffic through the VPN On Demand, which reduces consumption on the Domotz Cloud.
3. Click "Yes, open VPN Tunnel" to confirm your choice or select "Cancel" to exit.
Once you open the VPN tunnel a configuration file will be downloaded. You can import the configuration file with VPN free clients. You can try with the following external tools:
- For Windows OS: OpenVPN
- For Mac OS: Tunnelblick
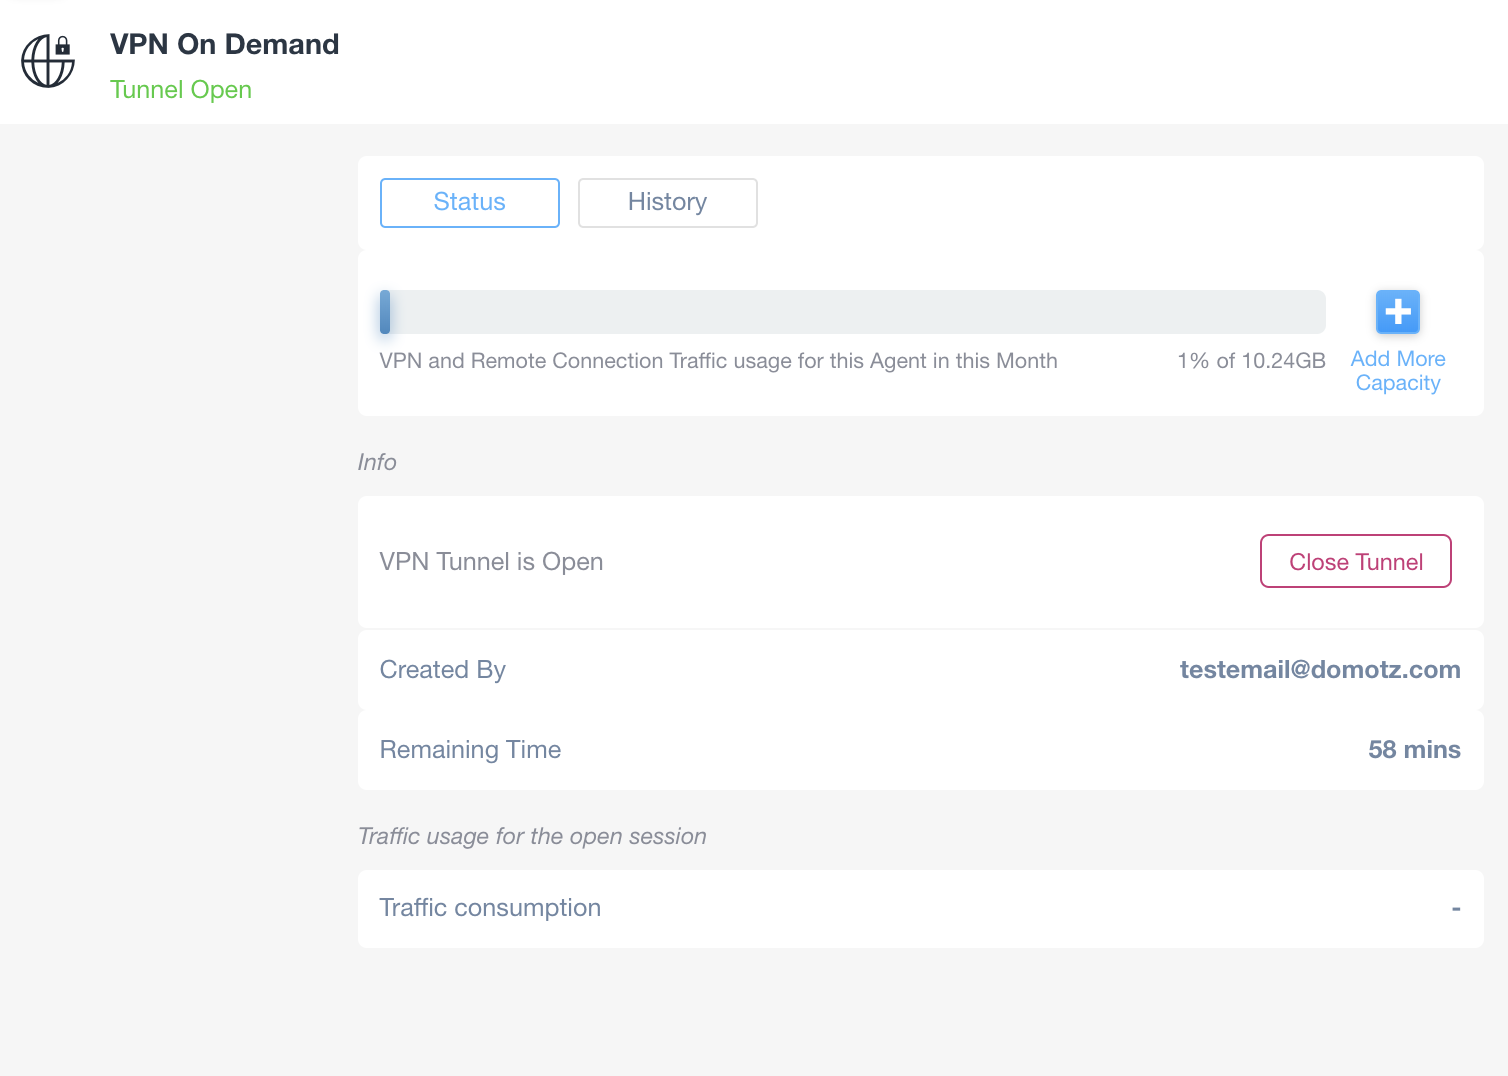
VPN On Demand Interface with Tunnel Status
1. The top section indicates that the VPN status is "Tunnel Open" in green.
2. The interface has tabs for "Status" and "History."
3. A progress bar shows data usage: 1% of 10.24GB used. An option to "Add More Capacity" is available if needed.
4. Under "Info," it confirms the VPN tunnel is open, with an option to "Close Tunnel."
5. "Created By" shows the contact email, and "Remaining Time" displays 58 minutes left.
6. "Traffic usage for the open session" section lists "Traffic consumption," currently showing a placeholder dash.
The VPN tunnel will stay active for 1 hour. You can close it anytime. If you loose the configuration file you need to close the tunnel and open it again; the configuration is new and different everytime.
The data consumption during a VPN session is deducted from your monthly Remote Connection Traffic.