Domotz Agent Installation on NETGEAR ReadyNAS
This section contains a few tips and tricks on how to get started with the Domotz Agent on your NETGEAR ReadyNAS.
Installing the Domotz Agent
Step 1: Download Domotz Pro
The latest version of the Domotz Pro Agent for ReadyNAS can be downloaded from the Domotz Portal at https://portal.domotz.com/login
Step 2: Installation
- Log in to the ReadyNAS admin page.
- Click on Apps, followed by Upload.

- Remove previous Domotz Agent installed if any.
- Click on Browse, locate the Domotz Agent on your hard drive, click on open, followed by Upload.
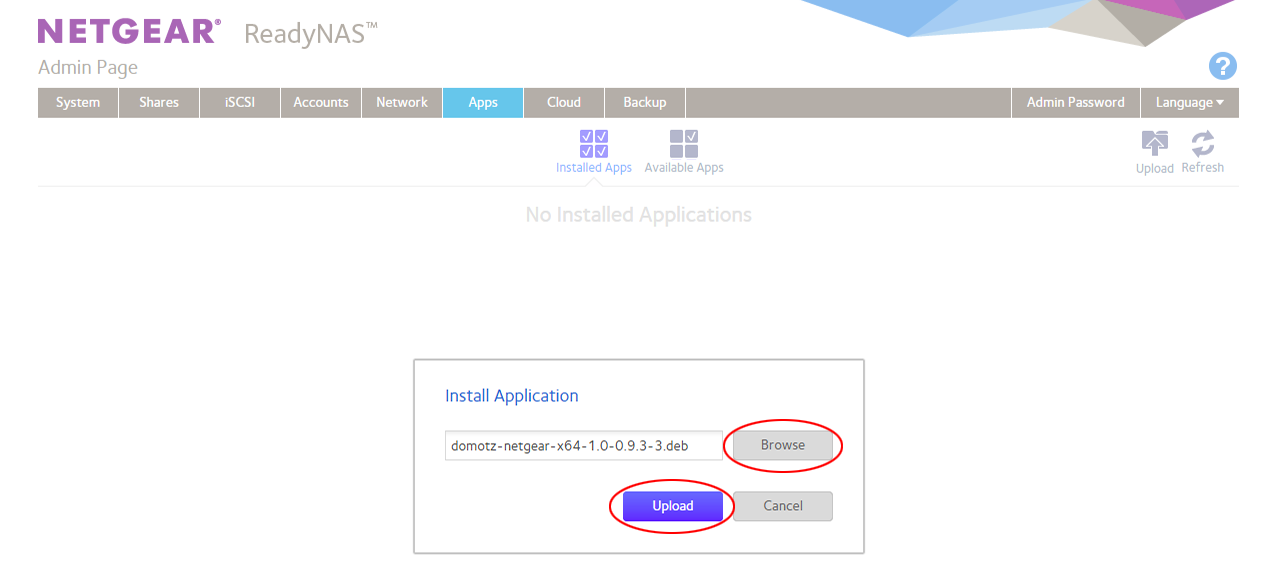
- Wait for the Domotz Agent to install, this will take a few minutes.
- Toggle the switch next to the Domotz icon to On, followed by clicking on the Launch button to start the Domotz Agent.
Step 3: Setup
Please follow the on-screen instruction to complete the setup of your Domotz Agent.