Introduction
The Automation & Scripts feature allows you to create scripts that can be used on IP-connected devices to retrieve additional data and execute actions on them.
Supported network protocols:
- HTTP
- SSH
- WinRM
- Telnet
- SNMP
- TCP
How to use a Script and apply it to a specific device
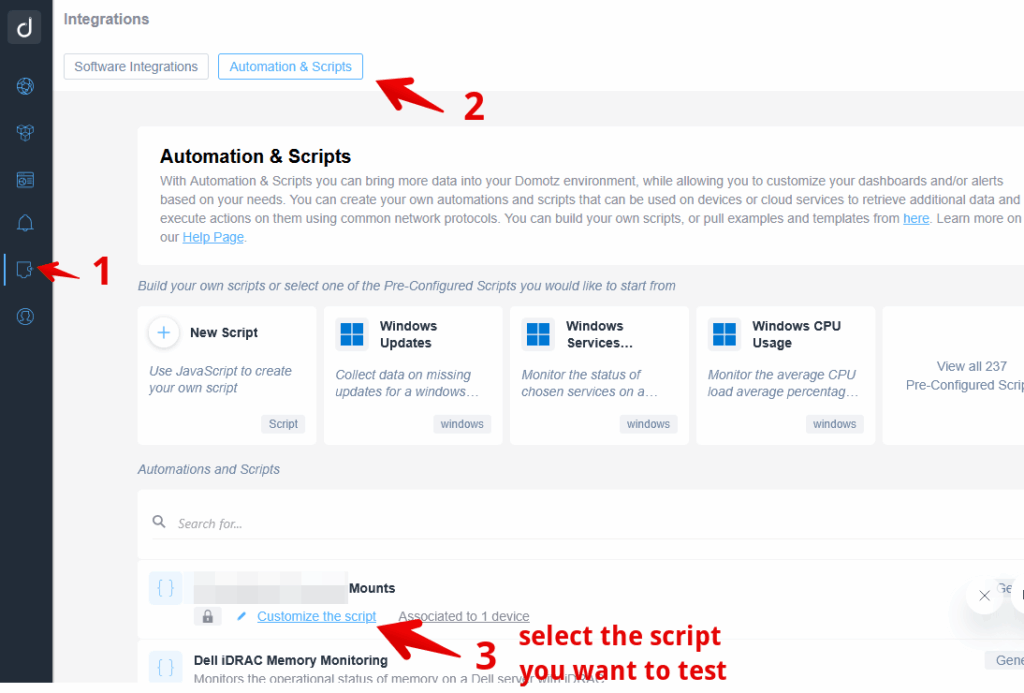
Step 1 – Go to Integrations > Automation & Scripts
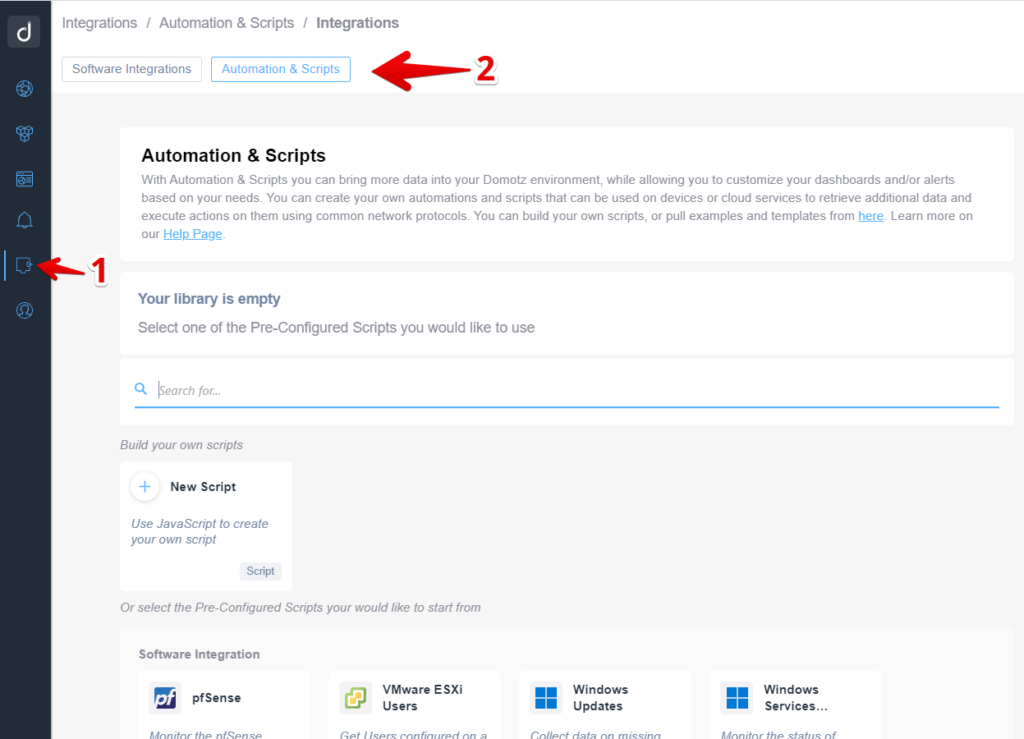
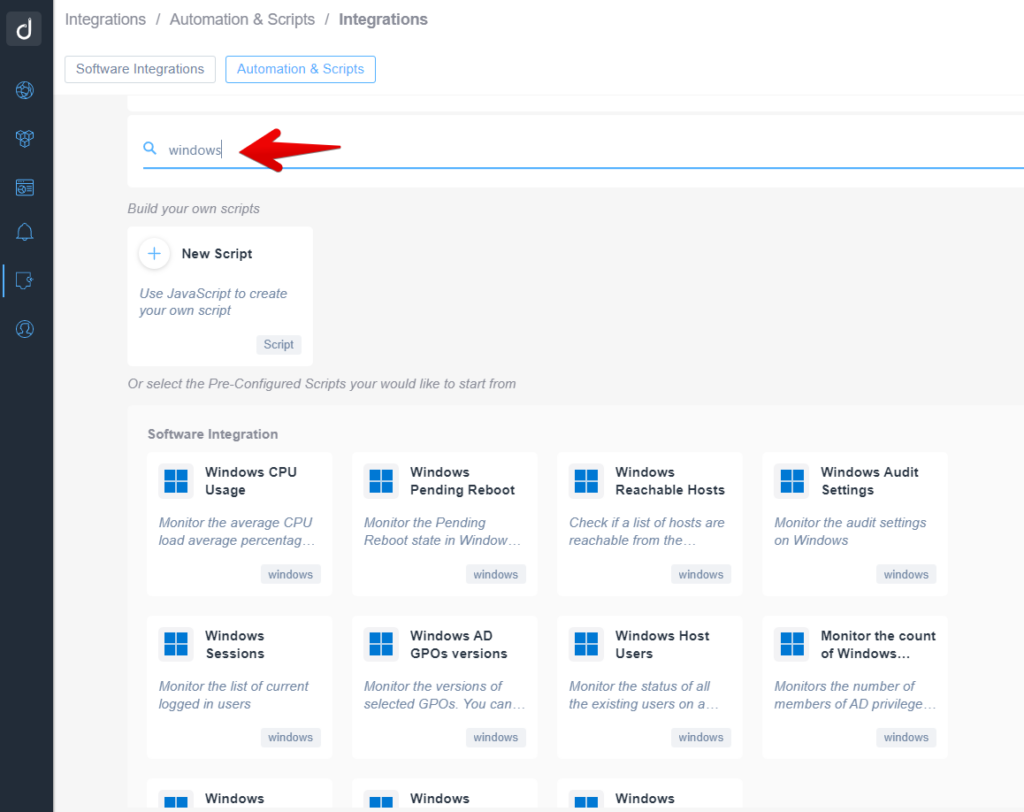
Step 2 – Search for in our Library:
This will filter for example scripts that we have already developed which they work as it is and that can be customized to fit your needs:
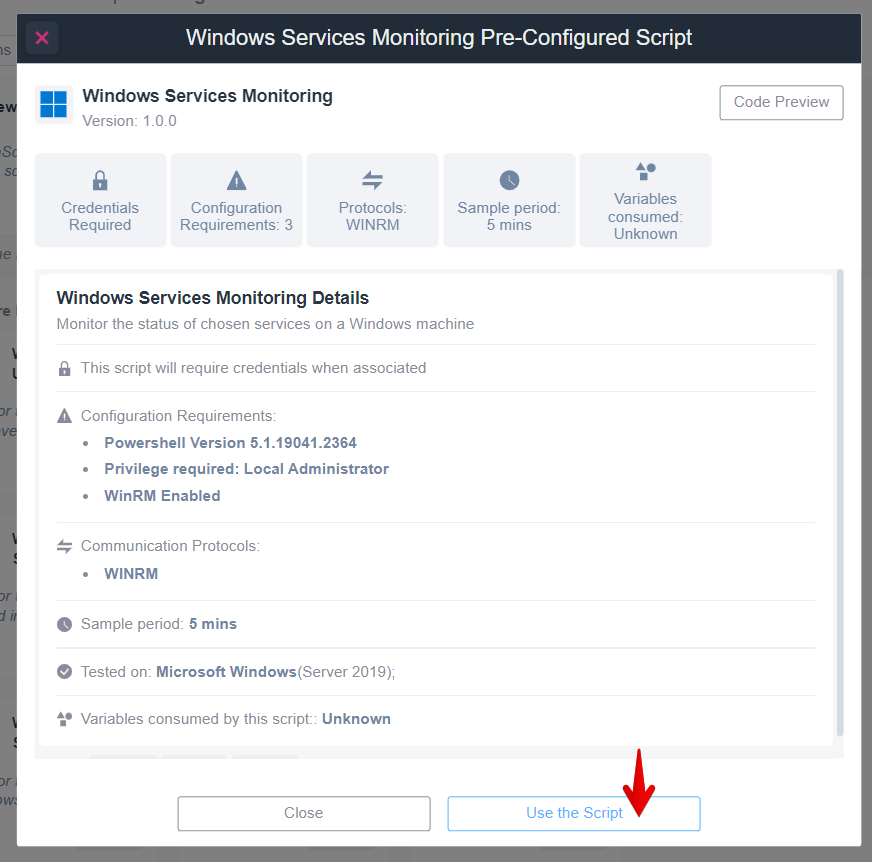
Step 3 – Select one Script example and “use” it:
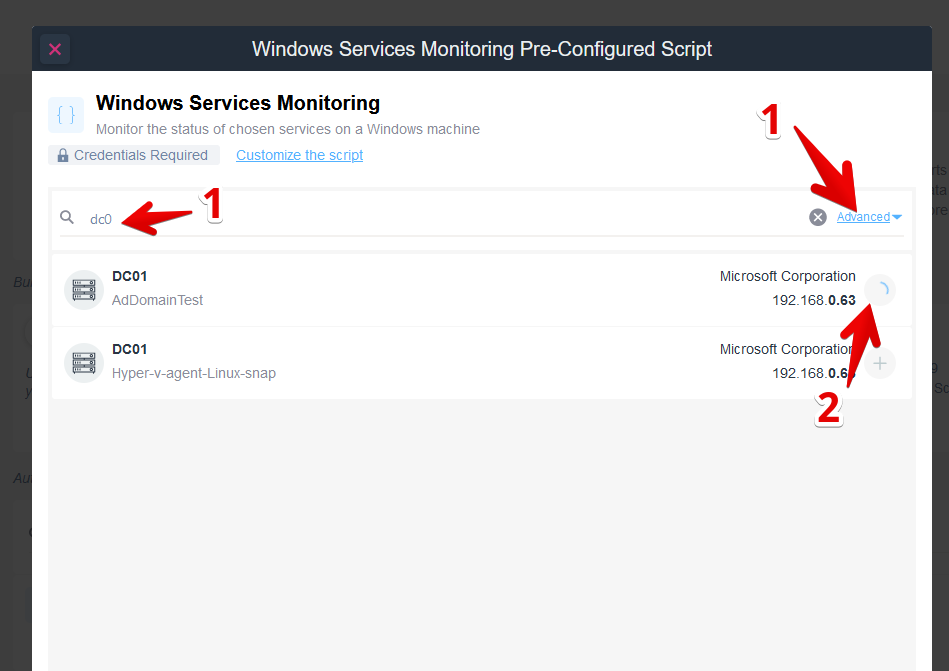
Step 4 – Select the devices you would like to apply it to and add the script to them:
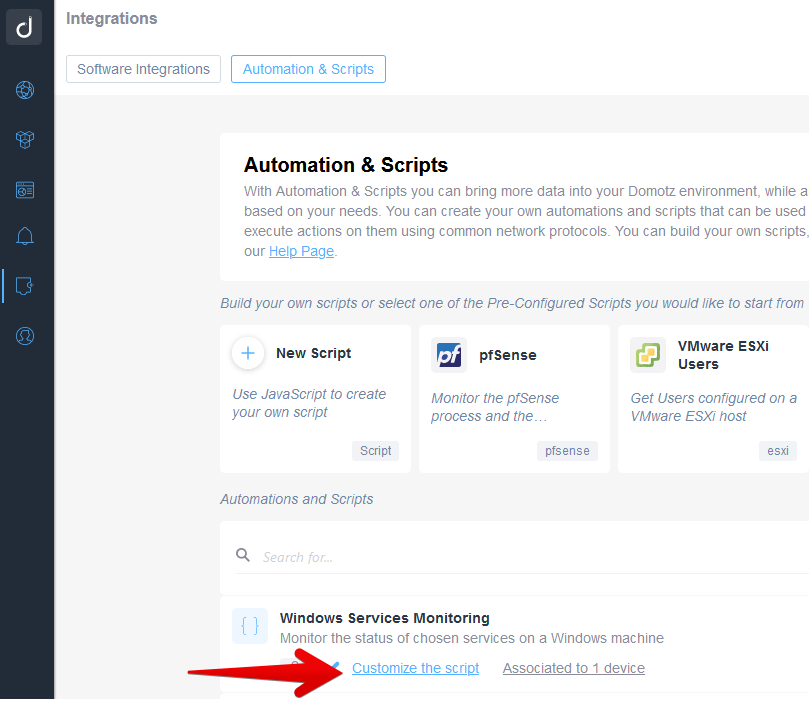
Step 5 – Customize the scripts for your needs:
How to create a Script from scratch?
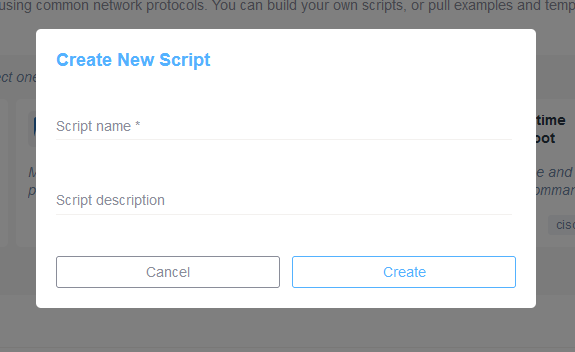
Search in the Click on Create a New Script:
Step 3 Enter script properties and code
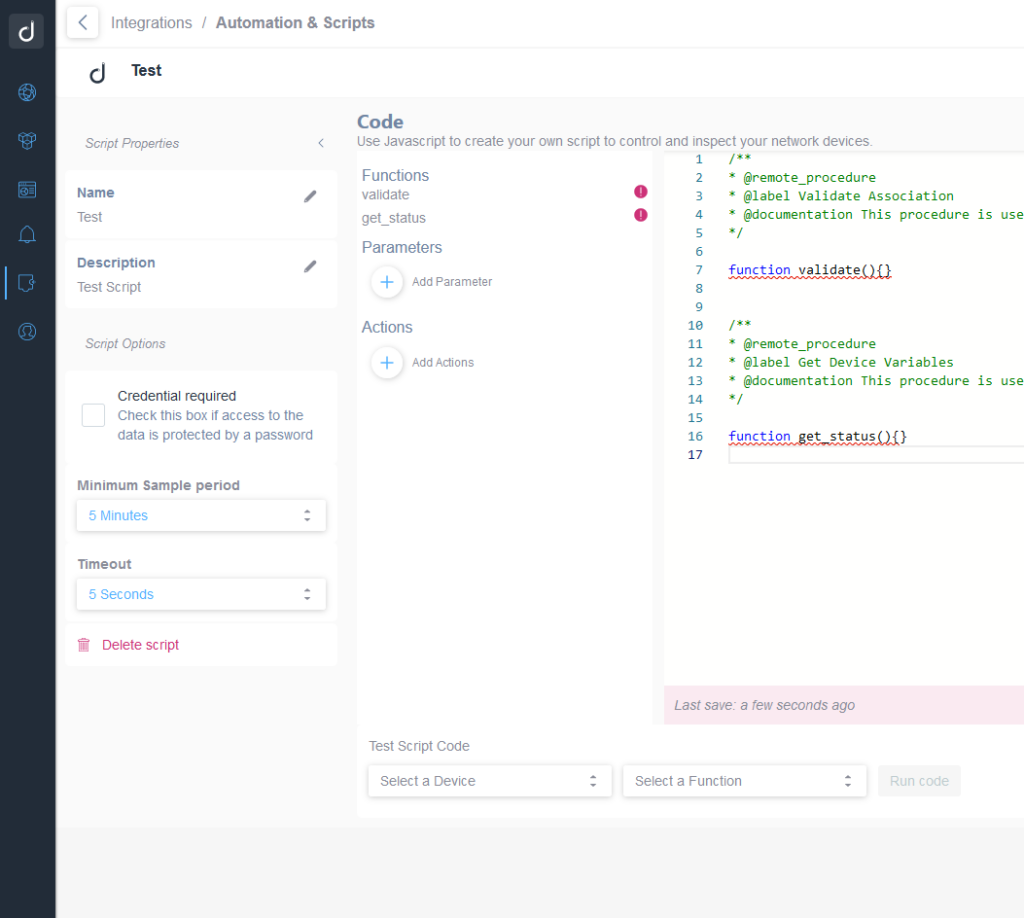
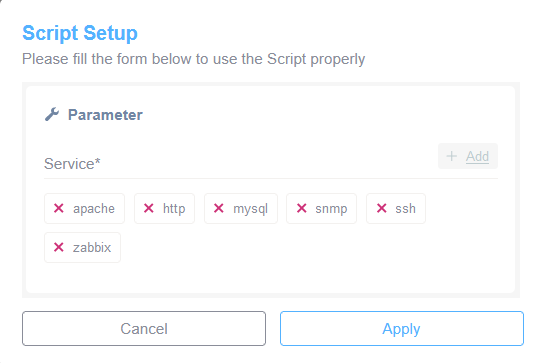
Step 4 Add Parameters
If needed (most scripts won’t require parameters), by using the “Add Parameters” + button, it is possible to add parameters:

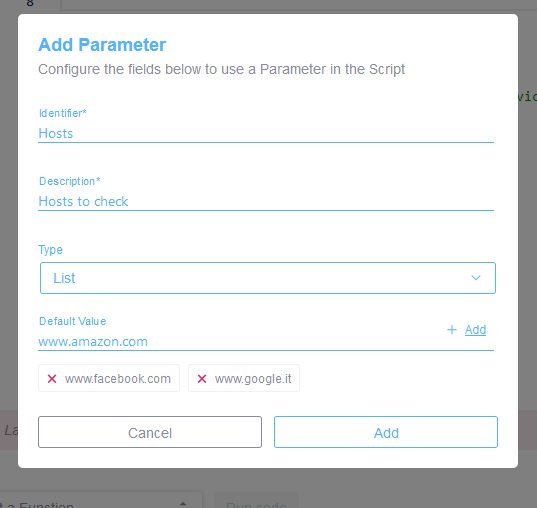
We support three parameter types: List, Text, and Number.
Once defined you will be able to see it here:
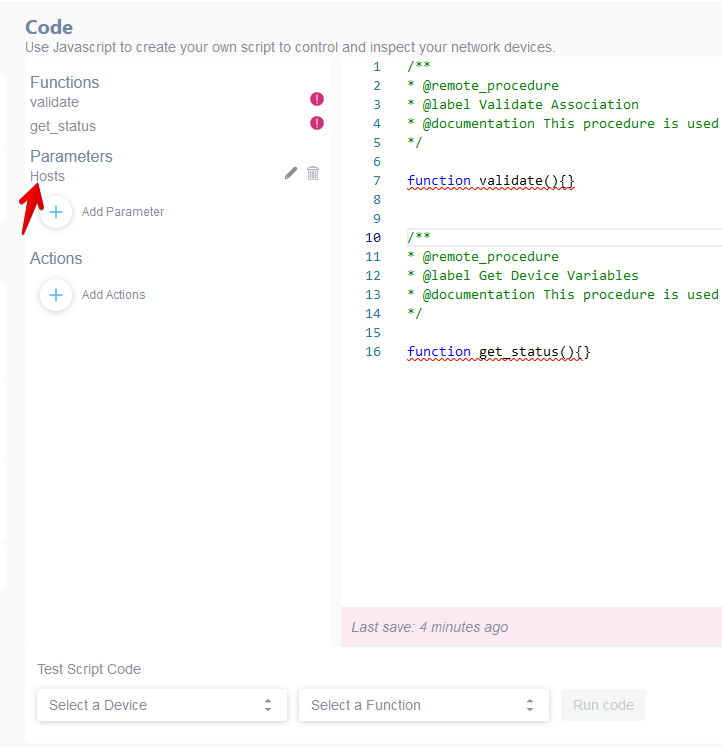
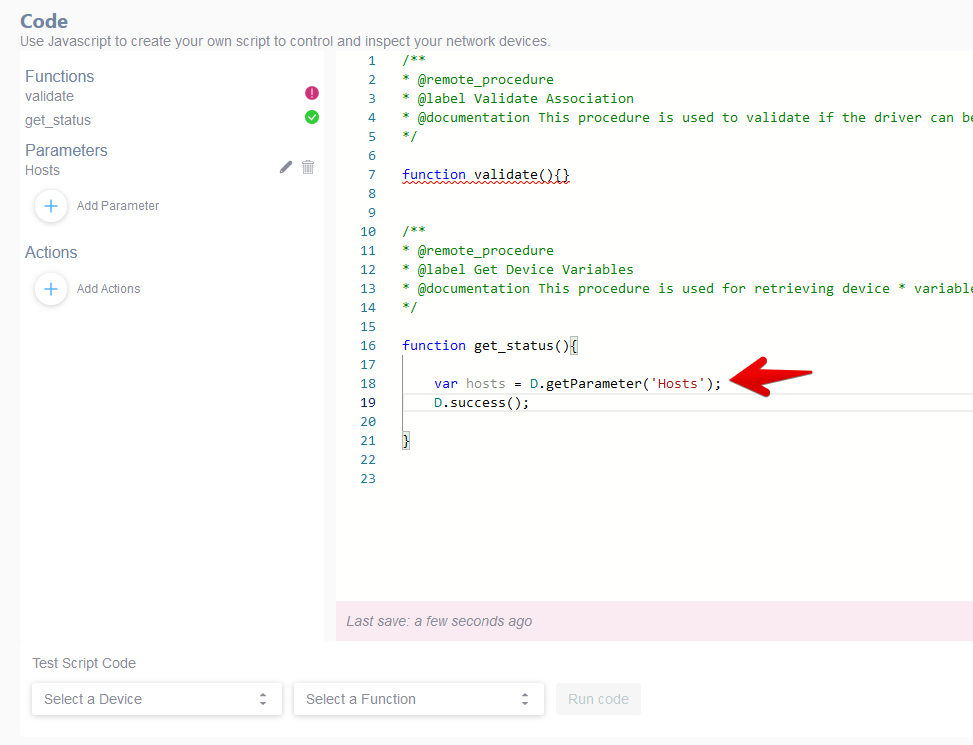
And you will be able to access it in the code by using the D.getParameter() function:
Change Parameters on an already applied script
Please note that once the script has been applied, you will be able to change its parameters directly in the Scripts tab:
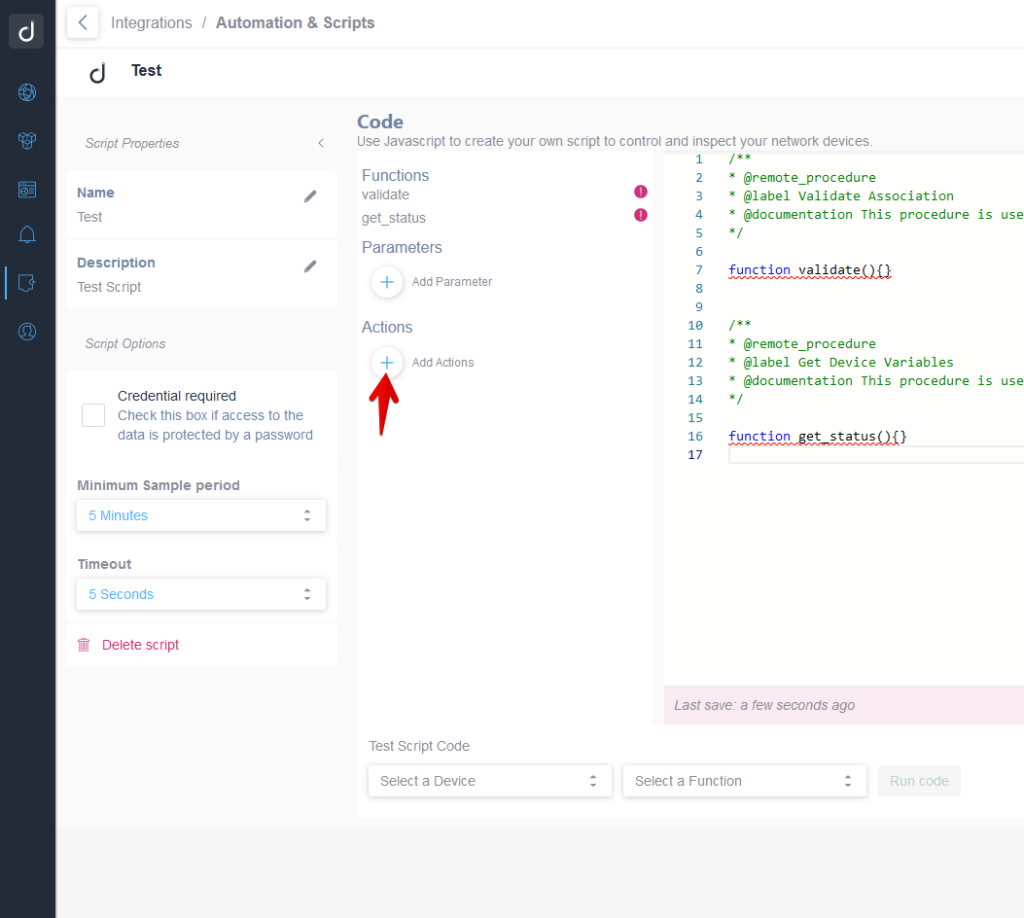
Step 5 Add additional Custom Actions
By using the “Add Actions” button, it is possible to create user defined “actions/functions”:
And these can be tested by assigning the script to the device and selecting the proper Custom function:
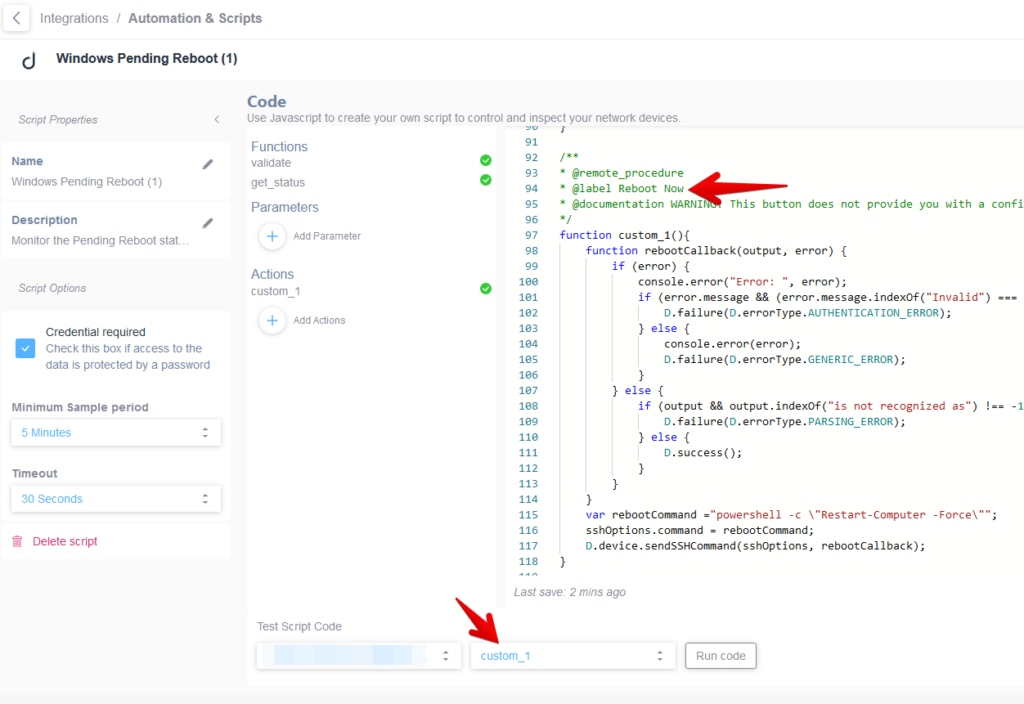
In the above example, the custom_1 action is a button with the label “Reboot Now” that if pressed will run the command contained in the rebootCommand variable.
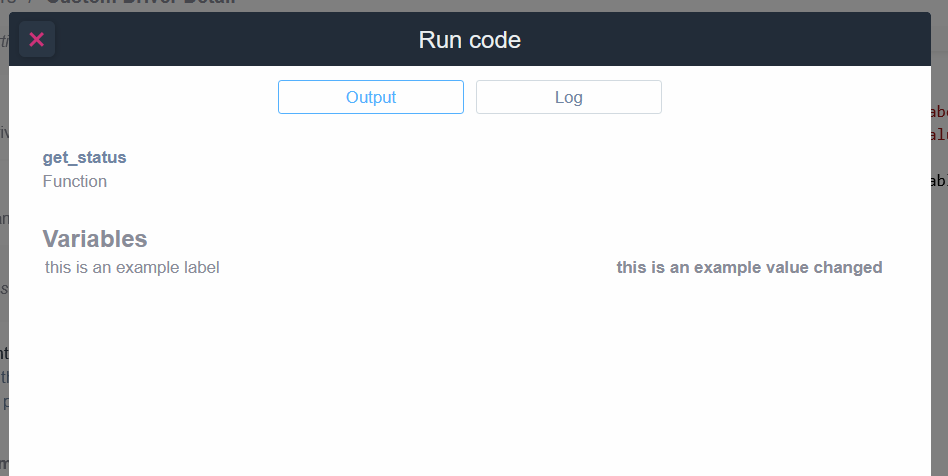
If you select the device you would like to test the script on and you select the custom_1 function and then press the “Run code” button, you will be able to test that specific action on the device.
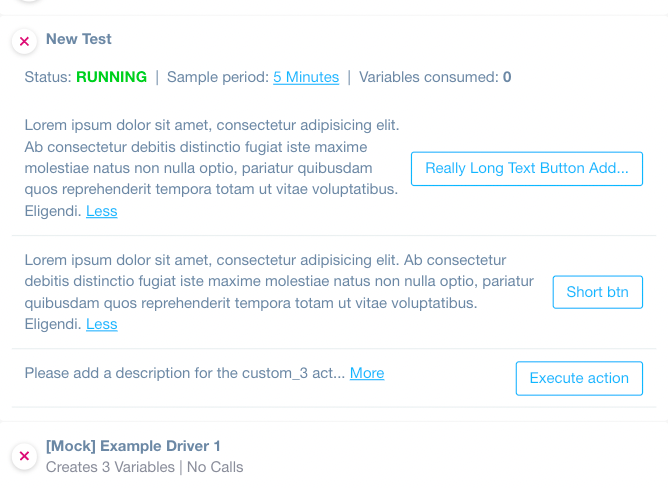
After assigning the custom_1 action to the device (please see here how to assign it: https://help.domotz.com/monitoring-management/custom-driver/#htoc-how-to-apply-drivers-to-device) , you can see it in the “Scripts” tab of your device and execute the function by clicking on the “Execute Action” botton:
Expandable descriptions are also available for your Custom action under “Scripts” tab of your device.
How to test a Script?
You can validate the code of a script by executing it against a device of your choice.
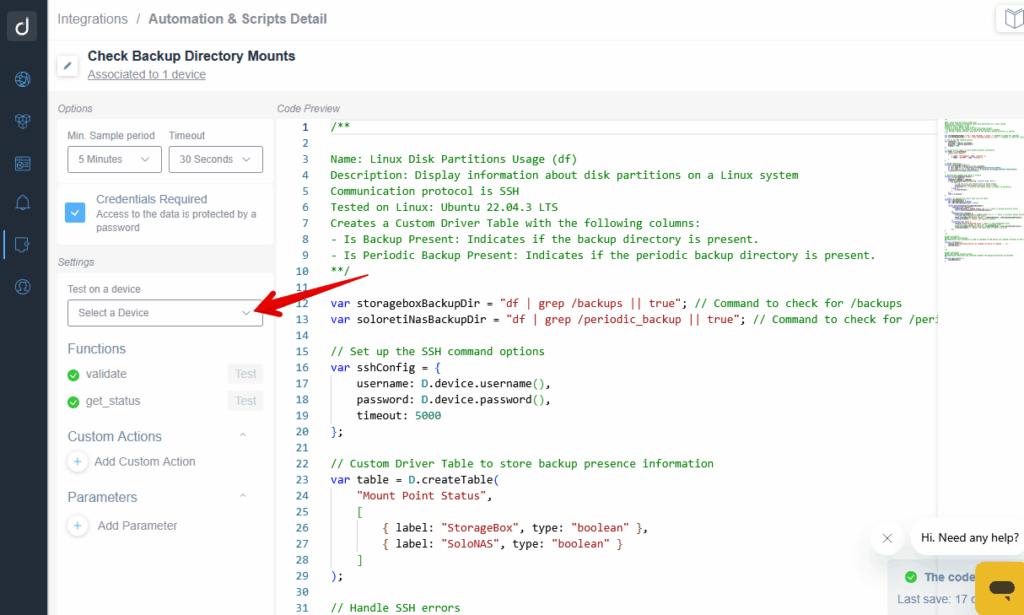
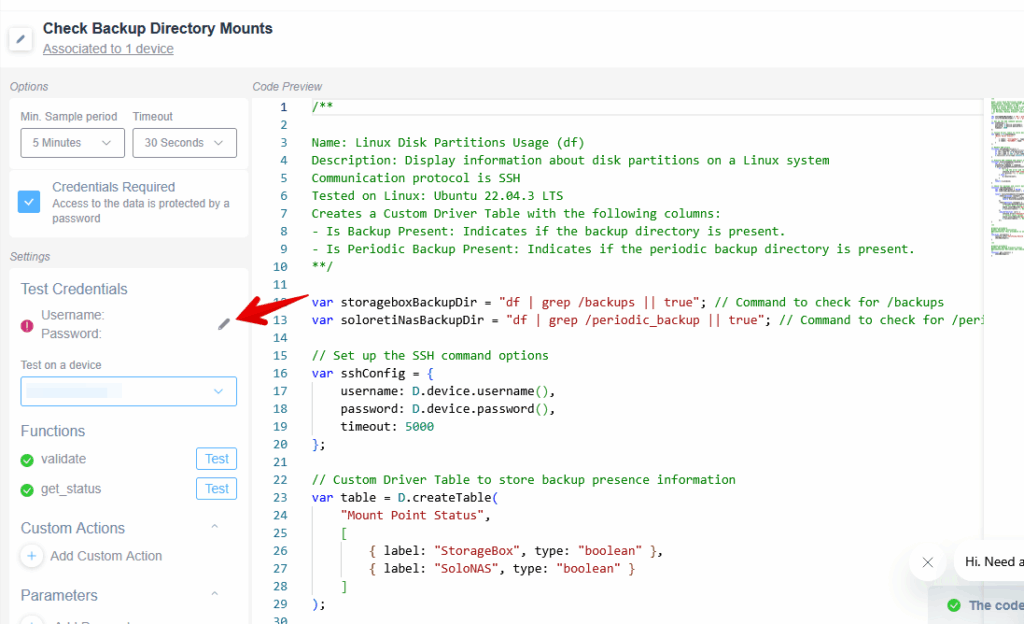
Step 0 Open the Script Coding IDE
Step 1 Open the Script Details section

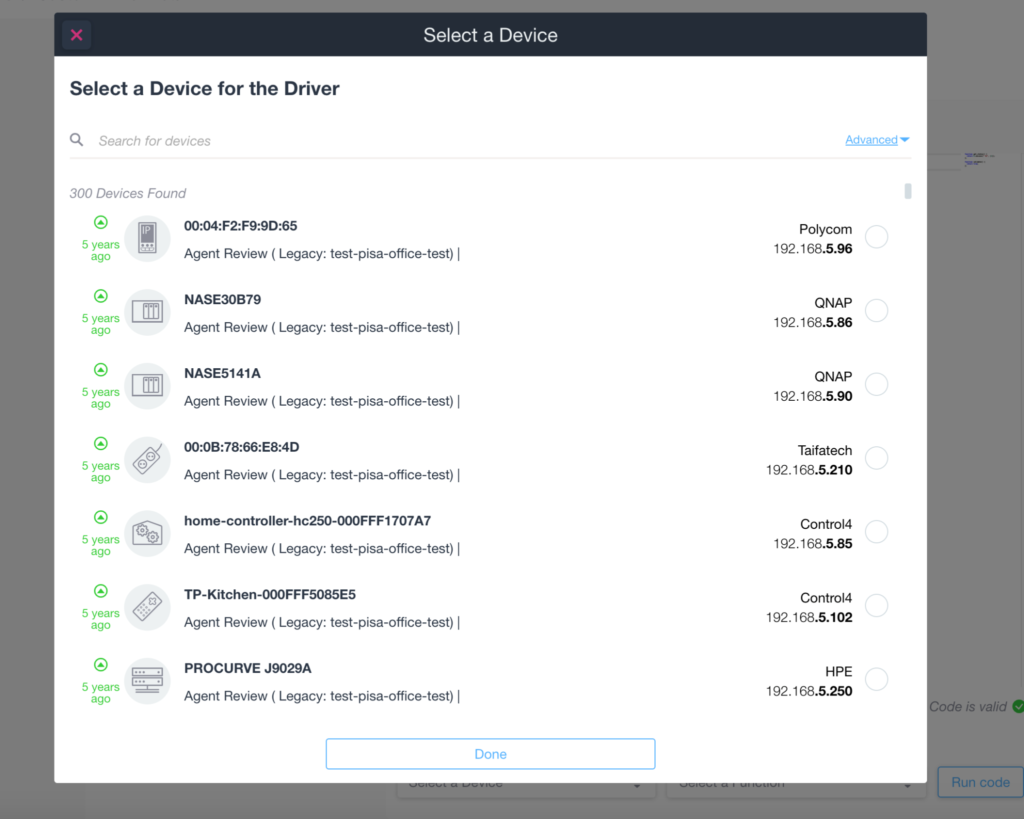
Step 2 Select a Device for the Script
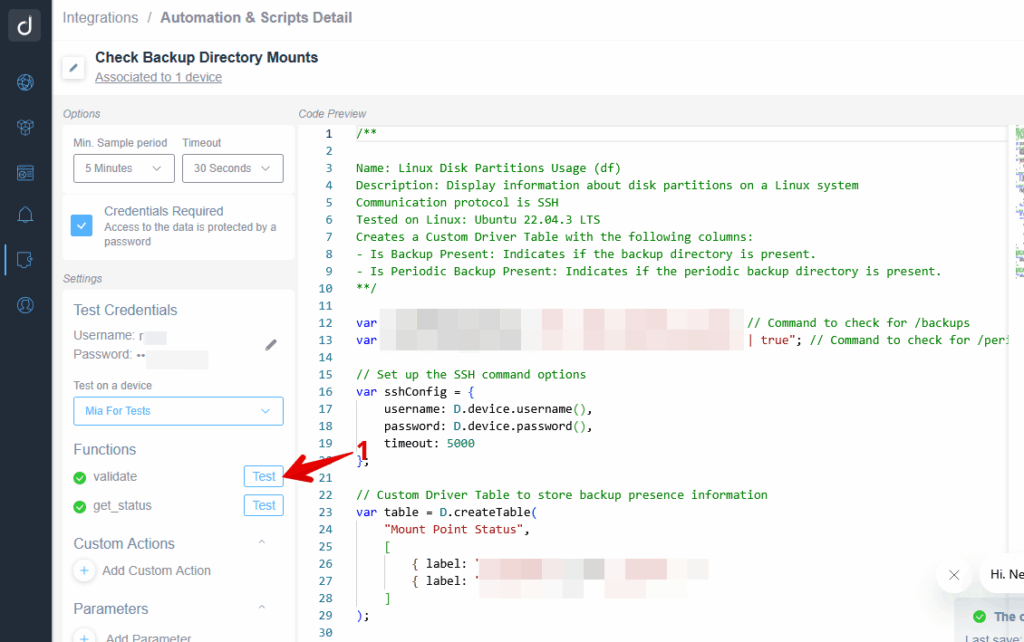
Step 3 Add your credentials and validate/test run the script
And select a function to execute:
- Validate is designed to verify if the device that you apply a script to can support the script’s functionality. To clarify, the function will be executed and depending on the result it will allow or prevent the script to device association:
- The D.success() callback indicates the device is a valid candidate for the script .
- The D.failure(D.errorType.DEVICE_NOT_SUPPORTED) callback indicates that this script’s functionality is not supported on the selected device.
2. Get_status is the the fuction to get your real variables.
Step 5 Checking the result
A pop-up will appear with the code run execution result for the specified function:
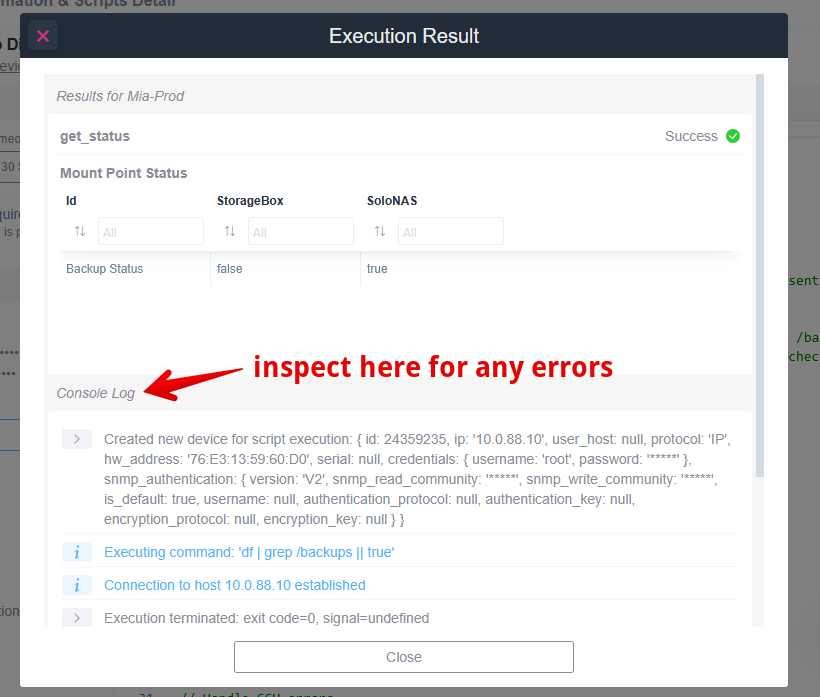
You can also add logging to your script:
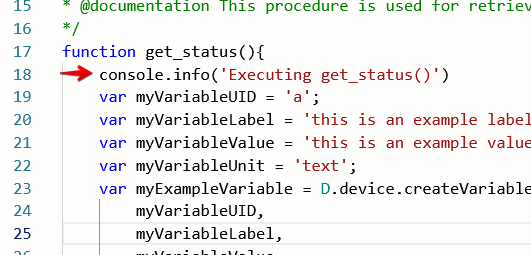
And after running the code you will be able to access it under the Console Log section.
Script table variables
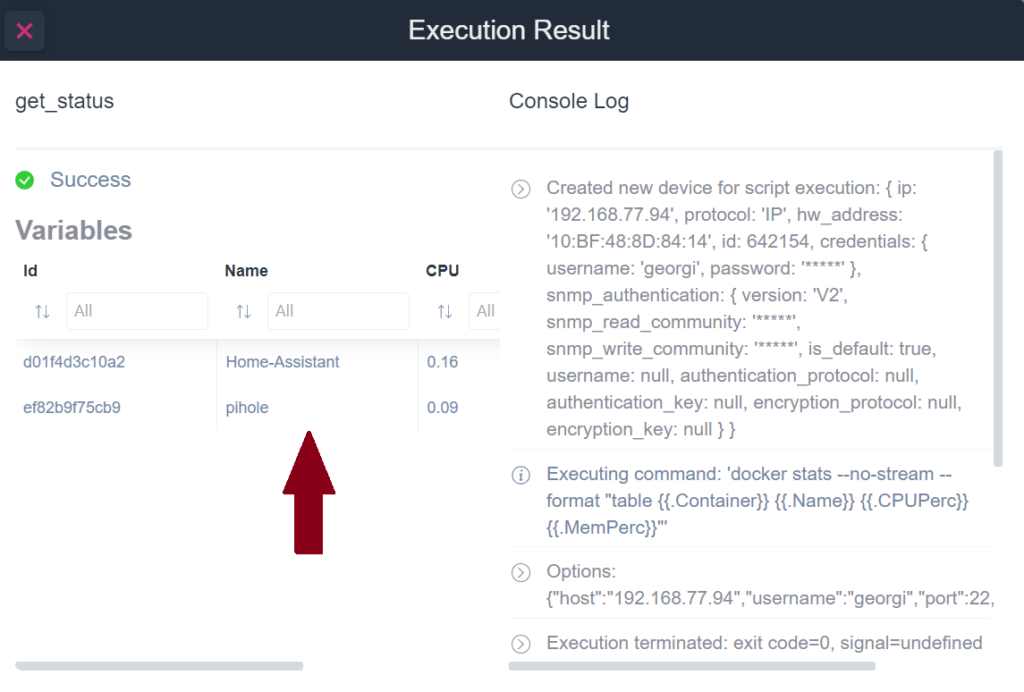
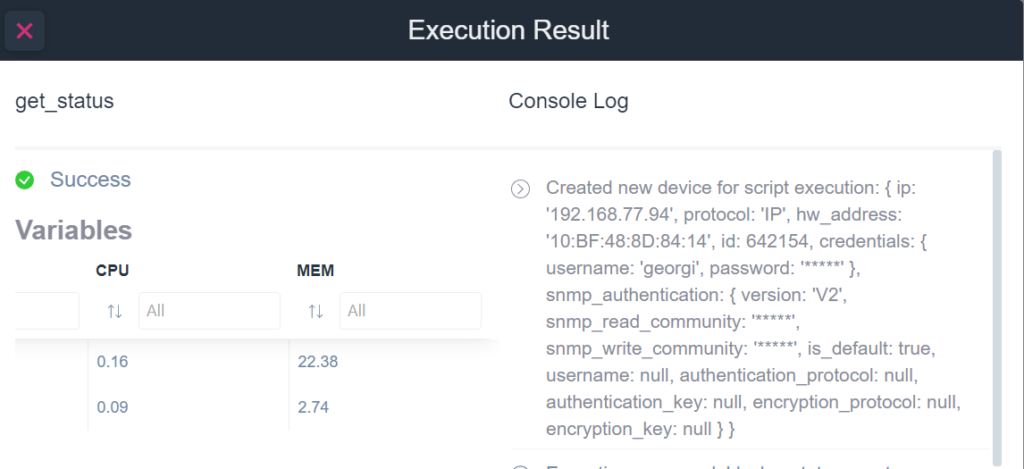
Now, you can also create table variables where each record is a demonstration of various key/value pairs. You can basically insert records and insert the unique identifier of the row, which in this case is the Docker container ID, then you just insert for each column your defined value.
How to define Script Table, you can follow the link: https://portal.domotz.com/custom-driver/driverTable.html
To see an example of script table variables: https://github.com/domotz/custom-driver/blob/master/examples/ssh/docker_stats.js
How to apply a Script from the Device Page
Step 1 – If no scripts where assigned to the device
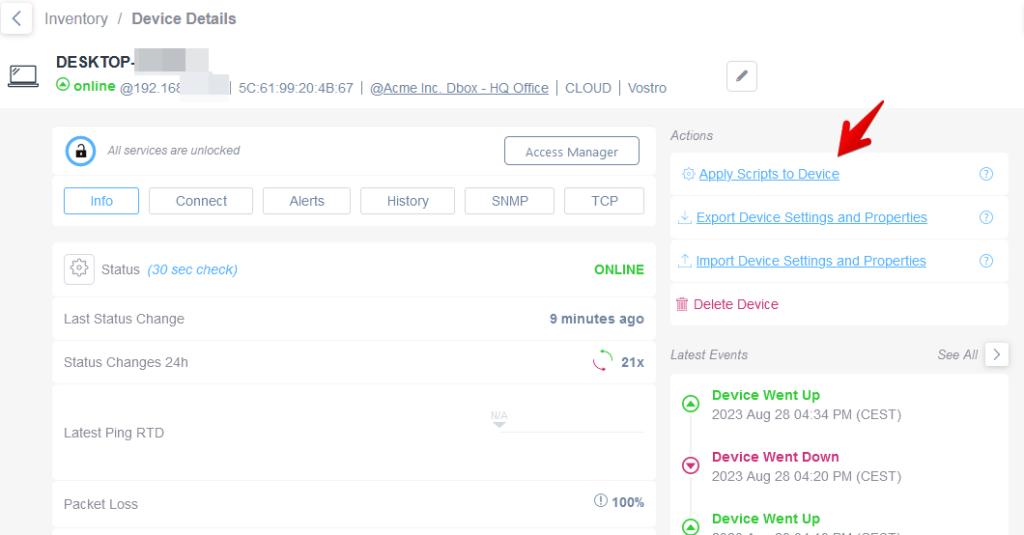
Go on the page of the device you would like to apply the script to and click on “Apply Scripts to Device”:
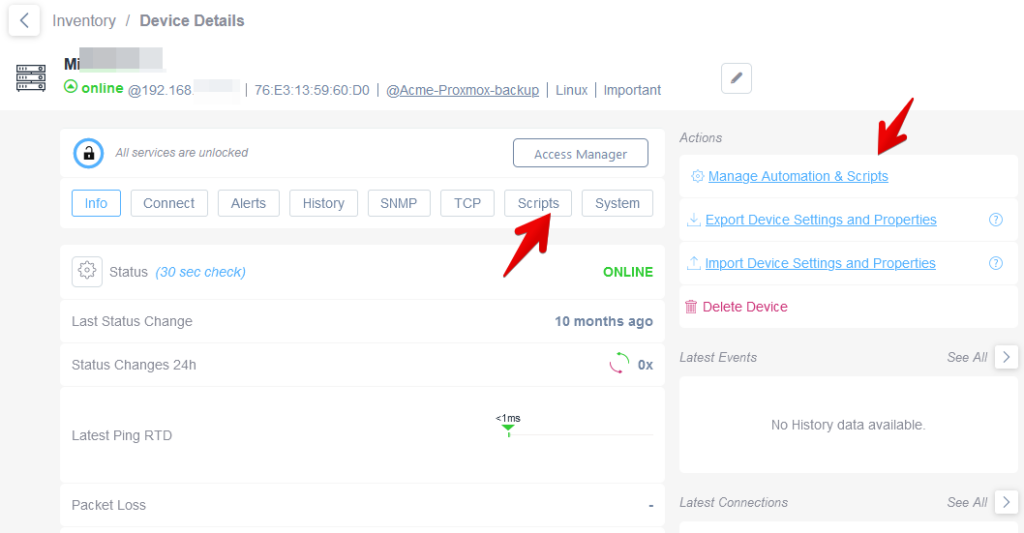
Step 1 – If you have already assigned a script to a specific device
Go on the page of the device you would like to apply the script to and click on select “Manage Automation & Scripts” or click on the “Scripts” tab button:
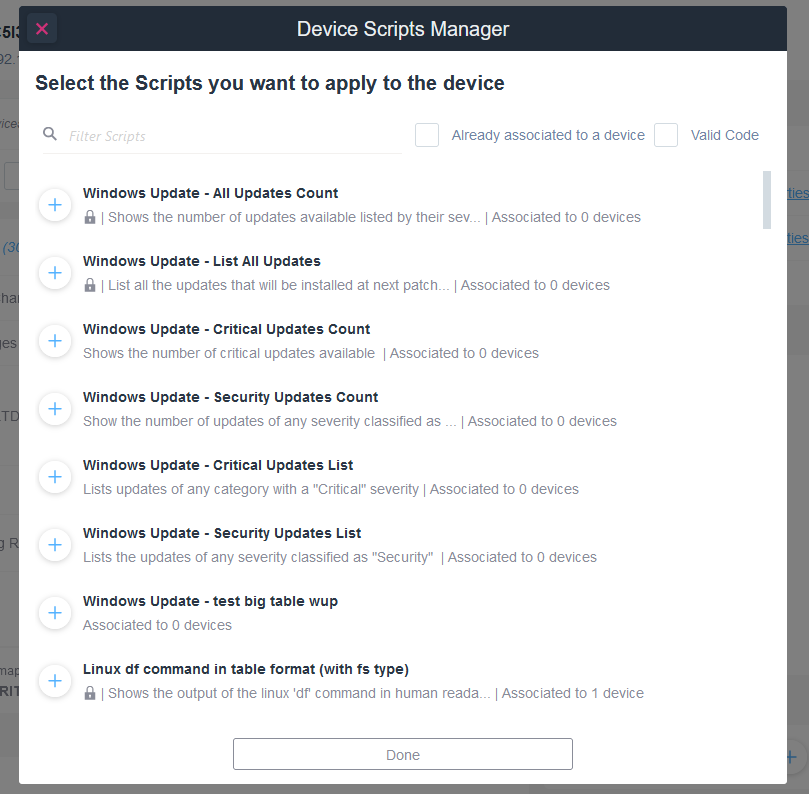
Step 2 – Search and Apply the custom script
Select the script that you want to apply to this device. To filter your Script list, check the boxes ” Already associated to a device” or ” Valid Code”, or both.

The ‘Script’ tab will appeare after assigning a script to a single device:
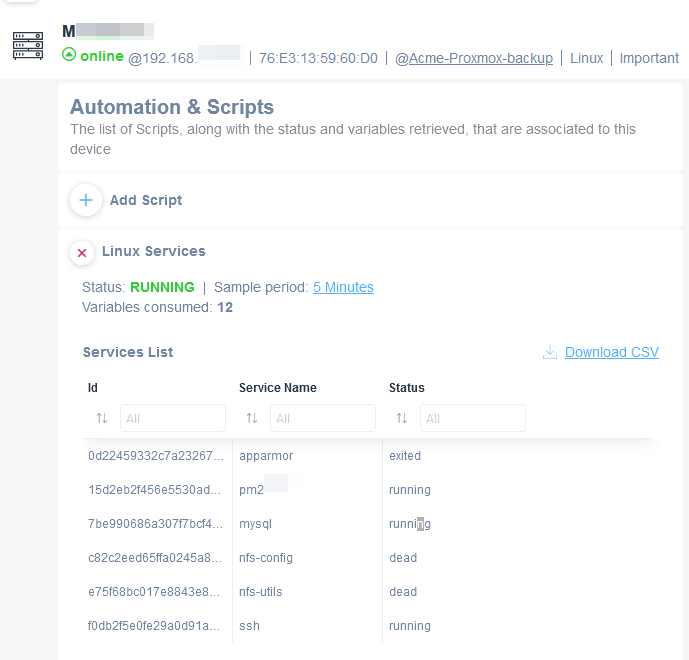
When multiple scripts are associated to a single device, the Scripts tab will display them one after the other (you just need to scroll down in the Scripts section):
Agent Variable Consumption
The Agent’s Automation & Scripts variable consumption box shown on the ‘Devices lis’t screen indicates the number of script variables consumed by the particular Agent:
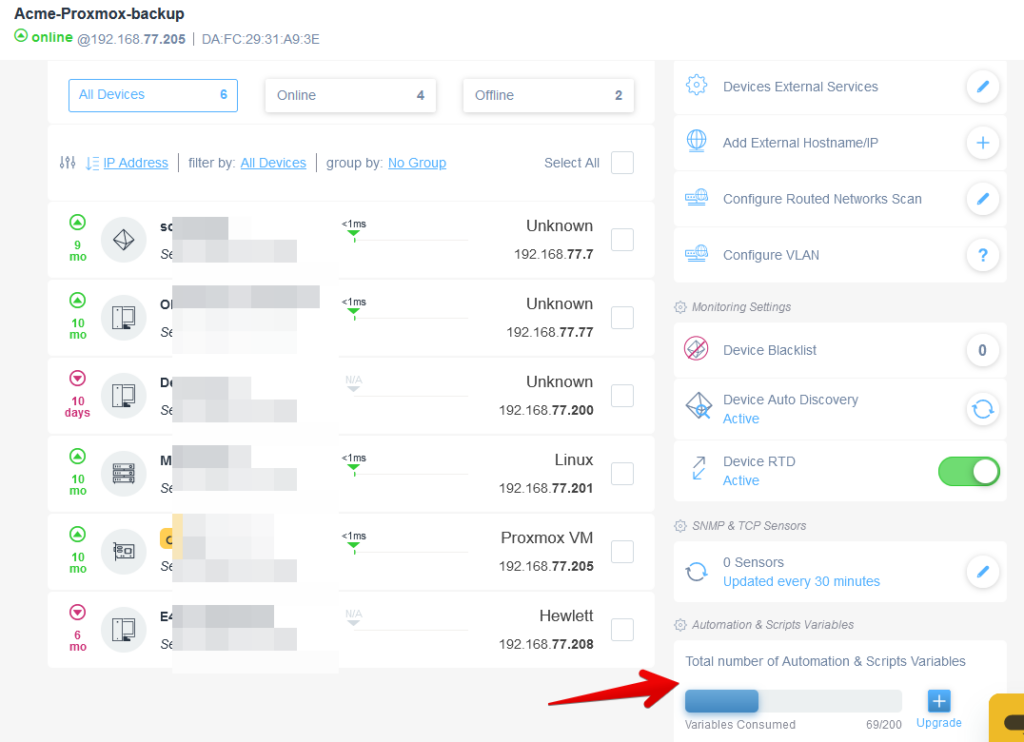
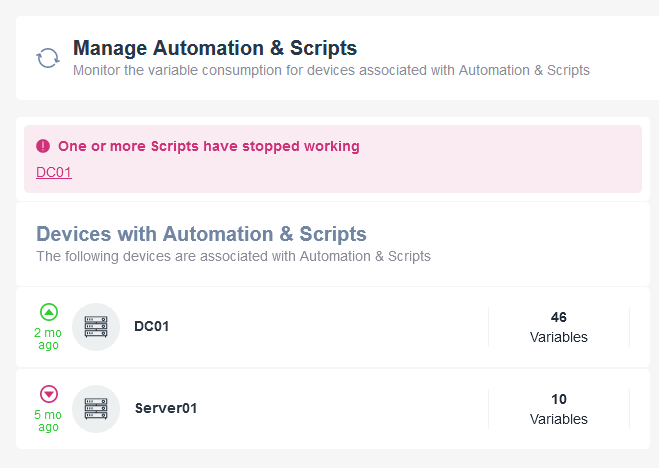
By clicking on the highlighted above section, you will be able to access the Manage Automation & Scripts section where you can see which devices are consuming variables:

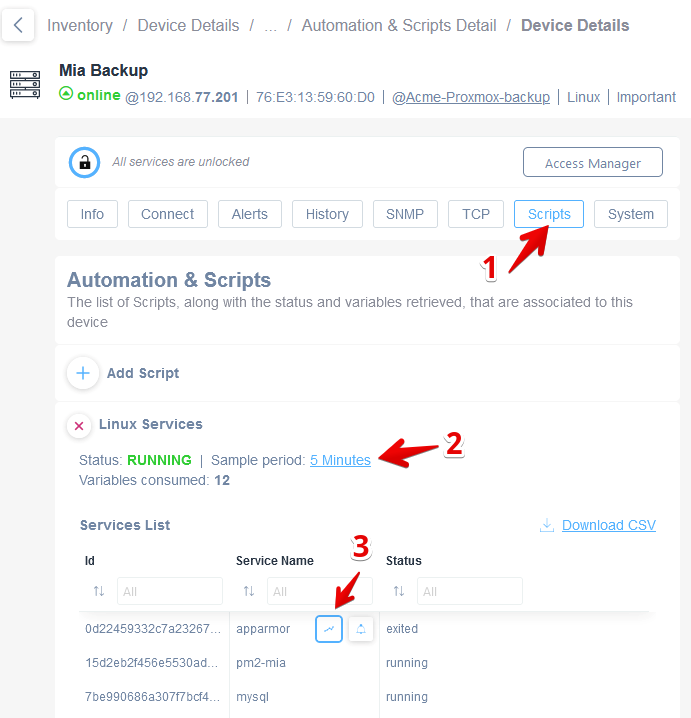
Step 3 Script configuration
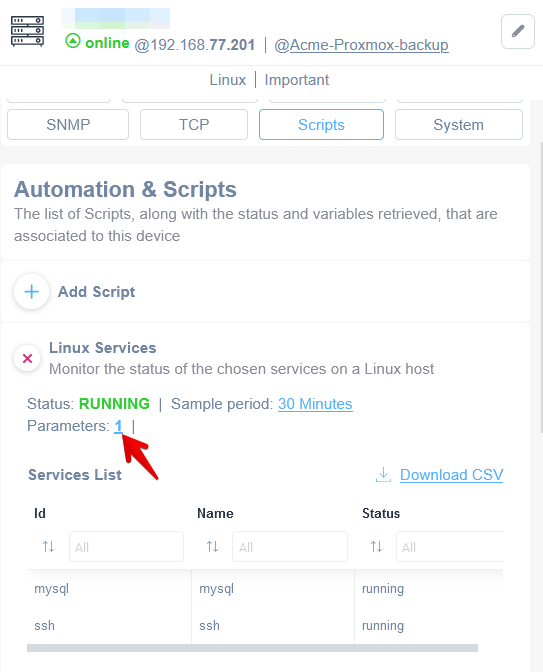
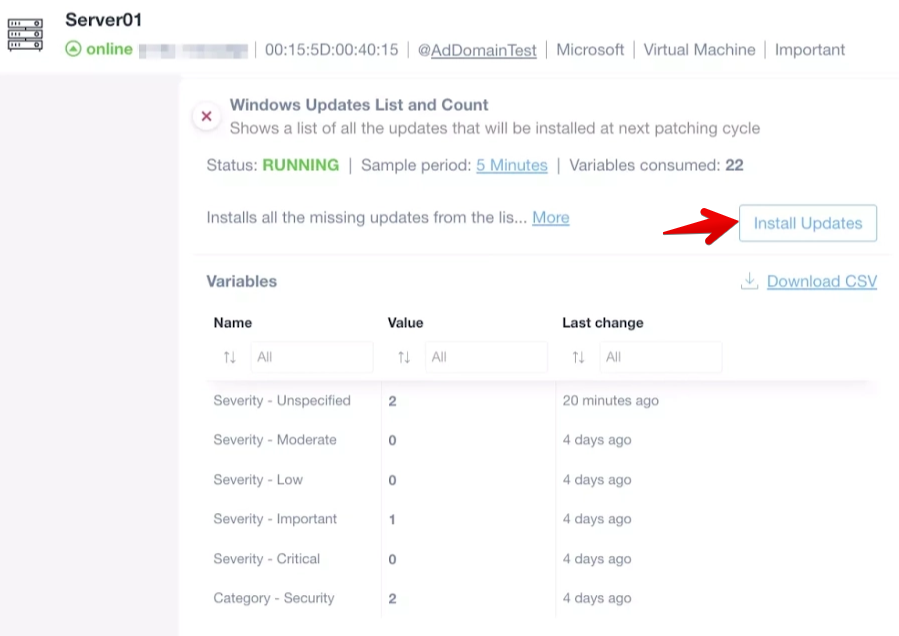
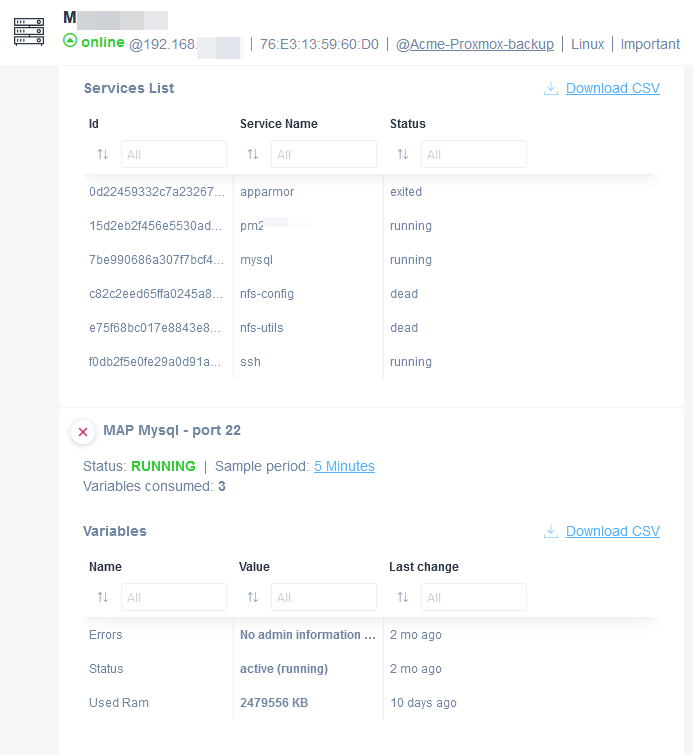
Go to the Scripts tab and find your script configuration (sample period) and results:
A historical view of the variable value changes is available by clicking under its value cell:

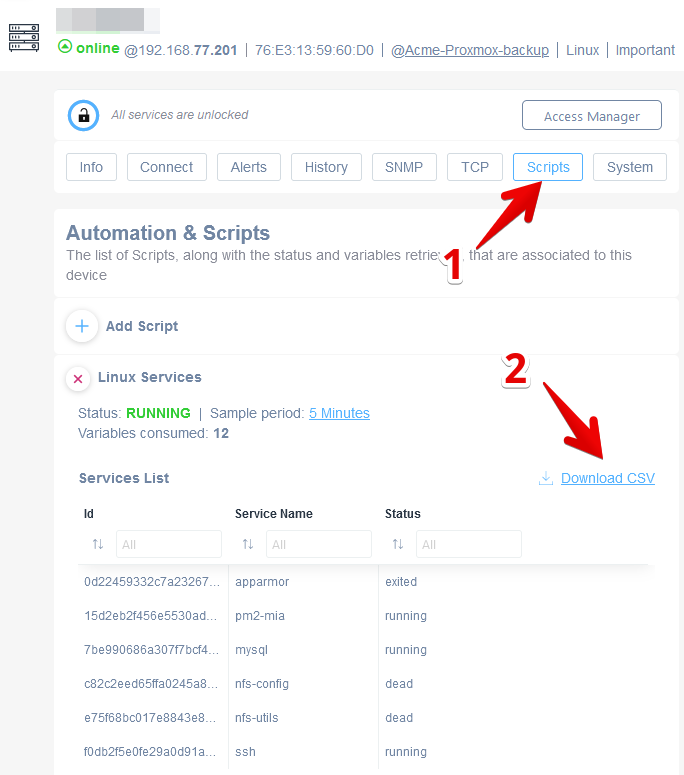
How to Download a CSV file of your Script variables tables
After selecting your device, please enter the Scripts tab of your device with custom integrations and click the “Download CSV” link to download a CSV of your chosen variables tables.
Failed Scripts
If one or more scripts are in the “Failed” status, you will see an informative banner in the “Automation and Scripts variables” section stating “One or more Scripts have stopped working”.
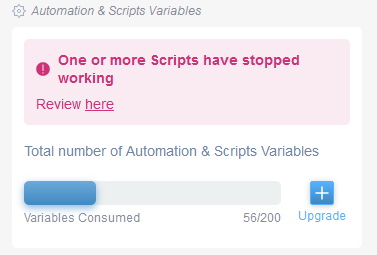
By clicking on the banner, you will be able to access the Manage Automation & Scripts section, where you can see a list of devices for which the script has been stopped.