Installing Domotz Agent on QNAP
Requirements
- Requires QNAP with Container Station / Docker support.
Install Domotz Collector via Docker
1. Log in to your QNAP and open the App Center.
2. Search for Container Station and click Install.
3. Once installed, open Container Station from the main menu.

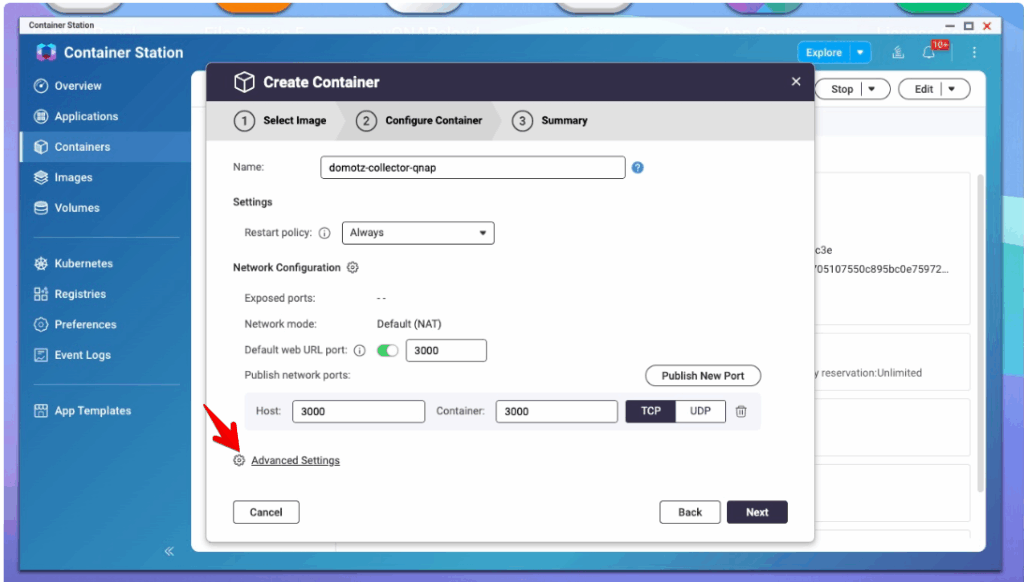
4. Go to the Explore > Create Container:

5. Use domotz/domotz-collector Docker image from Docker Hub, and click Next.

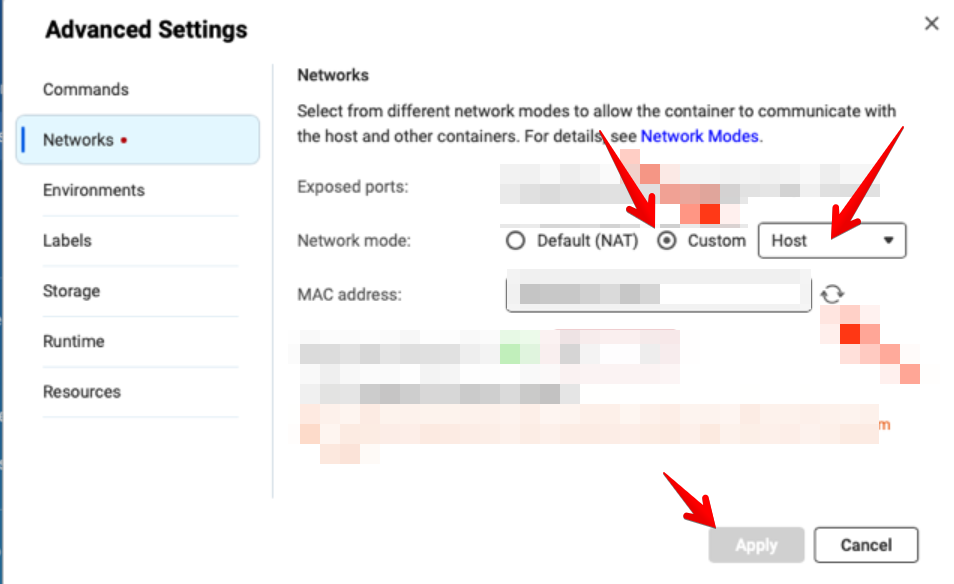
6. Configure the container. We recommend setting the container to use Host Network mode. To do this, click Advanced Settings, select Custom under Network mode, and then choose Host.
7. Optionally set Restart Policy to Always (recommended).
8. Click Finish and wait for the new container to be created and launched.

Please note that the Network Collector inside the container may take 1–2 minutes to become ready for configuration.
Configure Collector
- Get the IP address of your QNAP and configure your Collector, eg. http://QNAP_IP_Address:3000.
Please note that you have to use http and NOT https.

Migrate Your Native QNAP Domotz Collector (EOL) to Docker on QNAP
Support for the Native QNAP Domotz Collector is being discontinued due to limited adoption. The package certificate will expire on October 18, 2025, after which its operation cannot be guaranteed.
The good news is that you can seamlessly migrate your Domotz Collector to Docker. To do so, please follow these steps:
- Uninstall the Native Collector from your QNAP device.
(Important: Do NOT delete the Collector in the Domotz Portal — the cloud data is needed to restore it on the new Docker instance.) - Install a new Docker-based Domotz Collector on your QNAP device as outlined at the beginning of this article.
- Migrate your existing configuration using the official migration guide available here: Move Domotz to New Hardware.
If you run into any issues during the process, please reach out to us at support@domotz.com