
Domotz Cisco Meraki Integration
Remotely monitor your Cisco Meraki devices including firewalls, network switches, and access points, get device status alerts, and access enhanced network management features for certain Meraki devices.
Prerequisites
Before you can utilize the Meraki integration and view the devices in the network topology, Domotz must first discover all the Meraki devices you intend to monitor, either at Layer 2 or Layer 3.
How to set up the Domotz Cisco Meraki Integration
If you have Cisco Meraki devices in the network, you can connect Domotz to the Meraki Cloud in order to get additional info and features inside Domotz.
There are some of the additional info/features that you’ll get once the Meraki Cloud is connected:
- Software reboots
- PoE switches power control
- Device model, firmware and serial number
To activate this integration you will need the following mandatory field values:
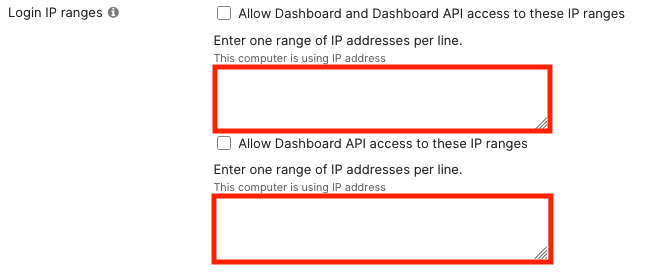
- Meraki API key – you can find how to generate your Meraki API Key here.
- Meraki Organization Name – to get your Organization Name you can see here or here.
After getting these two field values you can connect to your Meraki Account from Domotz.
Please open the “Cloud and Local Integrations” section, that you can find on the left menu in the Devices List section:
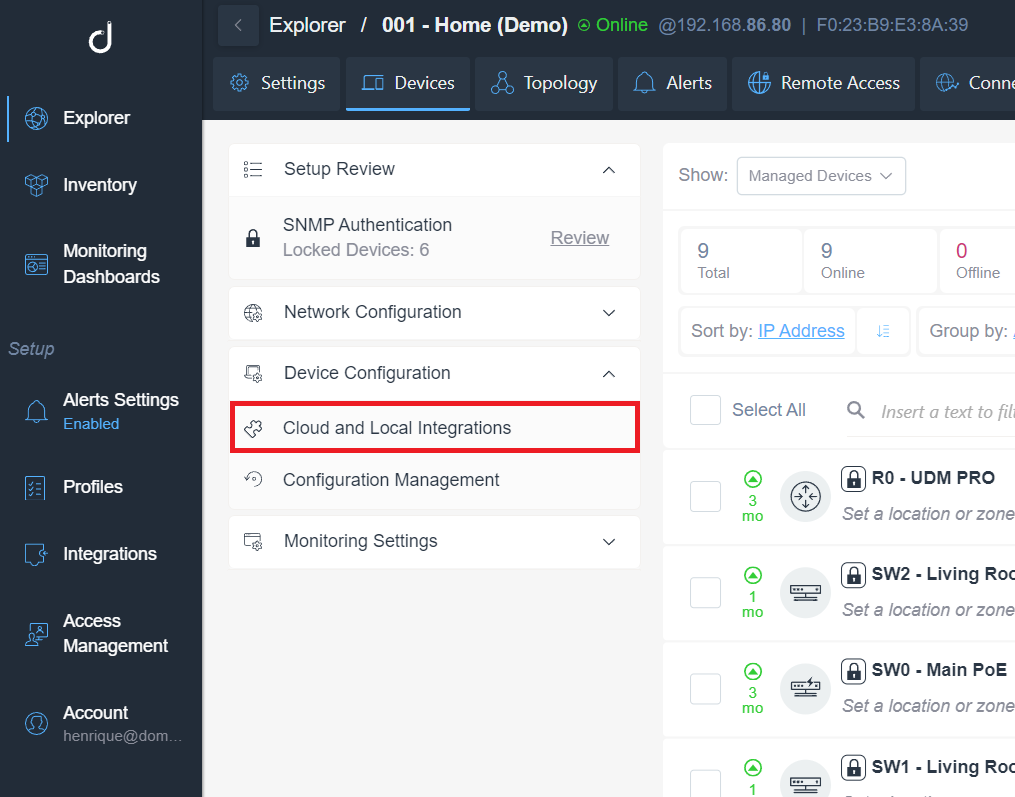
Managing Cloud and Local Integrations in the Dashboard
1. Navigate to the left sidebar menu and select "Explorer."
2. Under the "Setup" section, click on "Cloud and Local Integrations."
3. On the main panel, review the list of devices displayed. You can filter the list by showing only managed devices using the dropdown menu labeled "Show."
4. Use options to sort devices by IP address or group them accordingly.
5. Select devices by checking the box next to each one or use the "Select All" option for bulk actions.
6. Use the search bar to filter devices by name or other criteria.
This section allows you to configure integrations and manage connected devices effectively.
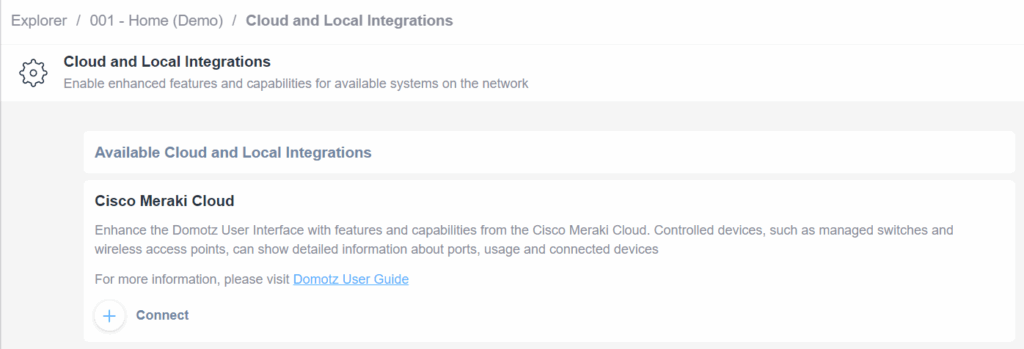
Connecting to Cisco Meraki Cloud Integration
1. Navigate to the "Cloud and Local Integrations" section within the Explorer interface.
2. Locate the "Available Cloud and Local Integrations" panel.
3. Find the "Cisco Meraki Cloud" option. This integration enhances the Domotz User Interface with additional features such as detailed information about ports and connected devices.
4. For more details, refer to the Domotz User Guide via the provided link.
5. Click the "Connect" button to enable the Cisco Meraki Cloud integration.
Click on the “Connect Account” button and insert your “Meraki Account API Key”:
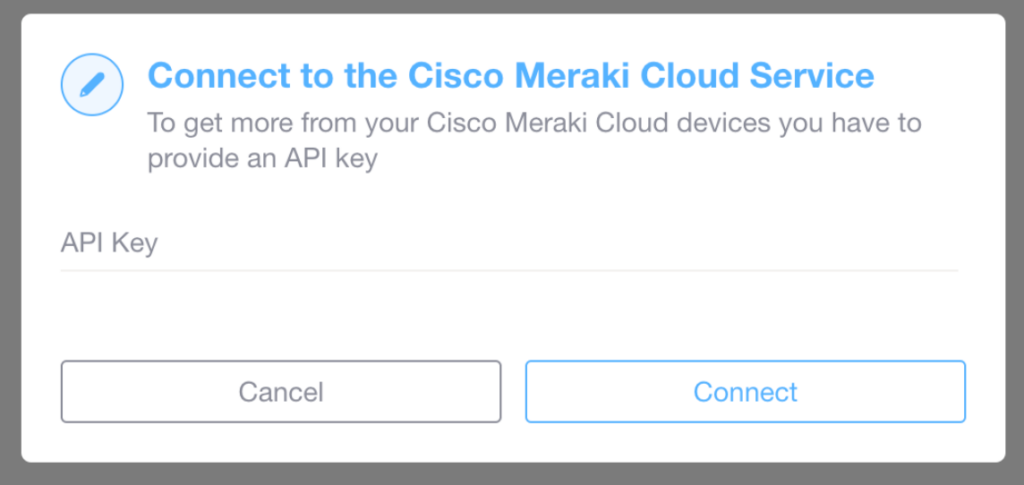
Connect to the Cisco Meraki Cloud Service
1. Enter your API Key in the provided input field to enable connectivity with Cisco Meraki Cloud devices.
2. To proceed with the connection, click the "Connect" button.
3. If you wish to cancel the operation, select the "Cancel" button.
Select your Organization:
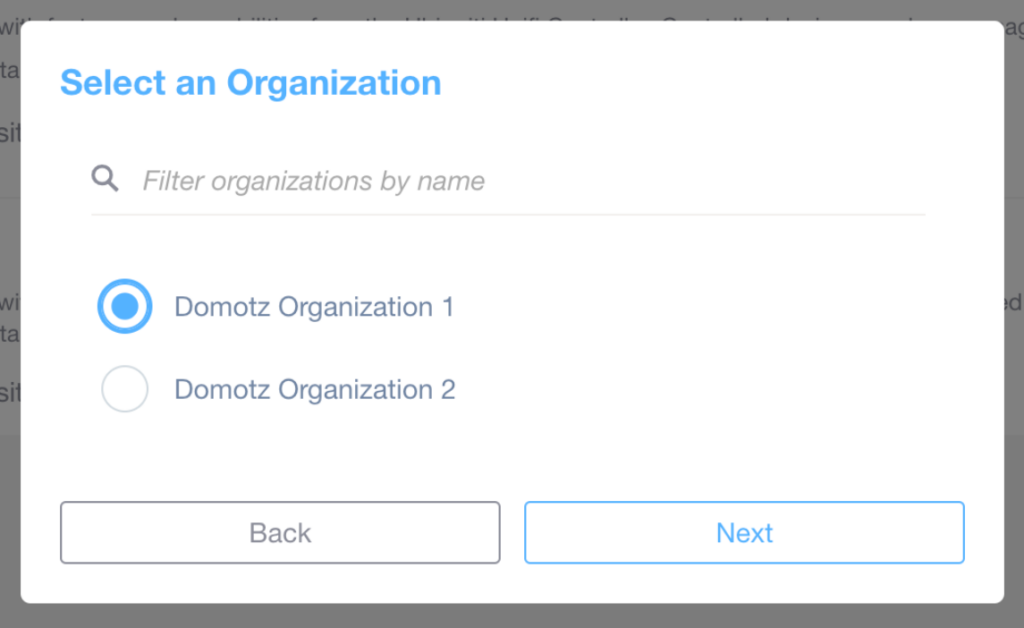
Selecting an Organization
1. Use the search bar labeled "Filter organizations by name" to find a specific organization.
2. Choose an organization by selecting its radio button. Options include "Domotz Organization 1" and "Domotz Organization 2."
3. Click "Next" to proceed after making your selection. If needed, use the "Back" button to return to the previous step.
Select the single Network (or Multiple Networks) for that Organization that you want to match to your single Domotz Agent:
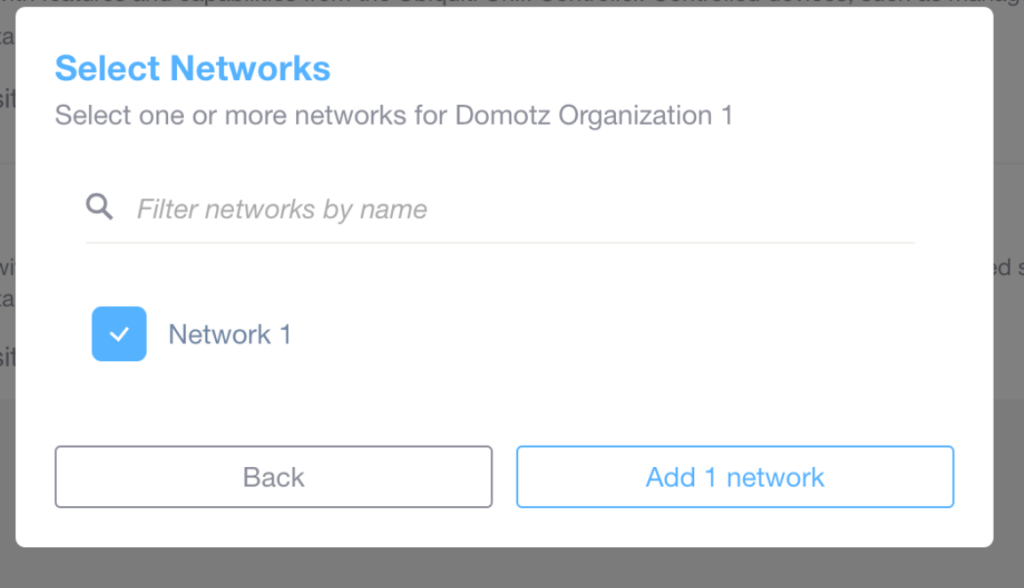
Selecting a Network for Domotz Organization
1. In the "Select Networks" dialog, choose networks for Domotz Organization 1.
2. Use the search bar labeled "Filter networks by name" to find specific networks.
3. Select "Network 1" by checking the box next to its name.
4. Confirm your selection by clicking the "Add 1 network" button.
5. If needed, go back by clicking the "Back" button.
Once connected, you can go back to your Meraki devices and, depending on the type of device, you’ll be able to see/do additional info/actions, some examples follow.

Firmware and Serial Number Information Display
1. Locate the "Firmware Version" entry to view the current firmware version, which is "wireless-25-14."
2. Find the "Serial Number" entry to see the device's serial number, listed as "Q2PD-5DRX-6YP6."
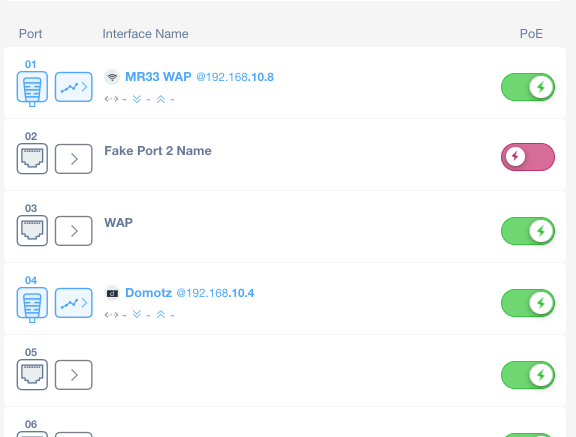
Network Interface Overview and PoE Status
1. The first interface is labeled as "MR33 WAP" with an IP address of 192.168.10.8 and has an active Power over Ethernet (PoE) connection, indicated by the green icon.
2. The second interface is labeled "Fake Port 2 Name" without an IP address specified, and the PoE is disabled, shown by a red icon.
3. The third interface, labeled "WAP," has no IP address listed and has active PoE, marked by a green icon.
4. The fourth interface is "Domotz" with an IP address of 192.168.10.4, and it has PoE enabled, as shown by the green icon.
5. Interfaces five and six are present but not labeled or configured, and their PoE status is not indicated.