Domotz provides extensive and robust monitoring capabilities for Simple Network Management Protocol (SNMP v1,v2,v3).
SNMP Discovery Lifecycle
After discovering a new device, Domotz promptly verifies if SNMP is enabled on the device. If SNMP is found to be enabled, Domotz attempts to determine if it can read information from the device by utilizing the v2 default community strings (public/private).
If you have set up custom credentials in your device, you might configure Domotz to use them as explained here.
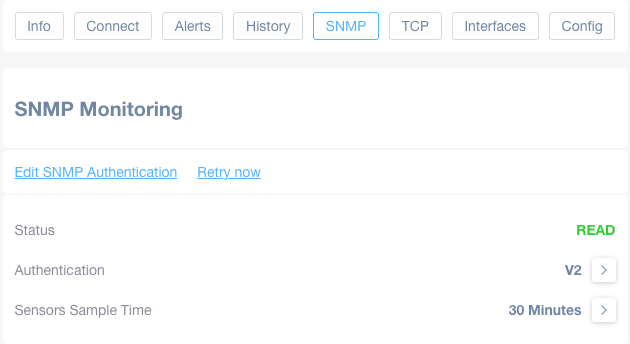
Once Domotz is able to read data from and SNMP service it automatically sets the SNMP Status of the device to ‘READ’ (see the green label in the following screenshot):

and starts an automatic scan on the SNMP service in order to discover which MIBs it supports and if there are any SNMP templates available for that specific device.
Any SNMP Template which is discovered to be usable for that specific device, will be listed under the SNMP Status section:

Search SNMP Capable Devices
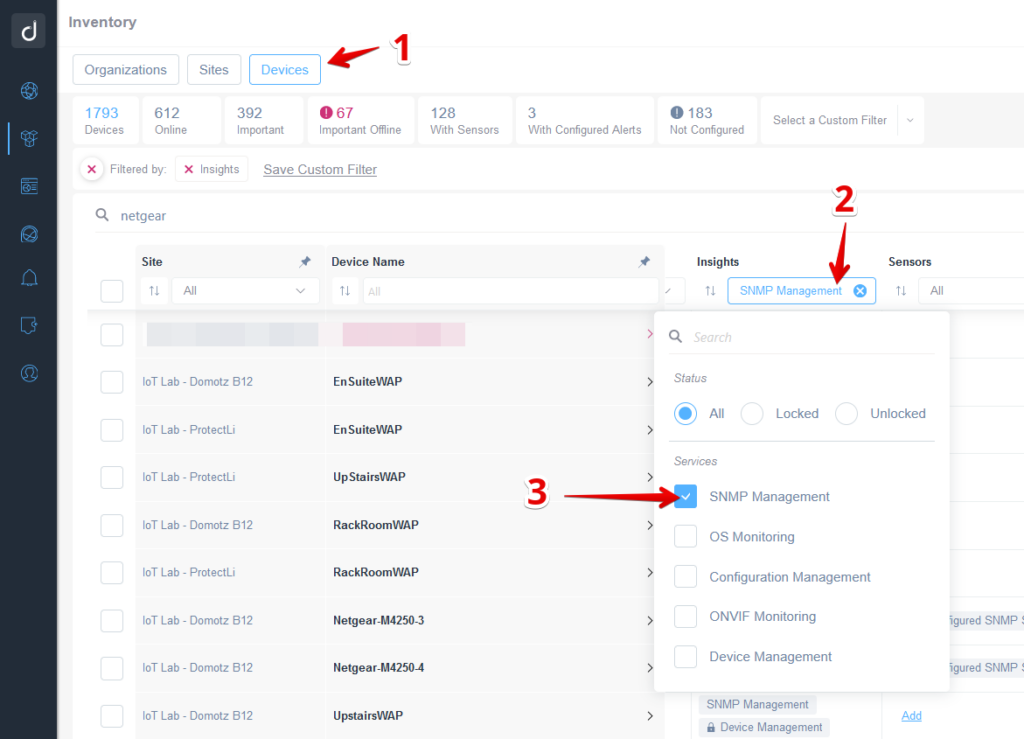
In order to see which devices are SNMP capable and have SNMP in read status you may check in your inventory dashboard, by filtering the Insights column by selecting the SNMP Management property:
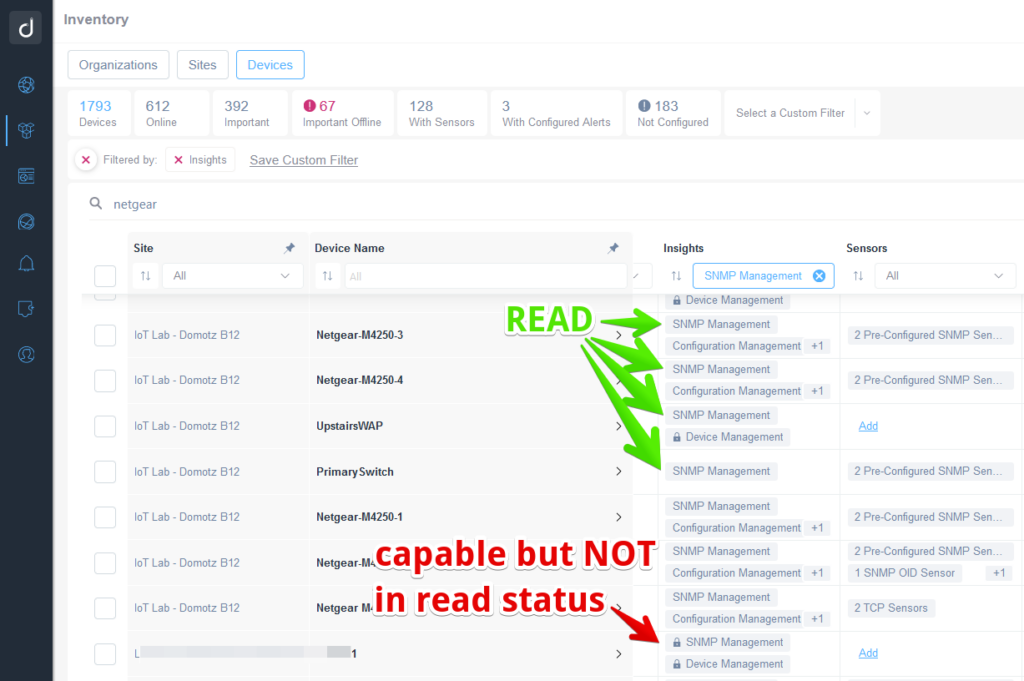
After filtering it, you will be able to see which devices are SNMP capable and in READ status (without the lock icon on the SNMP Management label), and which devices are SNMP capable but they are not in READ status and should be investigated (with the lock icon before the SNMP Management label):
SNMP Status Explained
SNMP status is shown in the Device details view. At each point in the process, you can edit the authentication configuration or force a new retry.
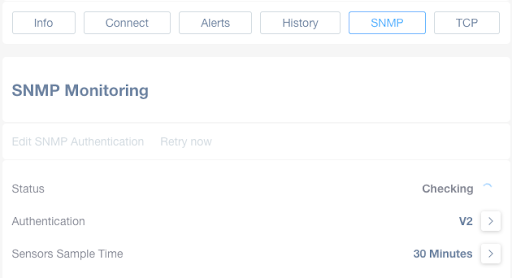
Status “Checking”
The status will show as checking, for a newly discovered device. The same status will be displayed when selecting “Retry now”.
Status “READ”
The status “READ” is displayed when Domotz is allowed to read SNMP data from the device, using either the default communities (in case of SNMP v1, v2) or the user-defined authentication configuration (for SNMP v1, v2, v3).
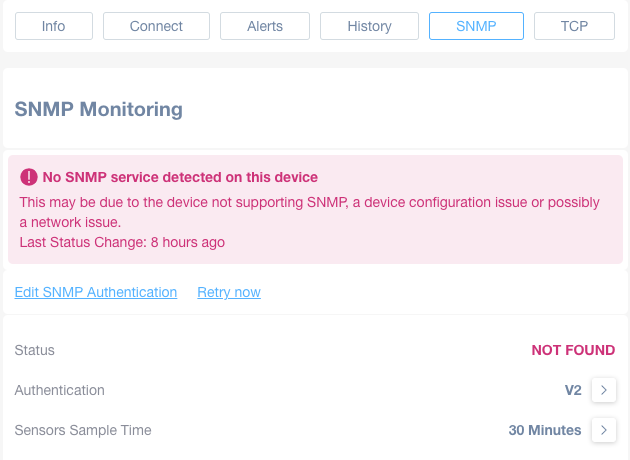
SNMP Status “Service not found”
The status, “Service not found” is displayed if the Agent detects that the required UDP port 161 is closed:
How to fix:
- enter the configuration of your device and enable the SNMP Service
- Depending on the device, sometimes the SNMP Service requires additional configuration, for example you have to allow the IP of the Domotz Collector/Agent to read from that service.
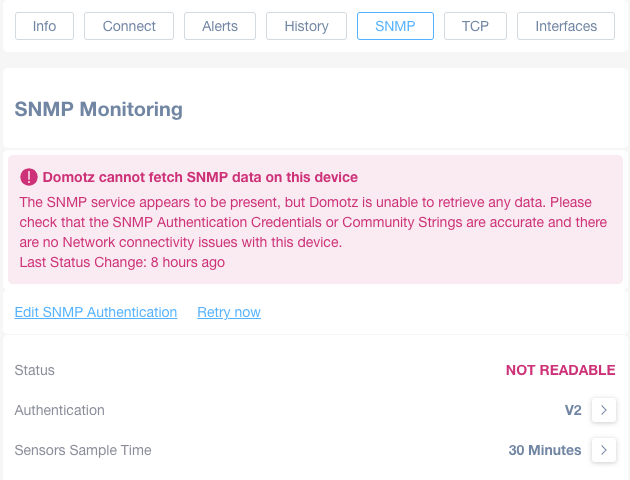
Status “Unable to read from SNMP service”
This status is displayed when the UDP port 161 is opened but the agent is not capable of retrieving data using the current authentication configuration.
How to fix:
- Enter the configuration of your device and check of the authentication credentials as well as SNMP version which has been enabled.
- Click on ‘Edit SNMP Authentication’ and modify them accordingly
- Depending on the device, sometimes the SNMP Service requires additional configuration, for example you have to allow the IP of the Domotz Collector/Agent to read from that service.
SNMP Templates
With Domotz Pre-configured SNMP templates you can perform SNMP monitoring with a single click.
We do provide many templates for the following device types:
- Network Appliances (Switches, Routers, Wi-Fi APs, Firewalls)
- Servers and Servers Boards
- Printers
- UPS
- NAS
- and so much more..
For a complete list of the current available templates please see here.
Monitoring specific SNMP OIDs
Domotz includes a very easy way to use MIB Browser that allows you to search amongst the MIBs which are supported on your device.
By clicking on the + button right next to the “Add SNMP Sensors” label,

the Domotz MIB Browser will open up allowing you to search for any keyword that could match what you would like to monitor, and it will provide results listed by MIB’s provenance:

This interface is really useful because you will be able to preview the output of a single oid before applying it to the device, by clicking the “More..” link:


Setup Alerts on Manually Added SNMP Sensors
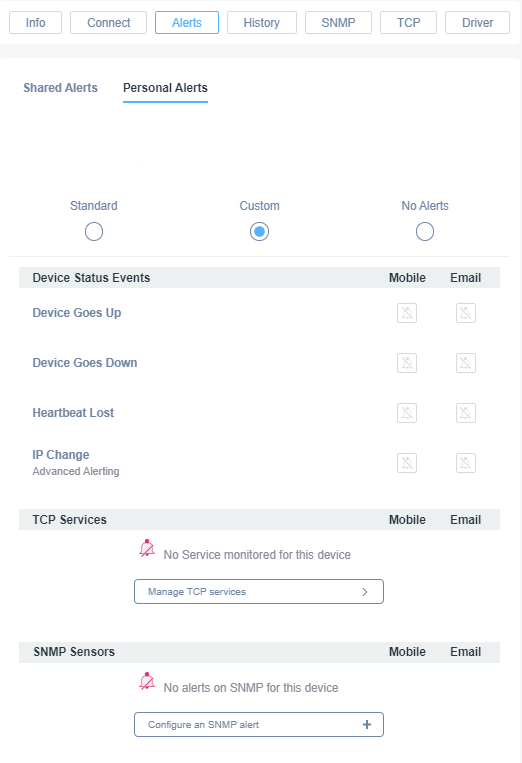
You can configure alerts on the SNMP sensors you have created from the Alerts section of the device:
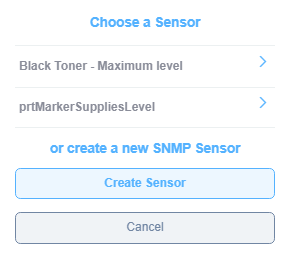
Domotz will ask you to choose one of the sensors you have already created (and it will also prompt you to create a new one if desired):
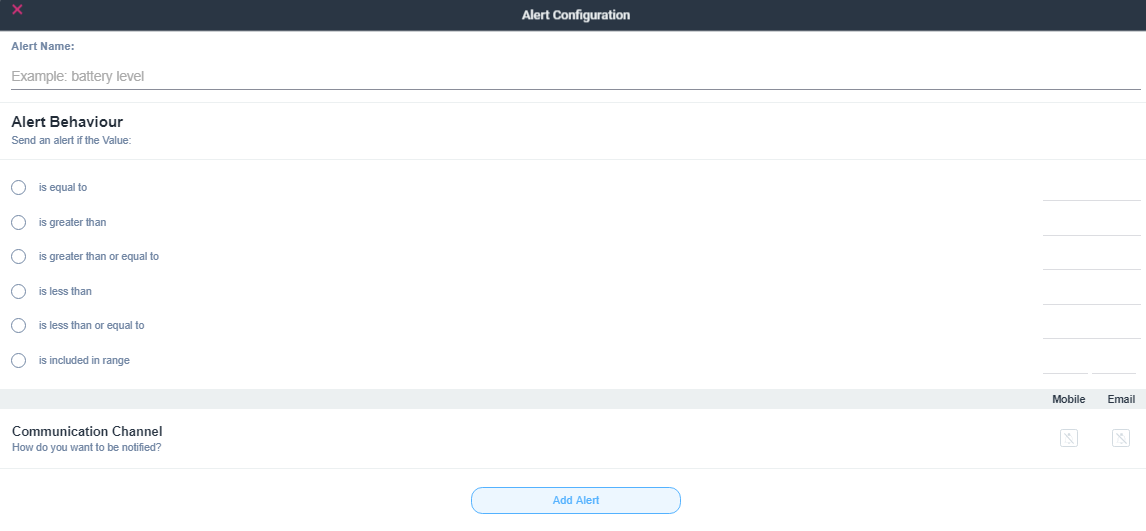
After choosing a sensor, you will be able to configure the alert. Assign a Name, Condition, and the Communication Channel for the alert:
And, finally, the alert is configured:

Other uses of SNMP within Domotz
SNMP is a powerful protocol. It is also used by Domotz to implement Network mapping algorithms, PoE management as well as Network Interface Monitoring. Please refer to the respective sections for more details.
