SAML/SSO Authentication Overview
SAML/SSO Authentication can be enabled on your Domotz account to let you and your team take advantage of your company’s Identity Provider to access Domotz services.
There are two steps to ensuring your team can use SAML/SSO; 1) you need to configure Domotz with your company’s Identity Provider, and 2) associate your team members to the SAML/SSO services.
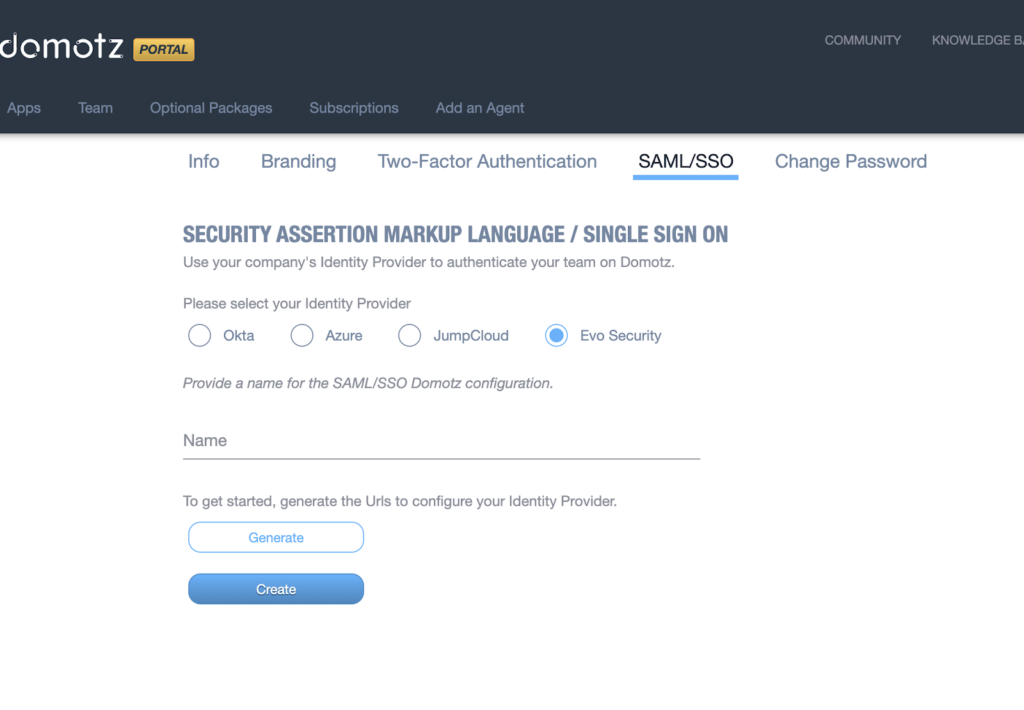
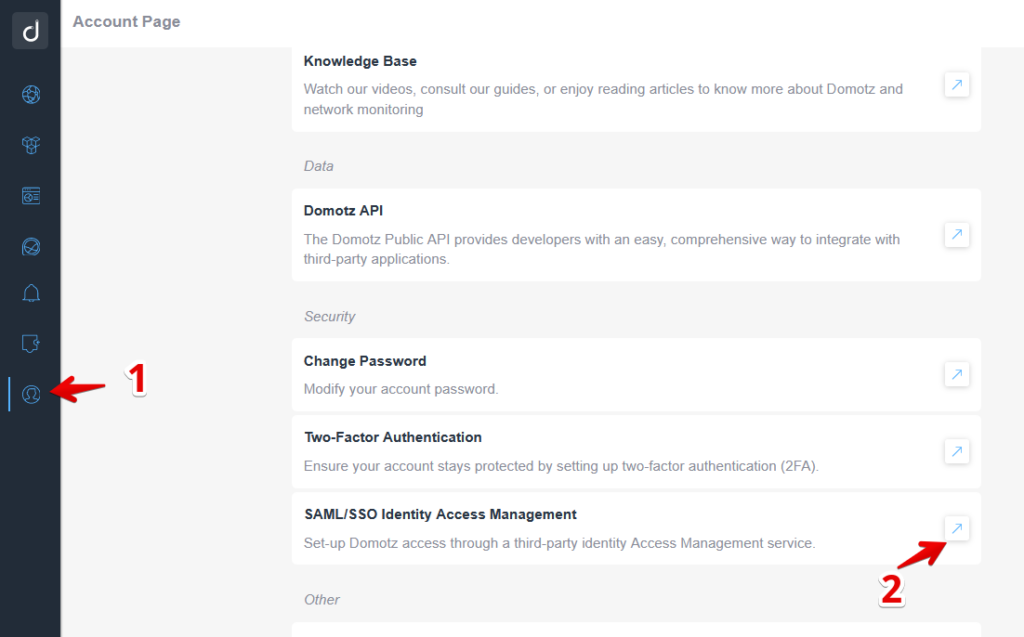
Configuring Domotz with your company’s Identity Provider starts from https://portal.domotz.com. Select Account and then SAML/SSO from the sub-menu.

After completing the configuration with your company’s Identity Provider, you will be able to set which users of your team must use SAML/SSO to access Domotz services. This can be done from the Team section in the top menu of the Domotz portal.
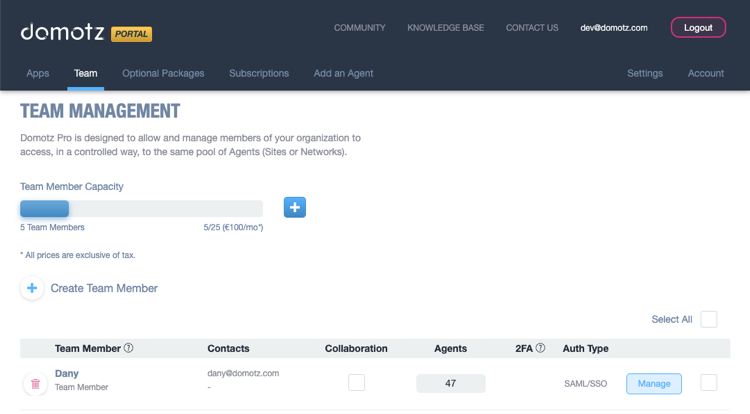
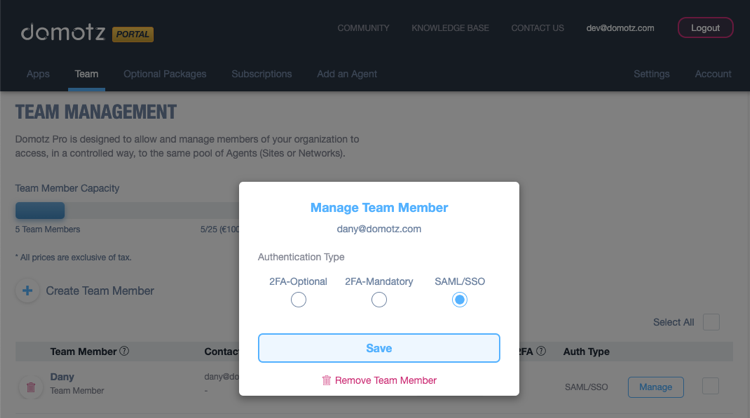
In order to change the Authentication type of your team members, click on Manage, and then select the desired option.
Below you can find a step by step tutorial to configure each supported Identity Provider.
Microsoft Azure Active Directory
The following steps will guide you through the configuration of Microsoft Azure Active Directory.
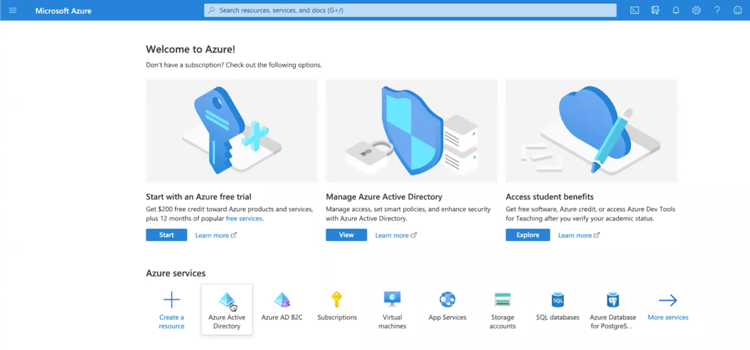
Open Microsoft Azure web interface, and select Azure Active Directory.
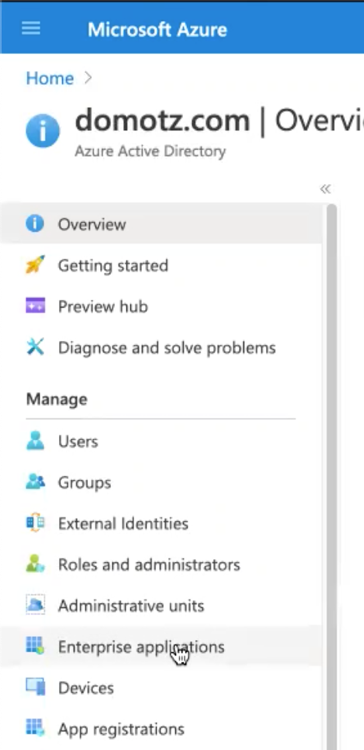
From the left menu select Enterprise applications.
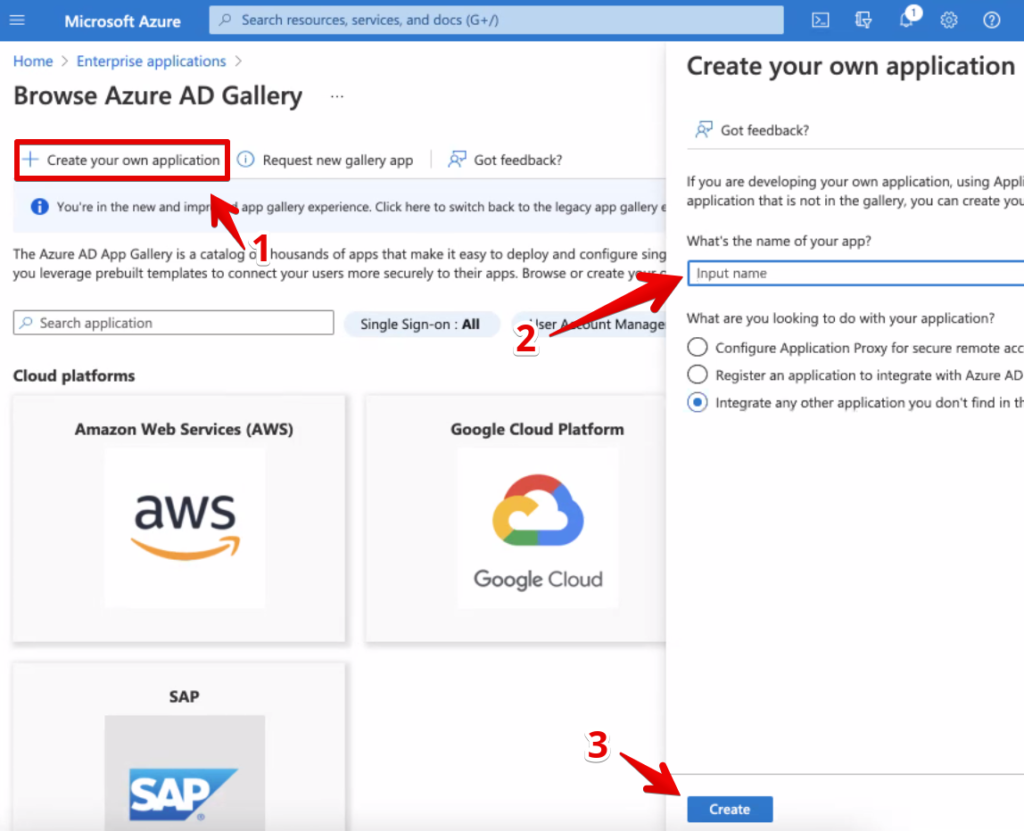
Create a new application selecting New application from the top sub-menu.

Click on Create your own application; a new panel will open on the right. There you can define your application name and select Create to proceed.
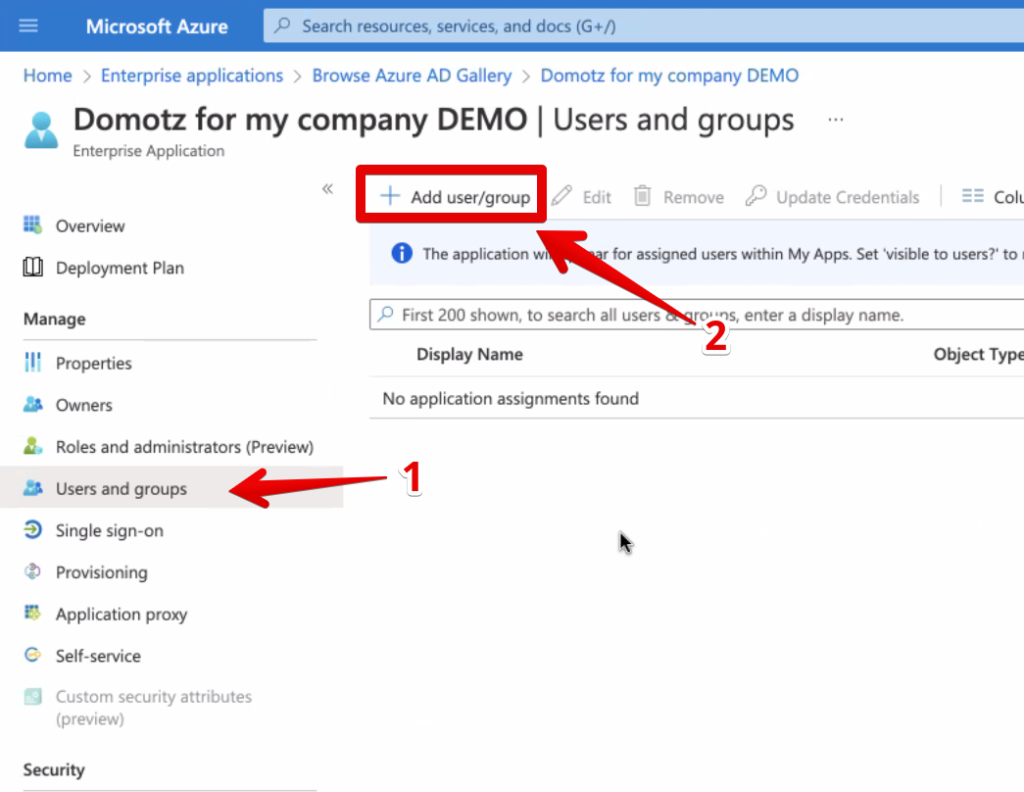
Your custom application has been created, but it now requires some additional configuration to provide SSO within Domotz.
Select Users and groups from the left menu and click on Add user/group
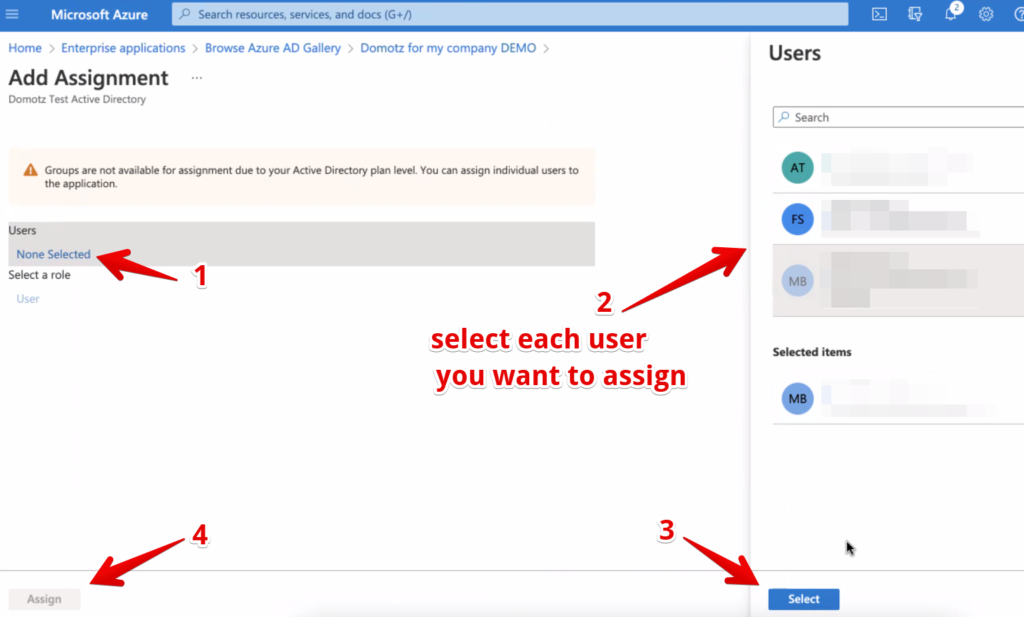
Click now on Users – None Selected and search/add the desired users from the “Users” panel that appears. The emails on Azure Active Directory must match the ones used by you and your team members on Domotz, otherwise they won’t be able to login using the SSO.
Once you have added all the users that require access to Domotz through Azure SSO, click on Assign.
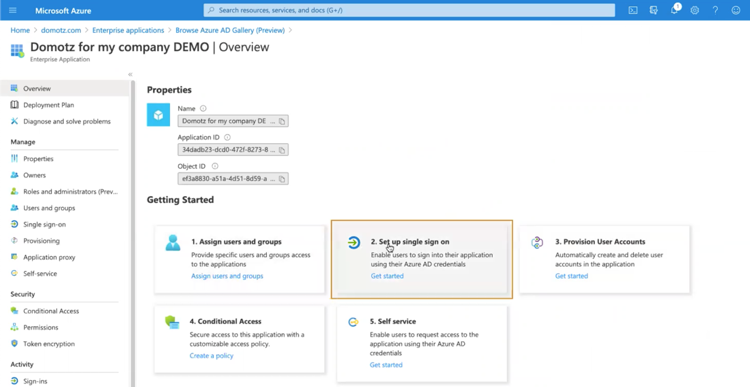
Go back to the Overview section.
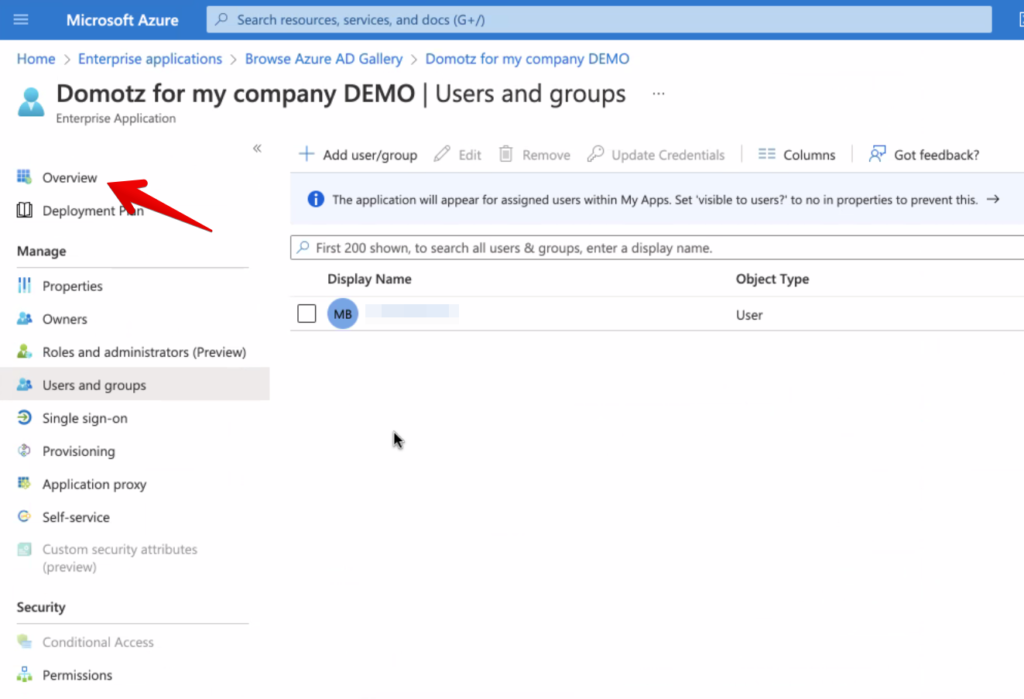
Now you are ready to setup Single Sign on.
Select 2. Set up single sign on
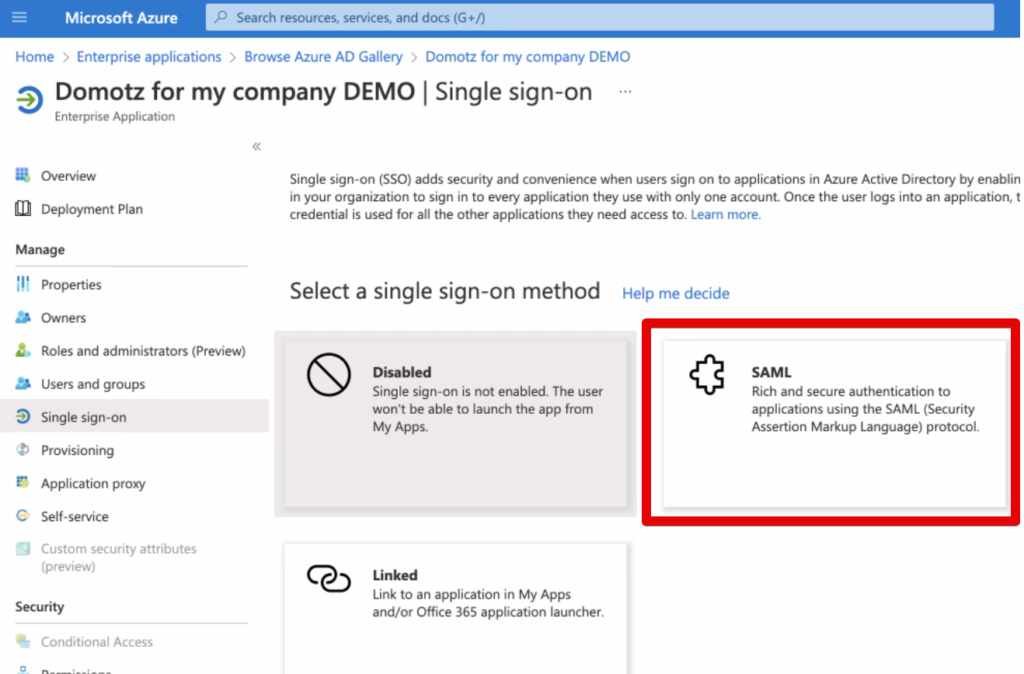
Please click on the SAML sign-on method
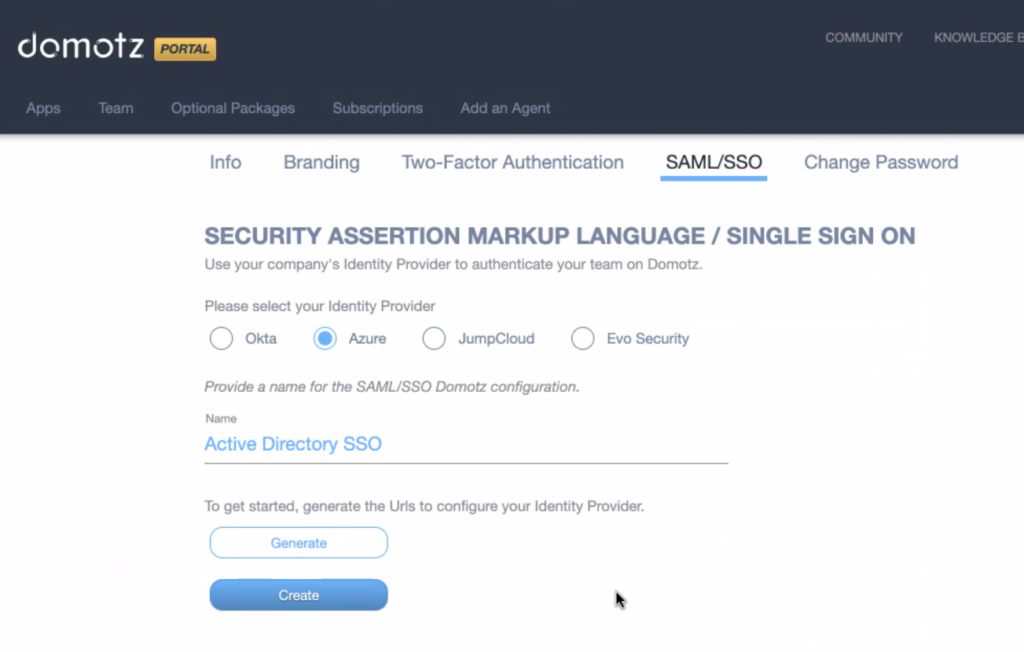
Now after leaving the SAML window open on another web browser tab, go back to the Domotz portal, and ensure you have selected Azure for your Identity Provider.
Then, name your integration and click on Generate.
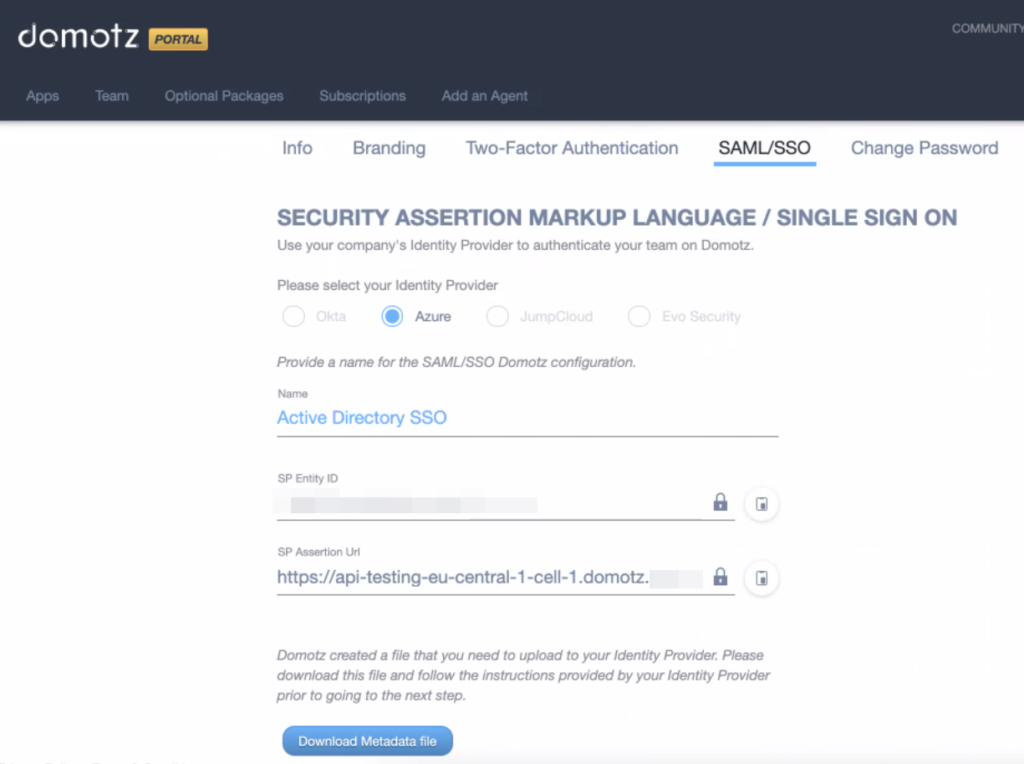
Click on Download Metadata file; the download of a .zip file will start. Open the .zip file and extract the XML file contained in it. You will need to upload it on the Azure web interface in a few steps.
Go back to the Azure web interface, select Upload metadata file from the top sub-menu, and upload the XML file downloaded from Domotz.
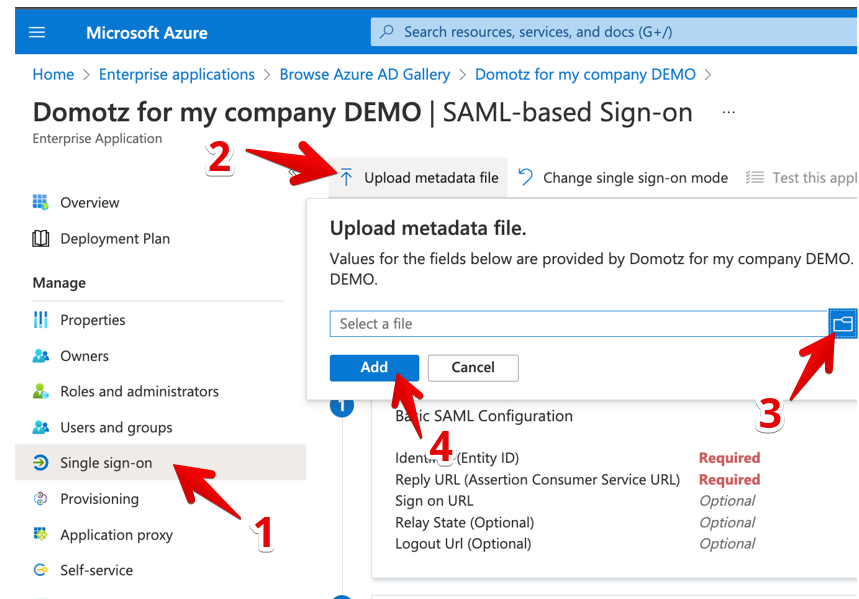
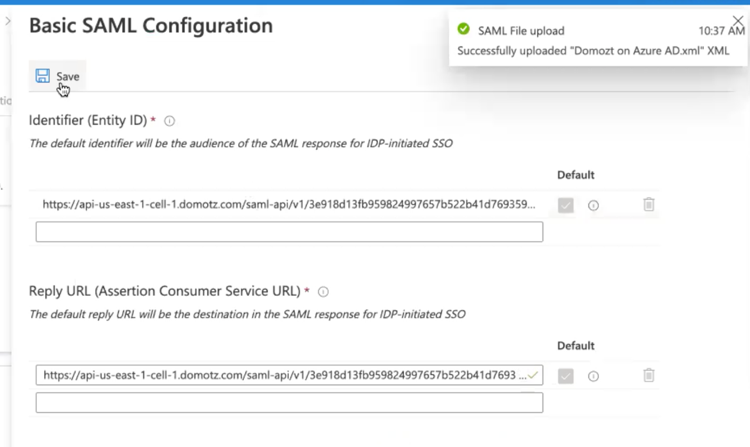
A set of pre-filled fields will appear, select Save to continue.
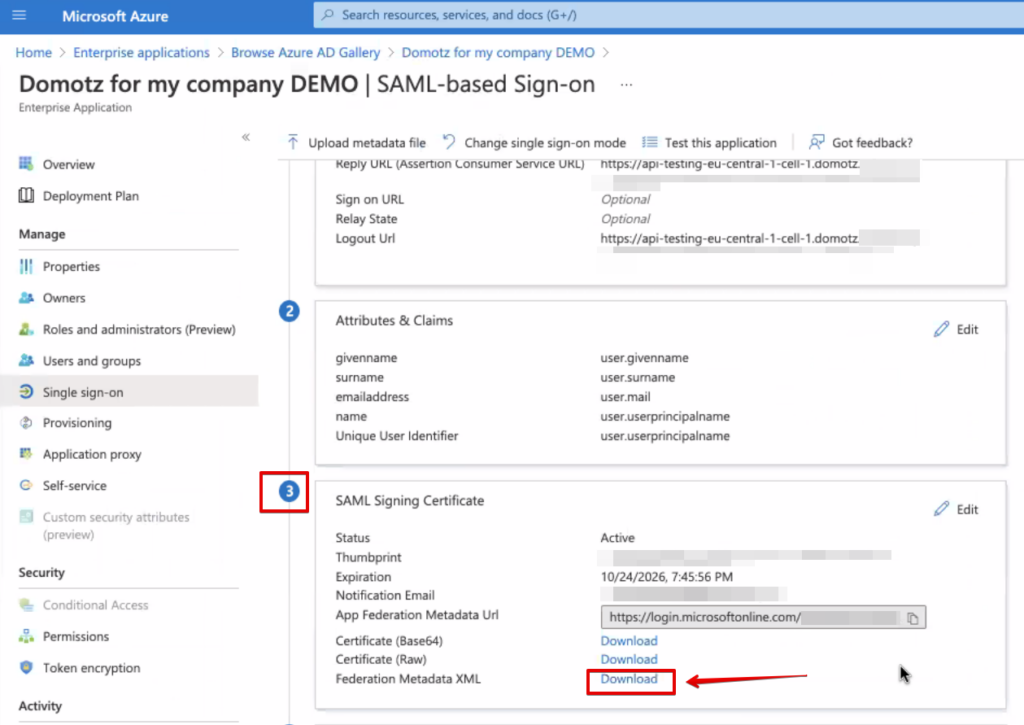
You will now need to download the Federation Metadata XML file from Azure, and upload it on Domotz.
Click the Download button to save this XML file.

Go back to the Domotz portal again, mark the required checkbox as done, and upload the Federation XML file that you have created and downloaded from Azure in the previous step.
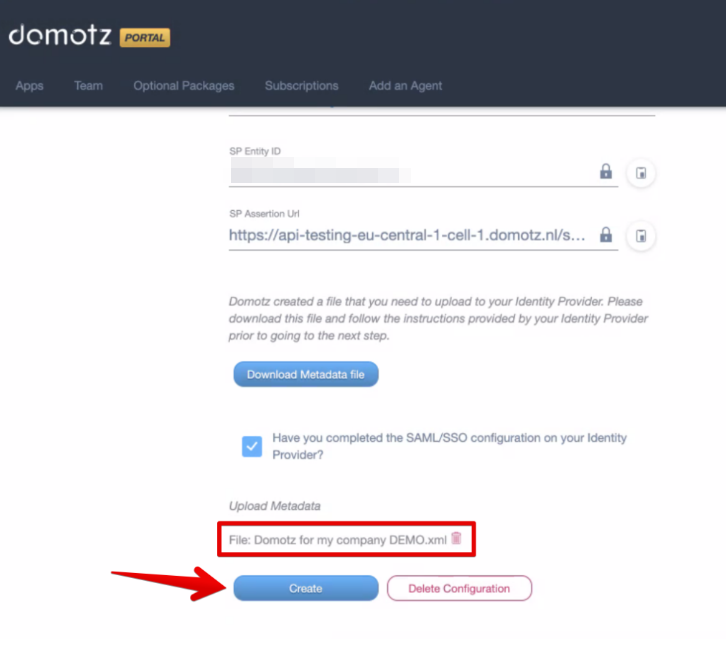
Check that the xml file has been uploaded and click on Create.
You are now ready to test and activate your SSO application.
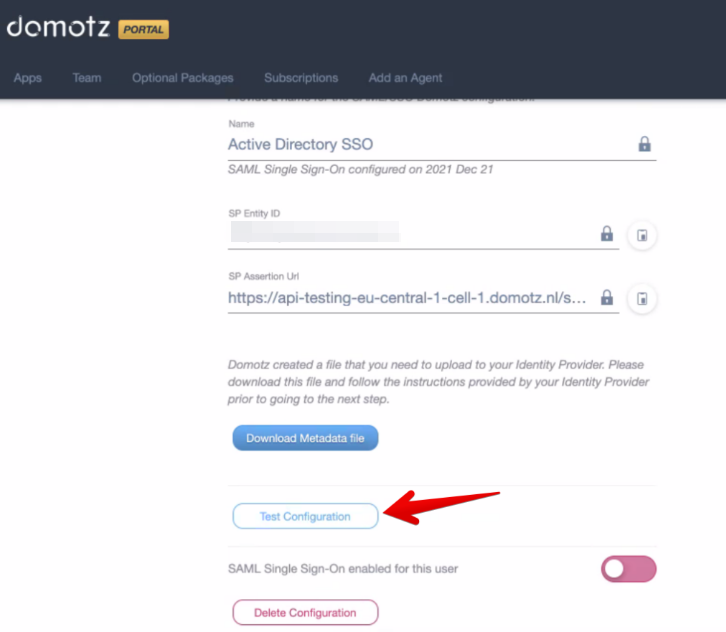
Click on Test Configuration to perform a test:
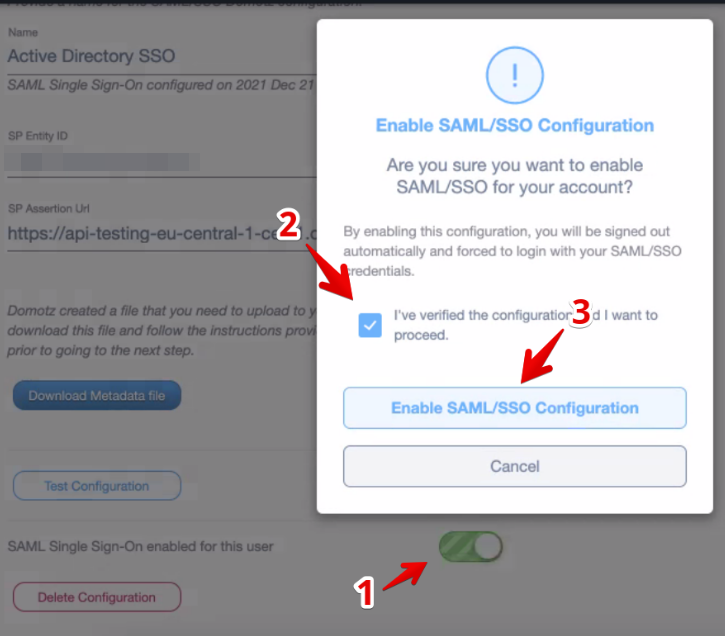
If the test is successful, you will be able to enable SAML/SSO on your account or on your team members’, by clicking on the SAML Single-On enable for this user toggle.
Be sure to configure each Team Member for SAML/SSO under the Team section on portal.domotz.com.
Azure IdP-Initiated SSO
If you want to access Domotz from the My Apps page, you have to initiate SSO from the Identity provided-initiated (IDP) SSO.
How to do it:
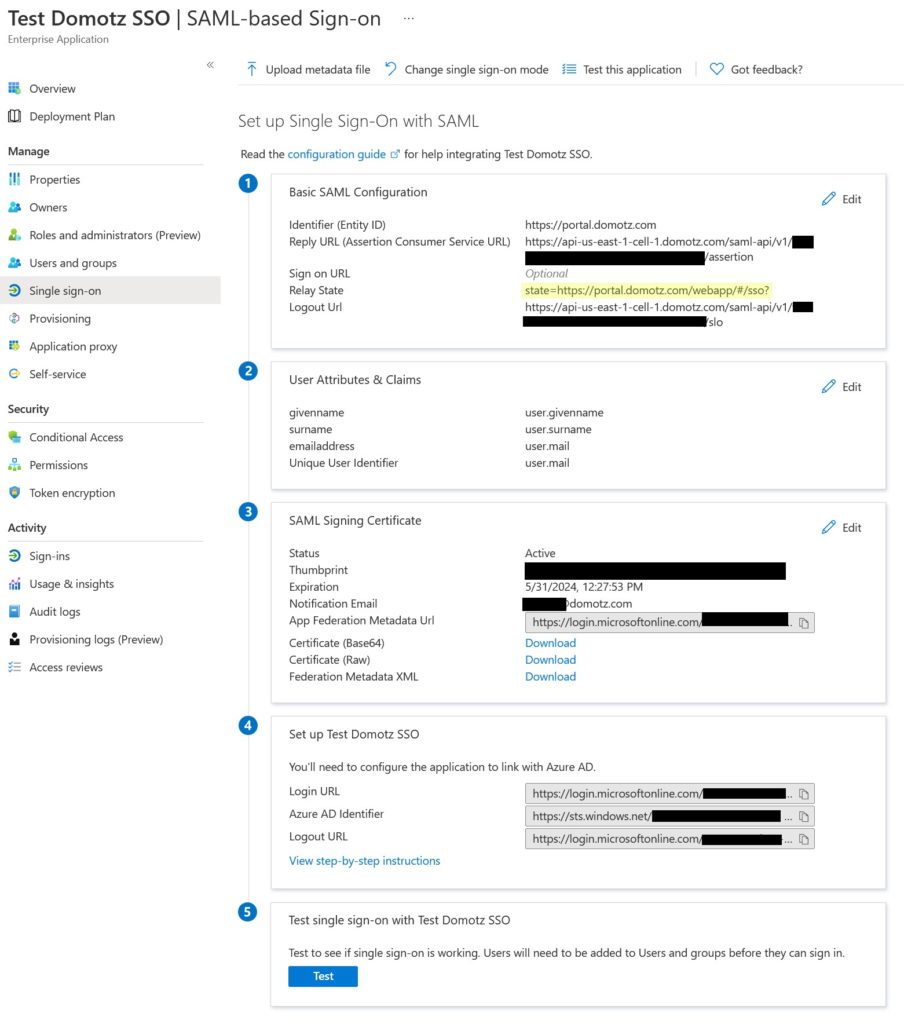
Step 1: Open the Azure Configuration and write in the Relay State field the following string:
state=https://portal.domotz.com/webapp/#/sso?
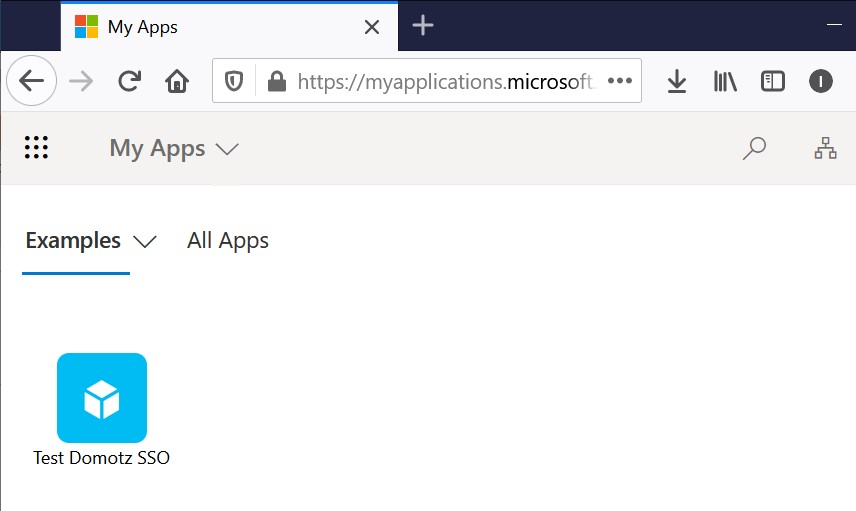
Step 2: Open My Apps from Microsoft and enter in the Domotz Webapp with a single click:
Evo
The following steps will guide you through the configuration of Evo Security.
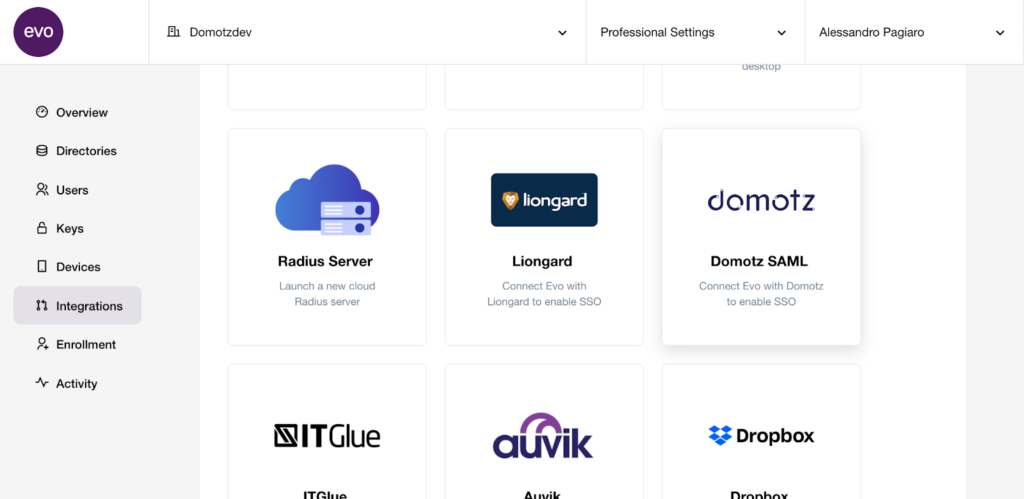
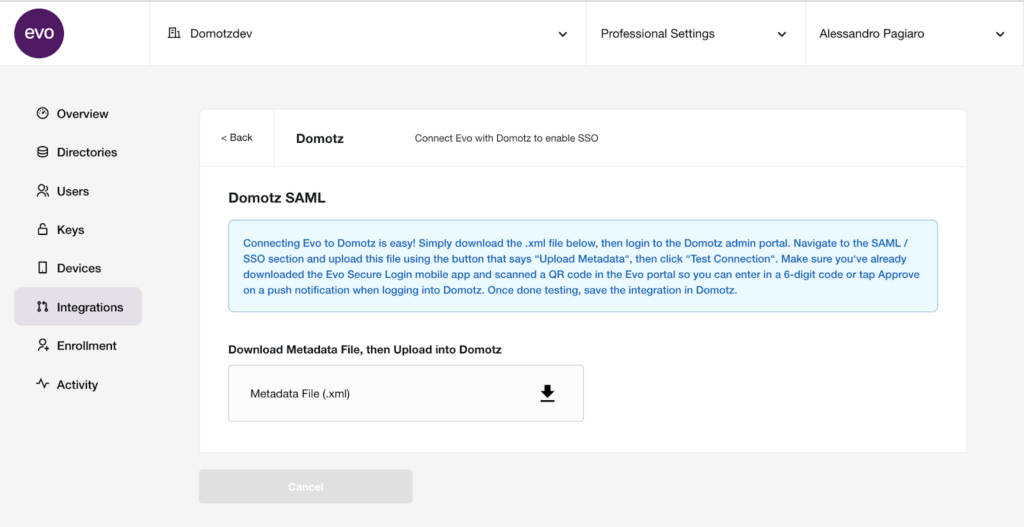
Download the Metadata File, you’ll need it to complete the configuration on the Domotz side.
Leave this window open and go back to the Domotz portal. After selecting Evo Security, name your integration and click on Generate.
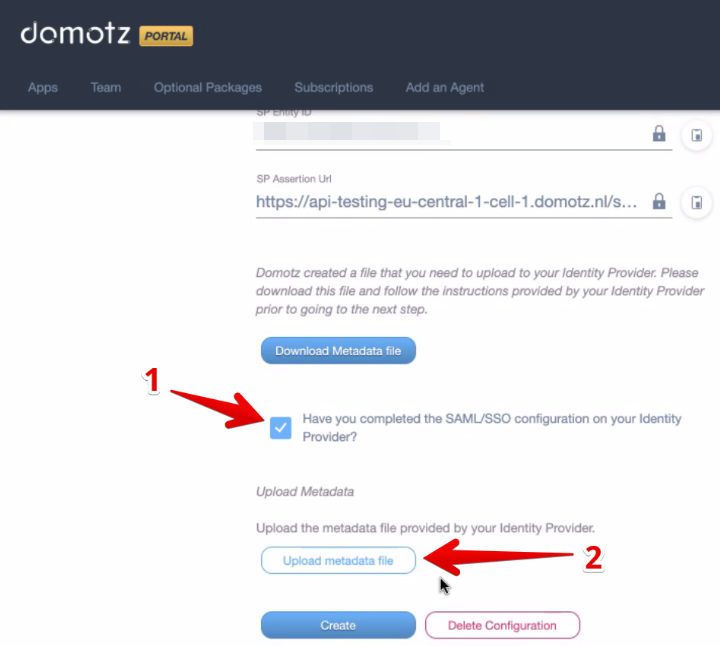
An SP Entity ID and SP Assertion Url parameter will be generated.
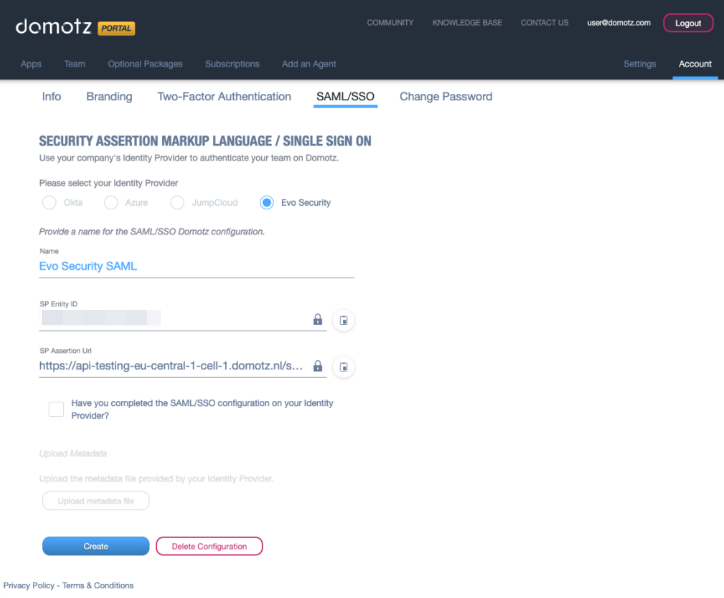
Select the checkbox “Have you completed the SAML/SSO configuration on your Identity Provider?” and then upload the metadata file you previously saved by clicking on the “Upload Metadata File” button.
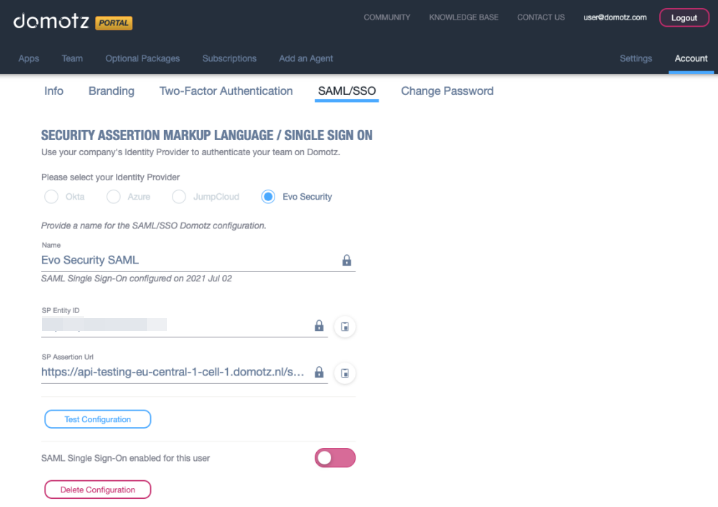
You are now ready to test and activate your SSO application.
Click on Test Configuration to perform a test.
If all the steps have been followed you will see a successful message. You can now enable SAML/SSO on your account or on your team members.
Be sure to configure each Team Member for SAML/SSO under the Team section of portal.domotz.com.
Okta
The following steps will guide you through the configuration of Okta.
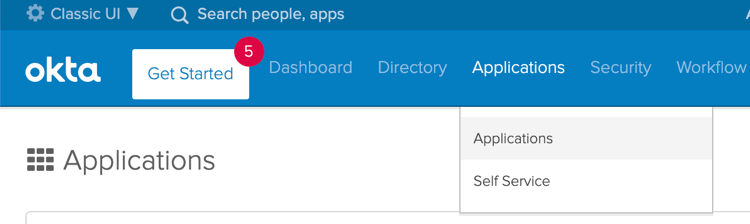
Open the Okta web interface, and select Applications from the top menu.
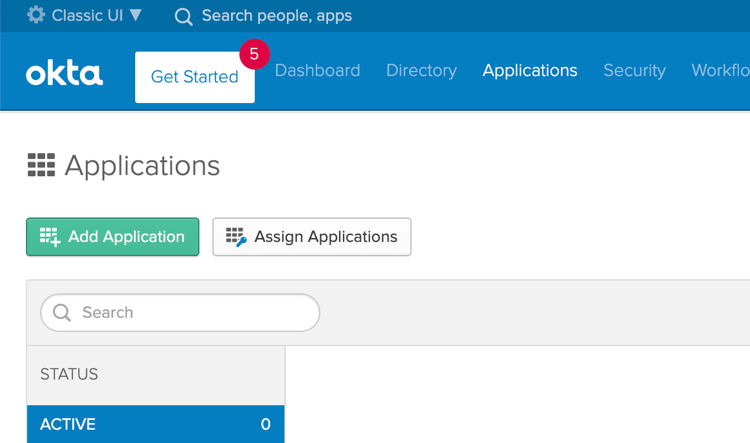
Click on Add Application.
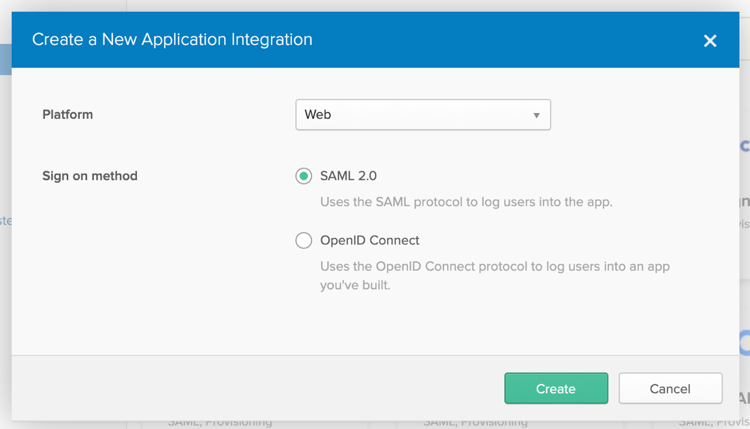
Select SAML 2.0 option and click on Create.

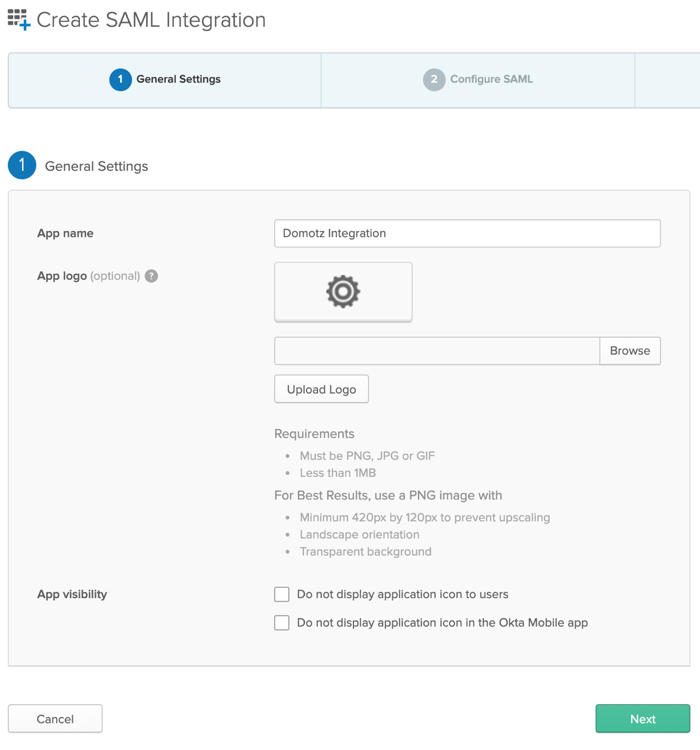
Define your application name and select Next to proceed.
To proceed with configuring Okta, you need to obtain the required configuration parameters from the Domotz side.
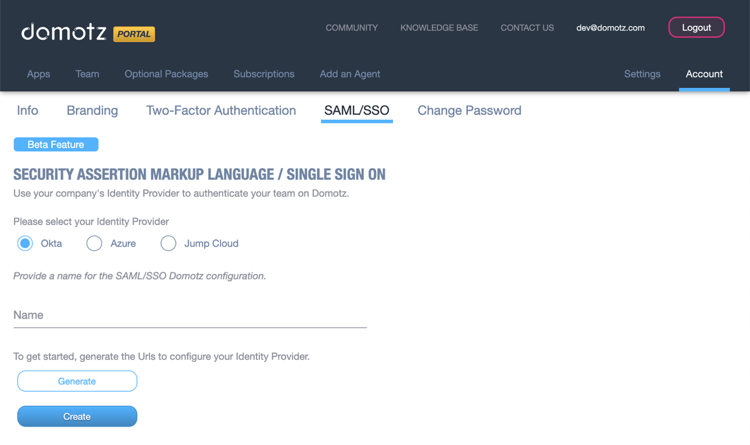
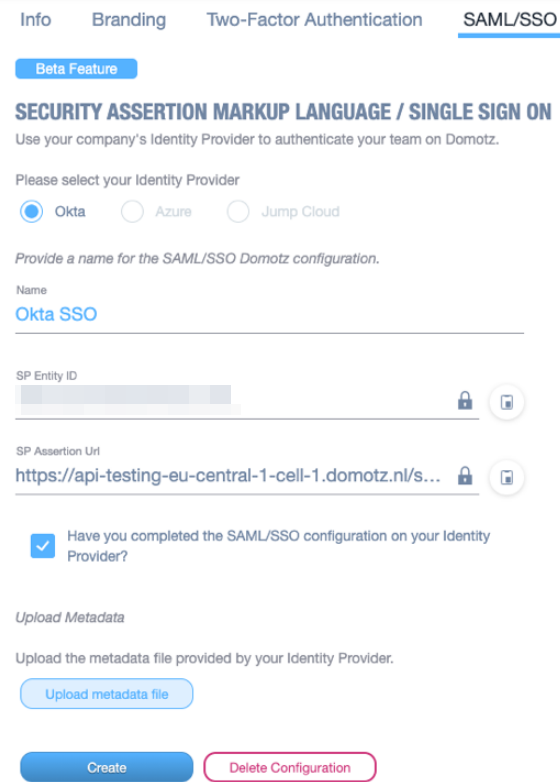
Leave this window open and go back to the Domotz portal. After selecting Okta, name your integration and click on Generate.
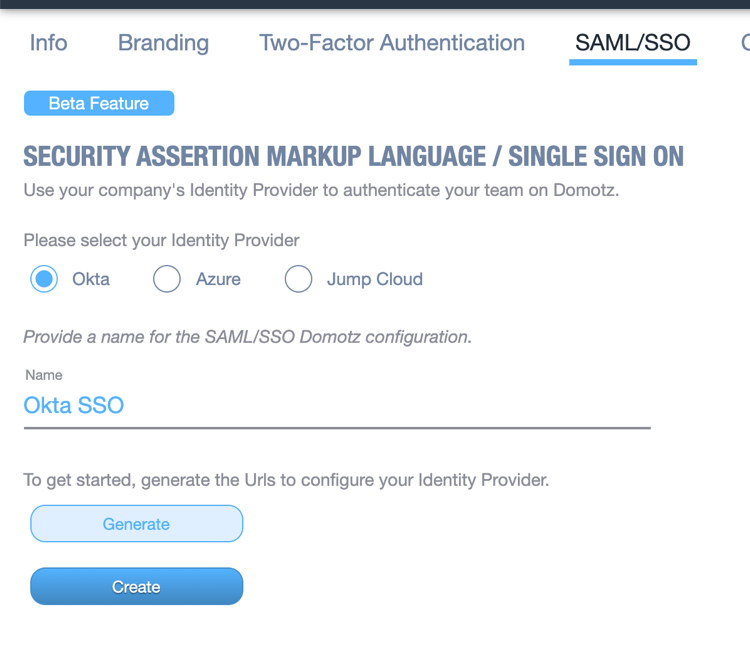
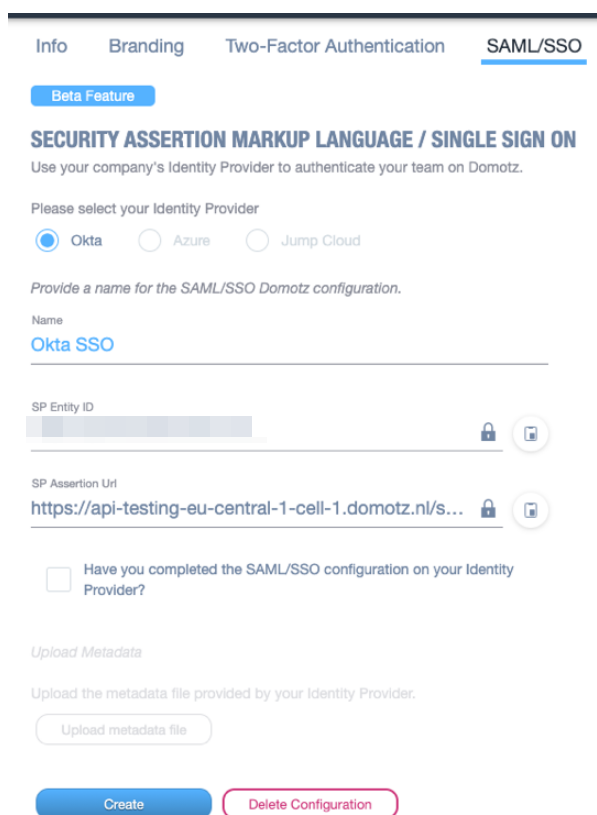
An SP Entity ID and SP Assertion Url parameter will be generated. You will need to copy and paste them during the following step on the Okta web interface.
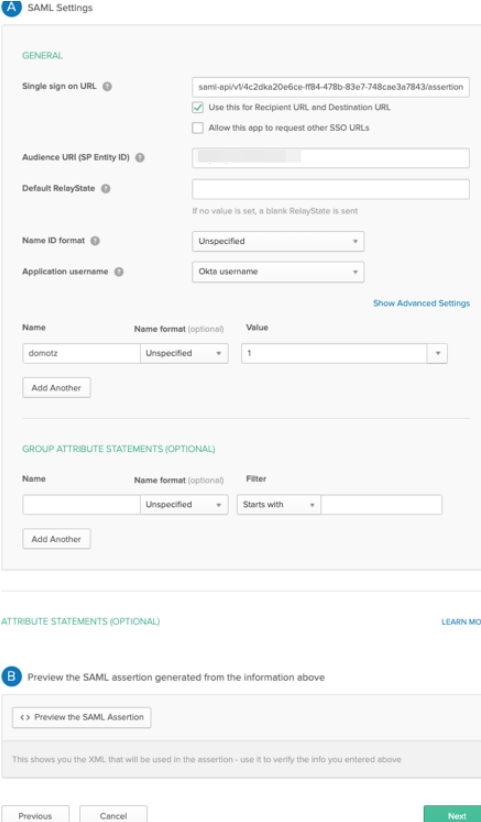
Go back to the Okta web interface that was left open, and paste the SP Entity ID copied from Domotz into the Audience URI (SP Entity ID), and the SP Assertion Url into the Single sign on URL.
Additionally, set an attribute with Name “domotz”, and with Value “1”. Please note: without this step the SSO integration will not work on Domotz.
When completed, select Next to proceed.
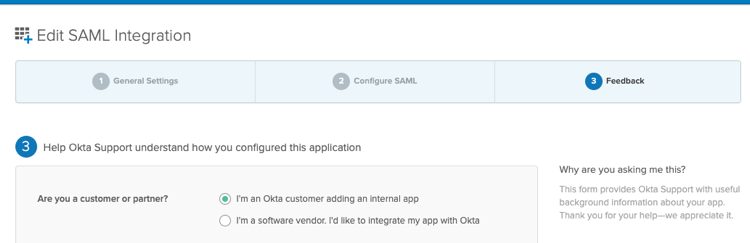
Select the option I’m an Okta customer adding an internal app and click on Finish.
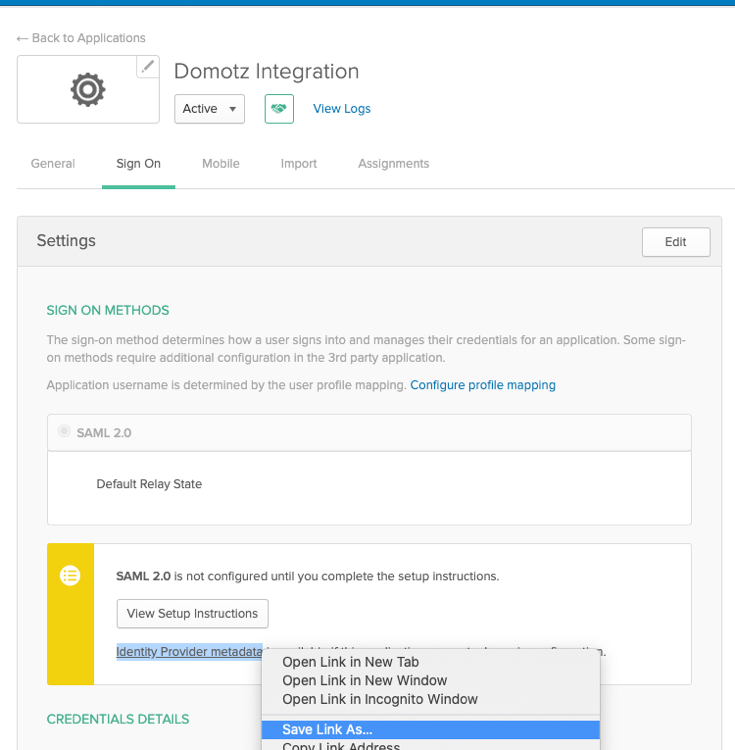
Right-click on Identity Provider metadata link, and Save Link As…; save the file with XML extension in the name (e.g. metadata.xml).
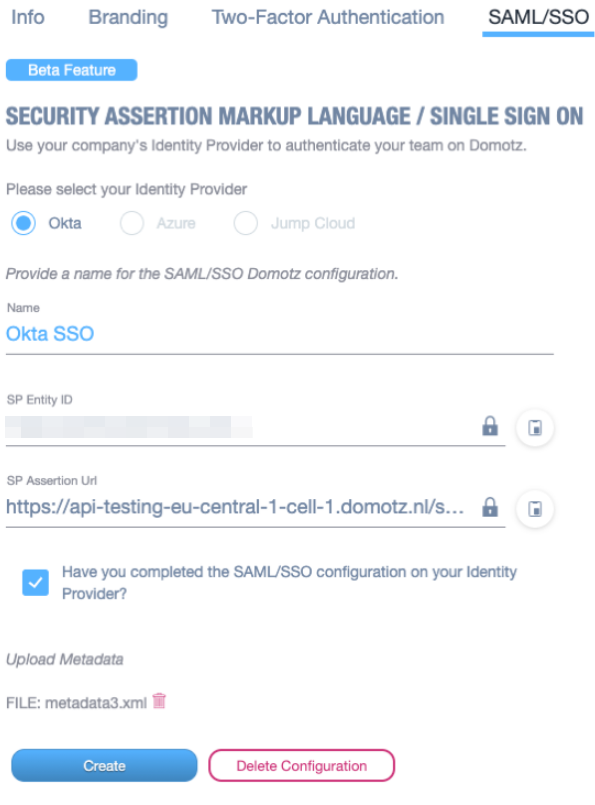
Go back to the Domotz portal, mark the required checkbox as done, and upload the metadata XML file that you downloaded during the previous step.
Click on Create.
Your SSO application is now configured to communicate with Domotz, but in order for it to work with your Domotz user and your team, you will need to select which Okta accounts can use the SSO application.
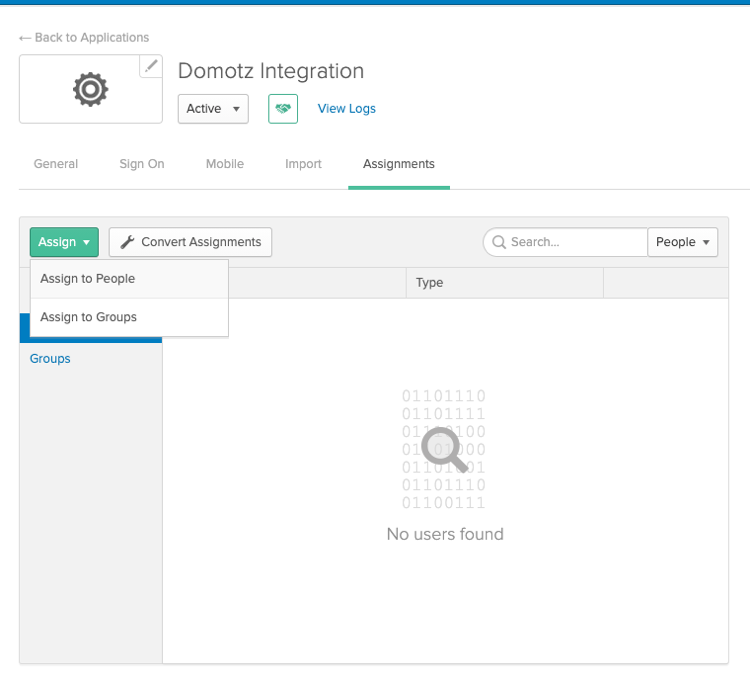
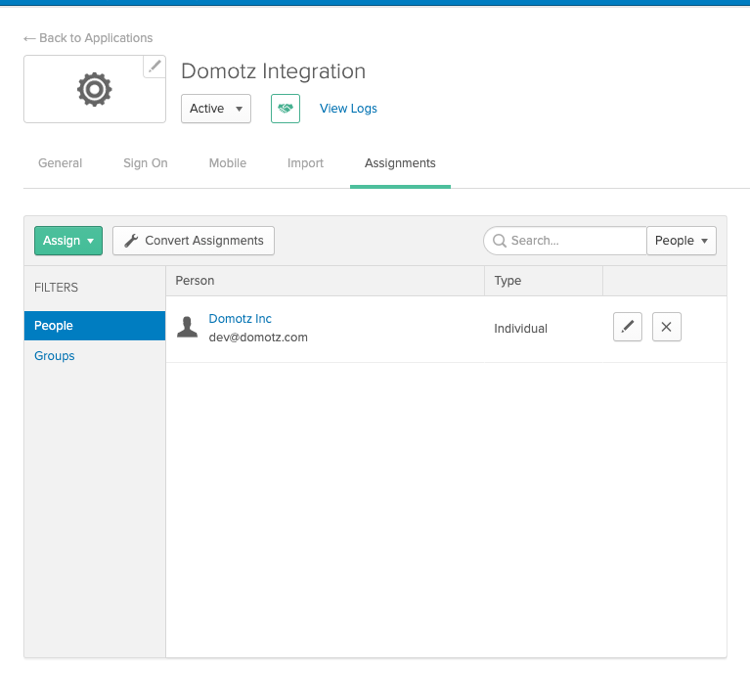
Go back to Okta web interface and select Assignments from your application sub-menu. Then click on Assign, Assign to People.
Search and add the desired users. The emails on Okta must match the ones used by you and your team members on Domotz, otherwise they won’t be able to login using SSO.
Once you have added all the users that must be able to use your Okta SSO application, you have completed the configuration of your Okta application.
You are now ready to test and activate your SSO application on Domotz. Go back to Domotz portal and click on Test Configuration.
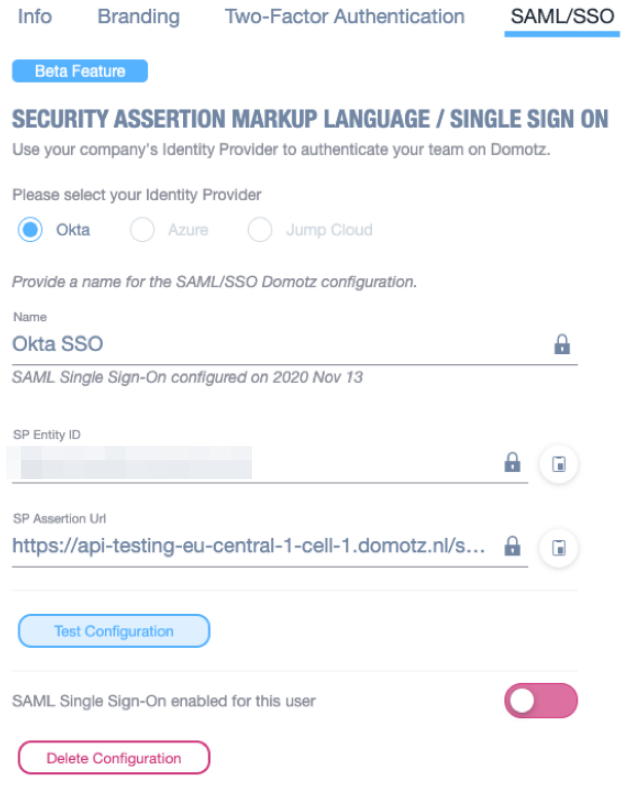
If all the steps have been followed you will see a successful message. You can now enable SAML/SSO on your account or on your team members. Be sure to configure each Team Member for SAML/SSO under the Team section of portal.domotz.com.

Okta IdP-Initiated SSO
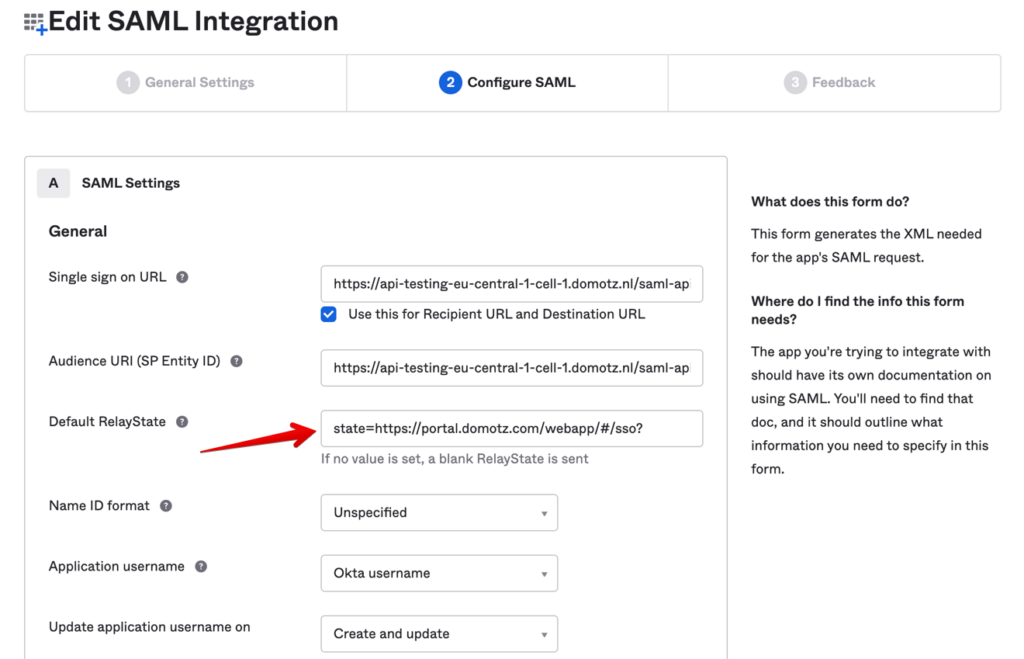
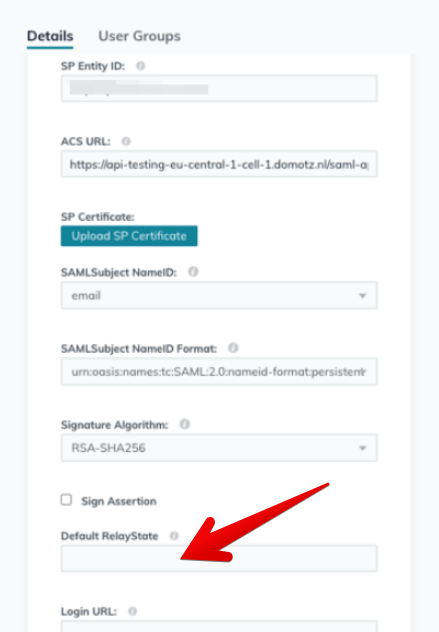
In the SAML configuration on Okta, set the Default RelayState field to:
state=https://portal.domotz.com/webapp/#/sso?
and save the configuration.
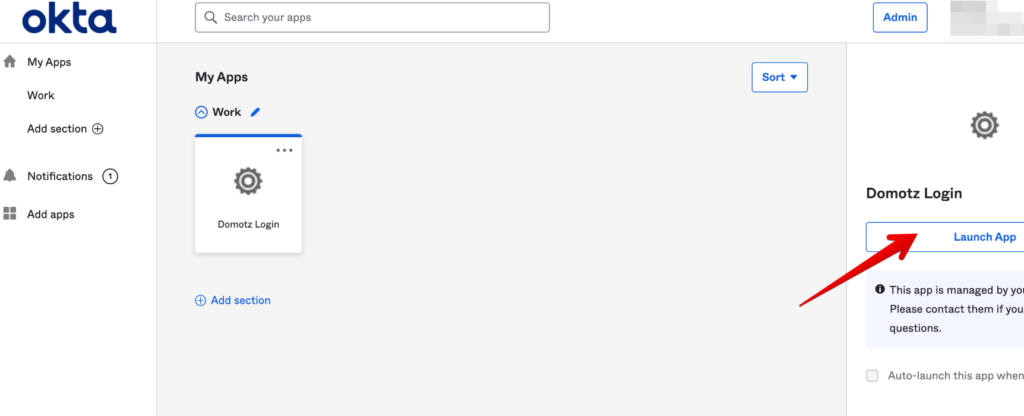
After that, you will be able to login on Domotz from your My Apps section in Okta:
JumpCloud
The following steps will guide you through the configuration of JumpCloud.
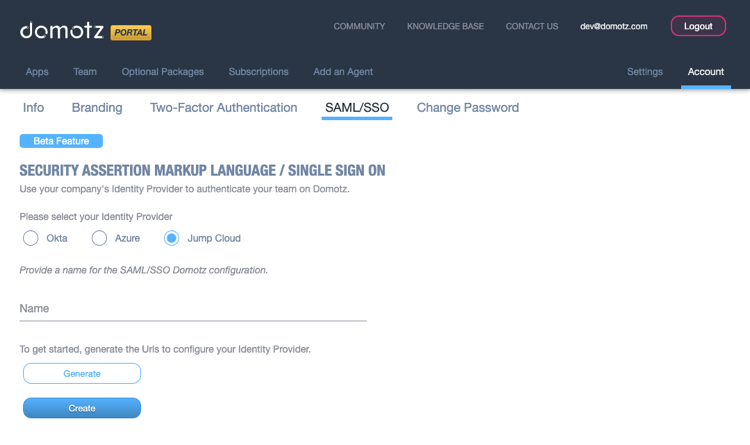
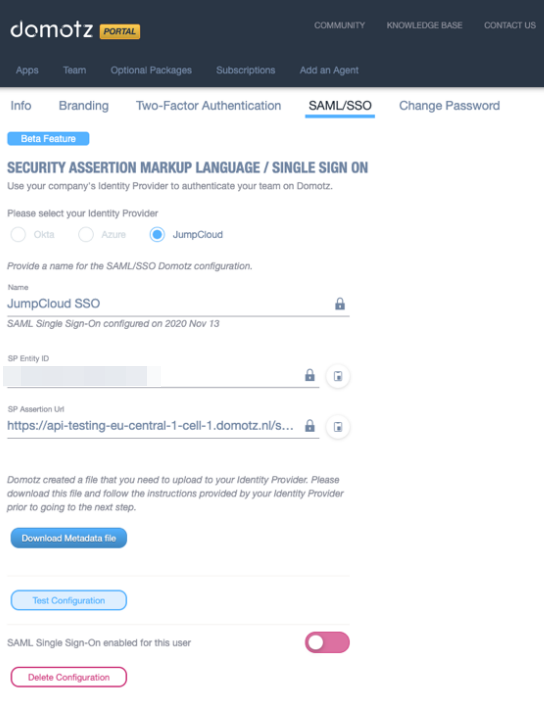
In order to proceed with the JumpCloud configuration you need to obtain the required configuration parameters from Domotz.
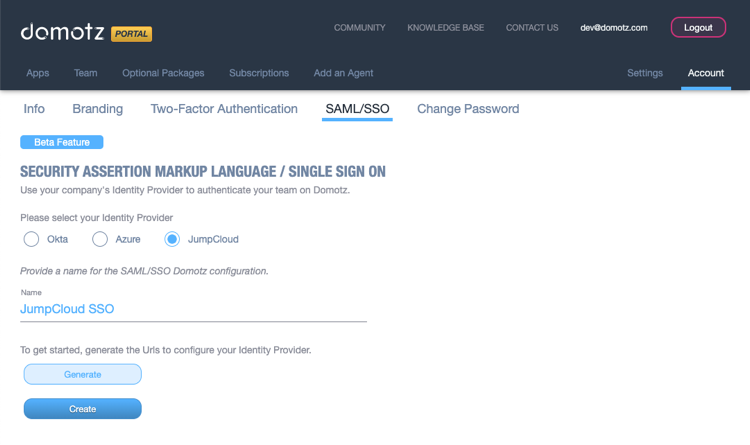
After selecting JumpCloud, name your integration and click on Generate.
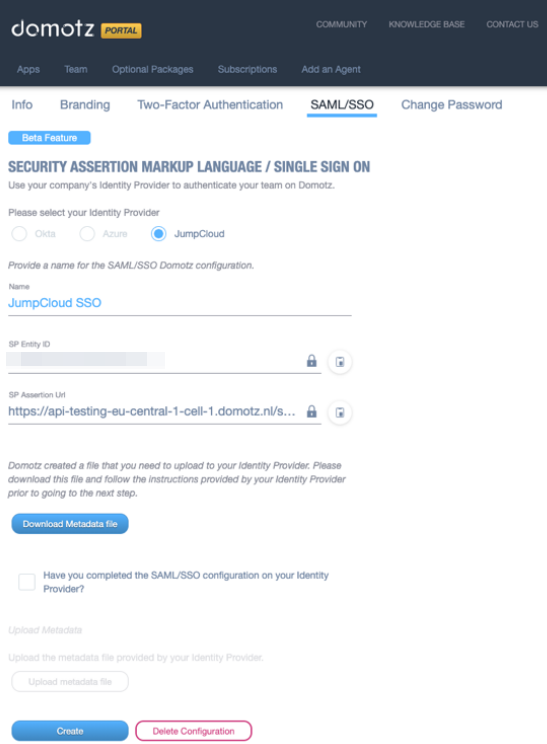
Click on Download Metadata file; the download of a .zip file will start. Open the .zip file and extract the XML file contained in it. You will need to upload it on the JumpCloud web interface in a few steps.
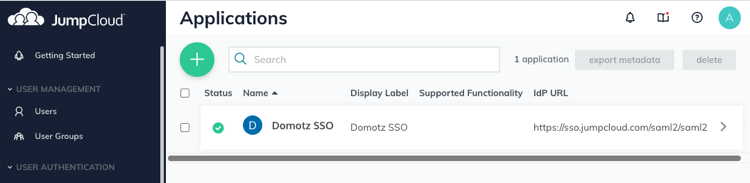
Open the JumpCloud web interface, and select SSO from the left menu. Create a new application selecting the “+”button at the top of the page.
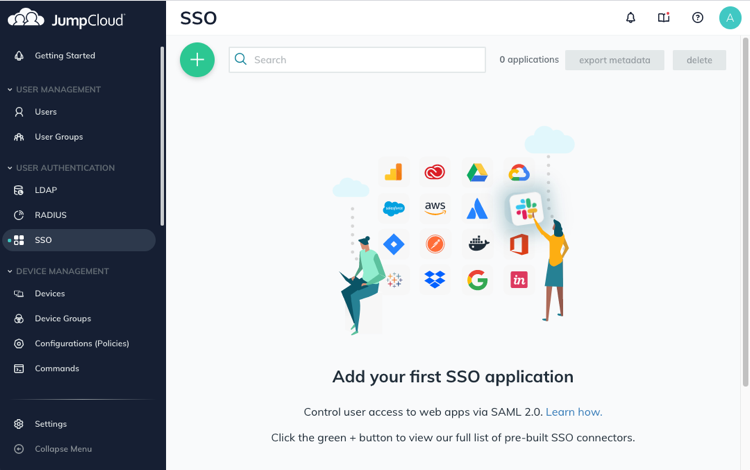
Click on Custom SAML App at the bottom.

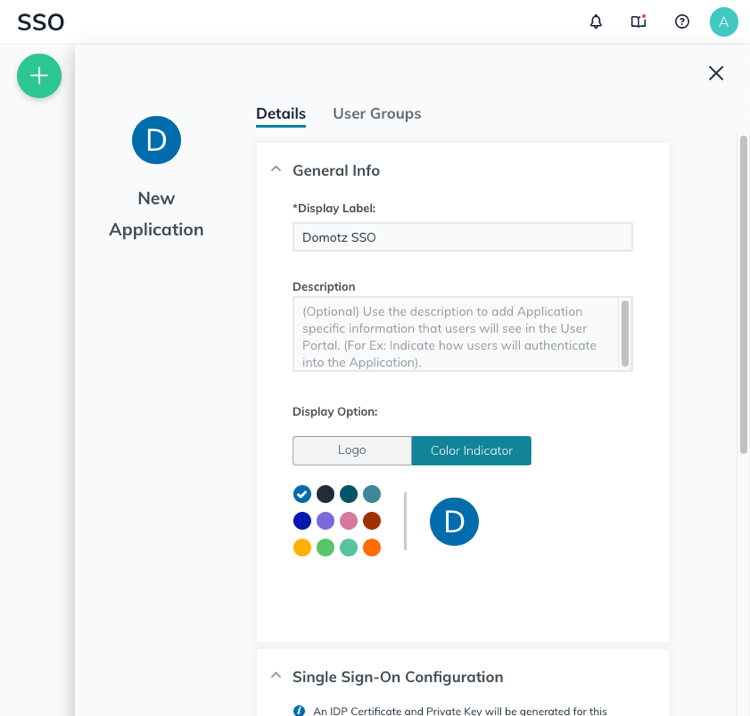
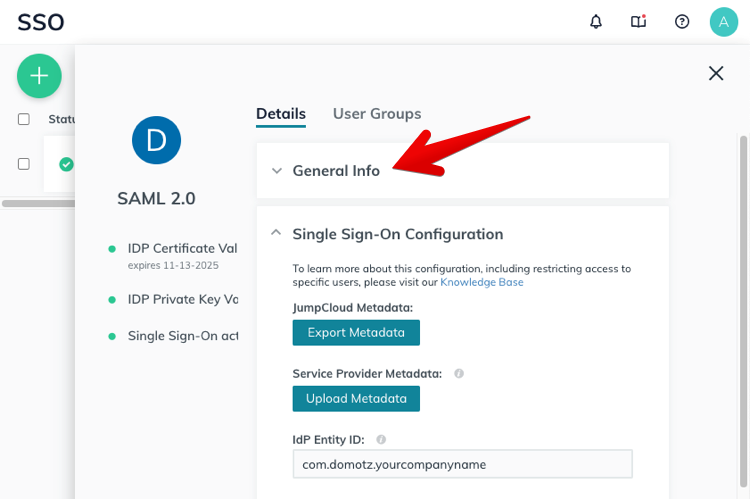
Define your application name in the General Info section.
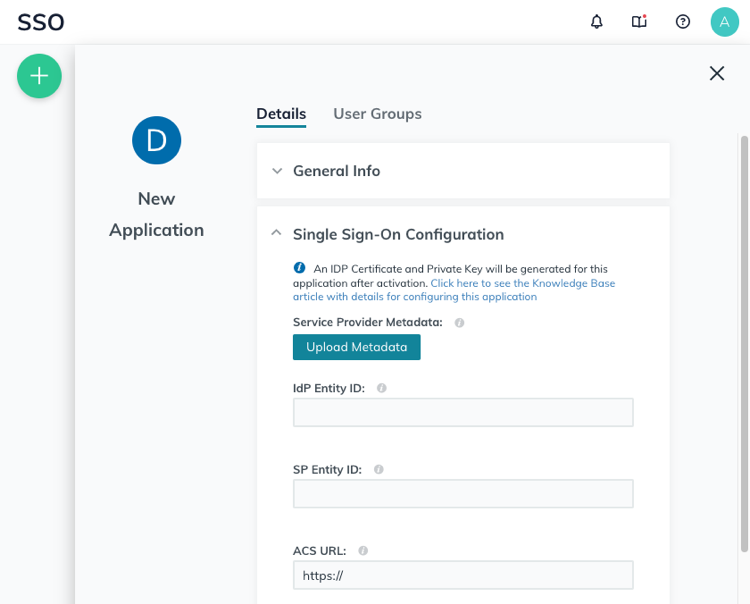
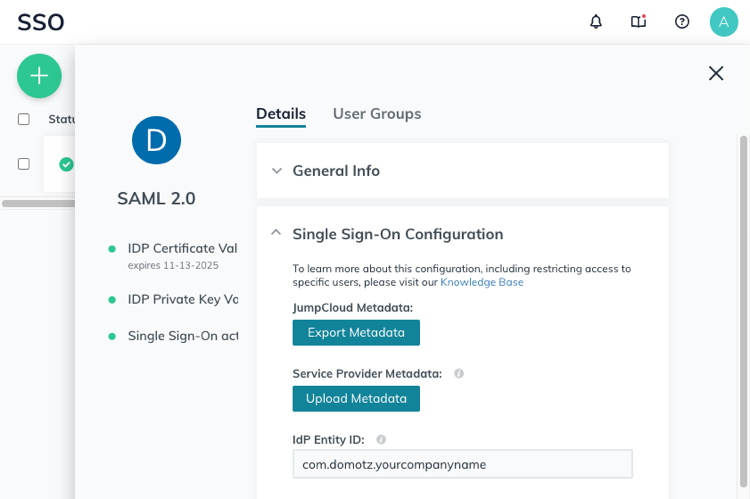
Scroll down to the Single Sign-On Configuration section, and click on Upload Metadata. Now, upload the Domotz metadata file you have downloaded from Domotz. Some fields will be automatically filled.
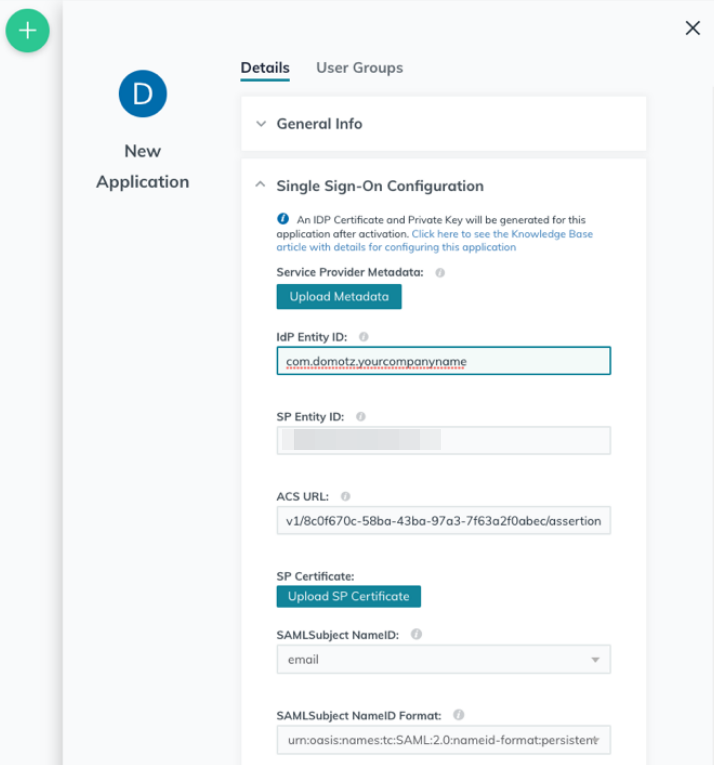
Type in the IdP Entity ID, which is a unique identifier for the integration with Domotz (e.g. com.domotz.yourcompanyname).
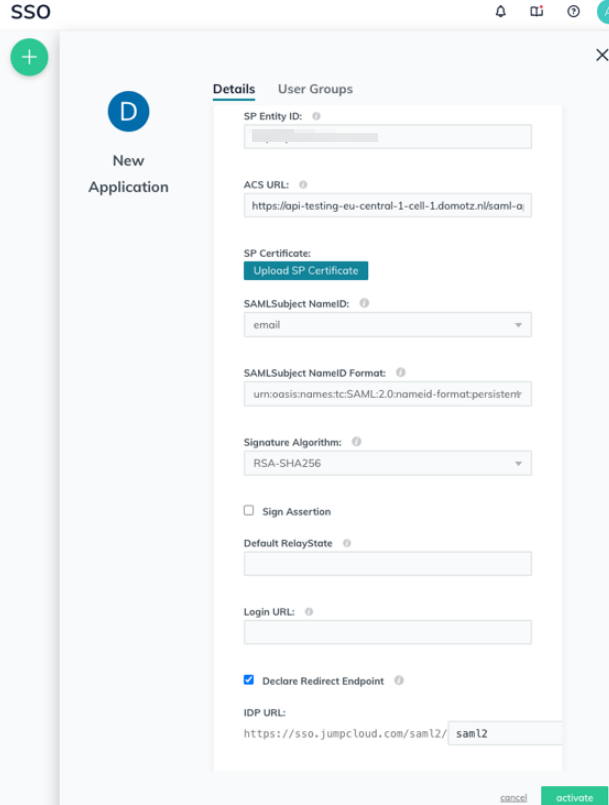
Select the Declare Redirect Endpoint checkbox, and then click on Activate at the bottom of the form.
The JumpCloud application has now been created. Now you will need to export the configuration into Domotz. Select the application you just created from the list.
Scroll down to Single Sign-On Configuration section, and click on Export Metadata button. This will start the download of the JumpCloud metadata file.
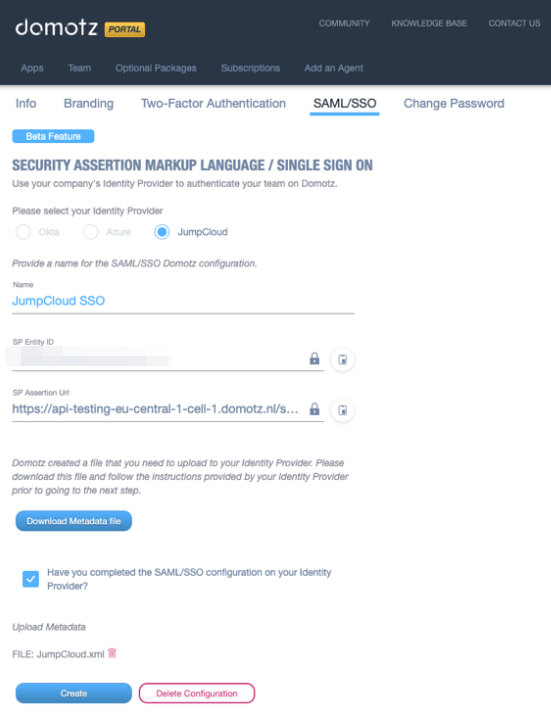
Go back to the Domotz portal, mark the required checkbox as done, and upload the metadata XML file that you have downloaded during the previous step.
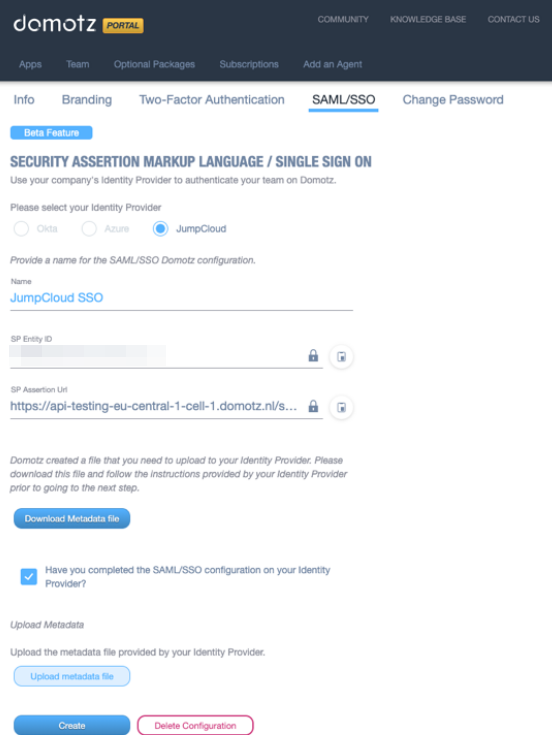
Click on Create.
Your SSO application is now configured to communicate with Domotz, but in order for it to work with your Domotz username and your team, you will need to select which JumpCloud accounts can use the SSO application.
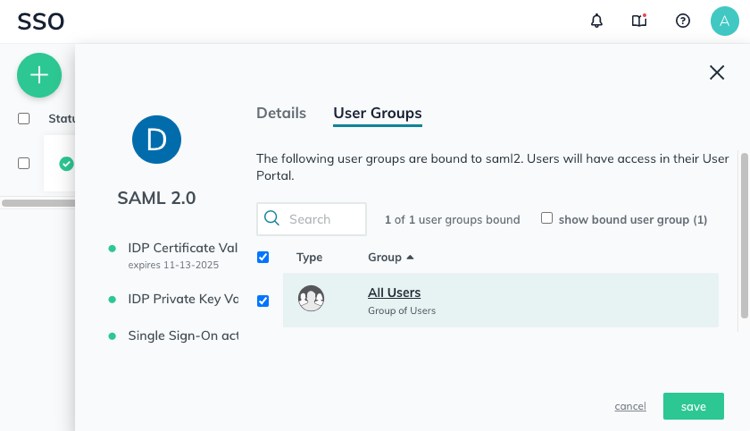
Go back to the JumpCloud web interface and select User Groups within your application. Select the User Groups that must have access to the SSO application using the left checkboxes. When finished click on Save.
You can configure JumpCloud User Groups from the left menu.
The emails on JumpCloud must match the ones used by you or your team members on Domotz, otherwise they won’t be able to login using the JumpCloud SSO.
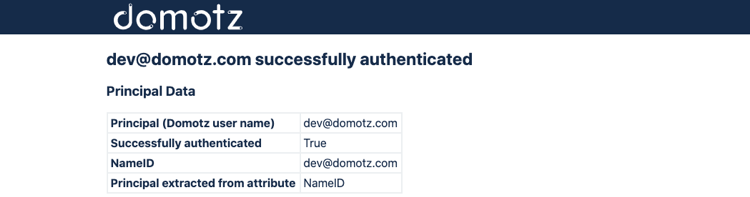
You are now ready to test and activate your SSO application on Domotz. Go back to the Domotz portal and click on Test Configuration.
If all the steps have been followed you will see a successful message. You can now enable SAML/SSO on your account or for your team members. Be sure to configure each Team Member for SAML/SSO under the Team section of portal.domotz.com.
JumpCloud IdP-Initiated SSO
Open your application General Info section
Set the following URL set in the “Default RelayState” field: https://portal.domotz.com/webapp/#/sso?
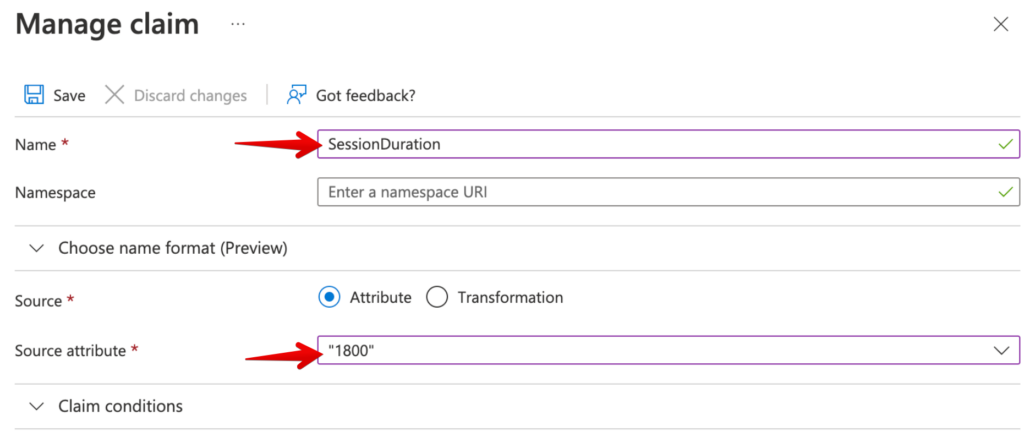
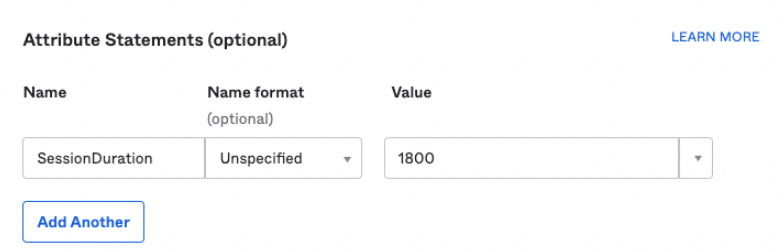
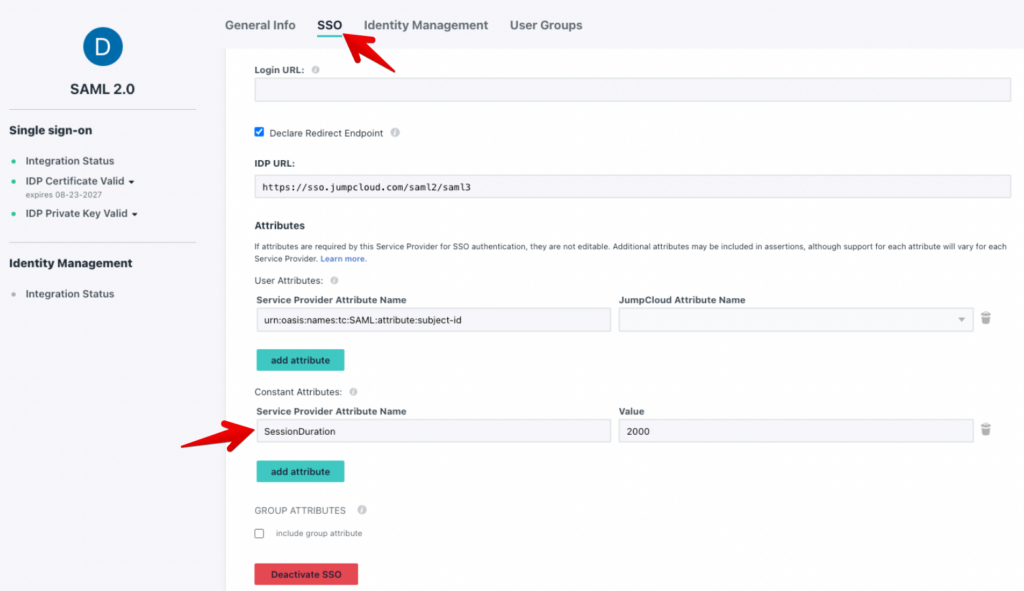
Session Duration attribute
It is now possible to add an attribute during the SAML configuration called SessionDuration. This value is essentially the number of seconds that we keep the authentication of the user valid after he/she has closed the Domotz App or WebApp.
The SessionDuration defines the validity of the token to authenticate in Domotz, considering the inactivity of the user himself.
This allows a user to keep its token valid for the Session Duration after his last operation within Domotz. For instance, if the user has configure the Session Duration for 2 days, the token used to authenticate within Domotz is always valid for the 2 days after his last operation within Domotz. After the 2 days, he will need to get a new valid token (by logging into the SAML/SSO system).
It is possible to configure the attribute on:
- Azure
- Jumpcloud
- Okta
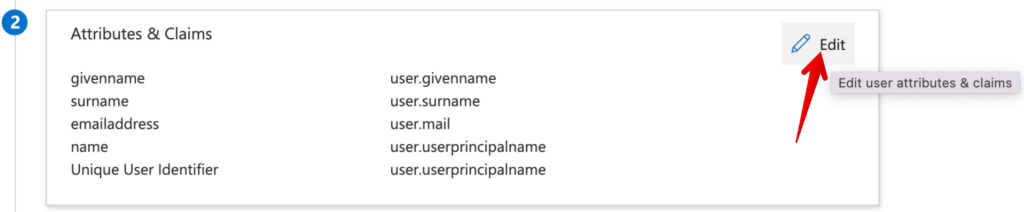
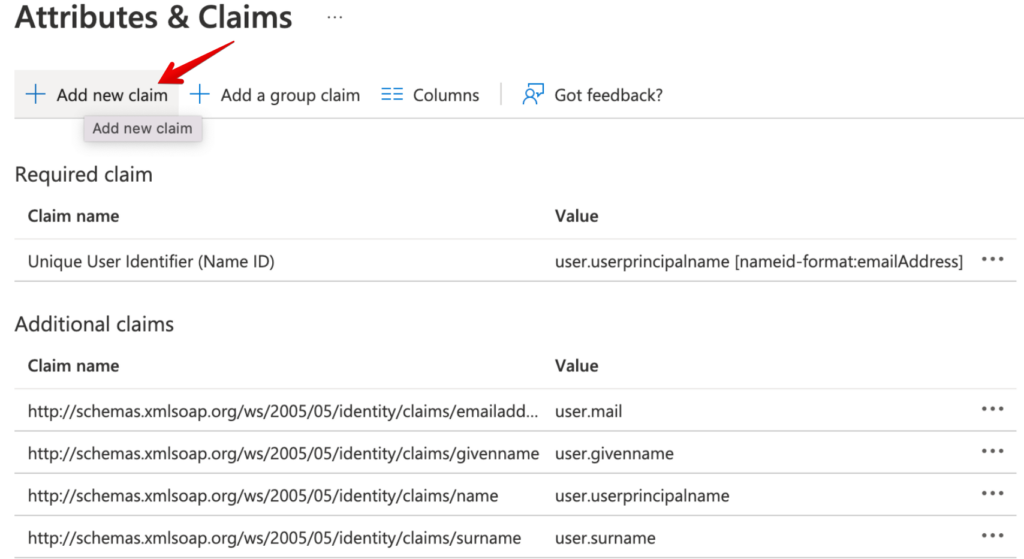
Following, some screenshot on how to configure the SessionDuration attribute.
Azure

Okta
Jumpcloud
Certificate Renewal
In case of a SSO/SAML certificate renewal please follow these steps.
1) Download the new generated Federation Metadata XML file:
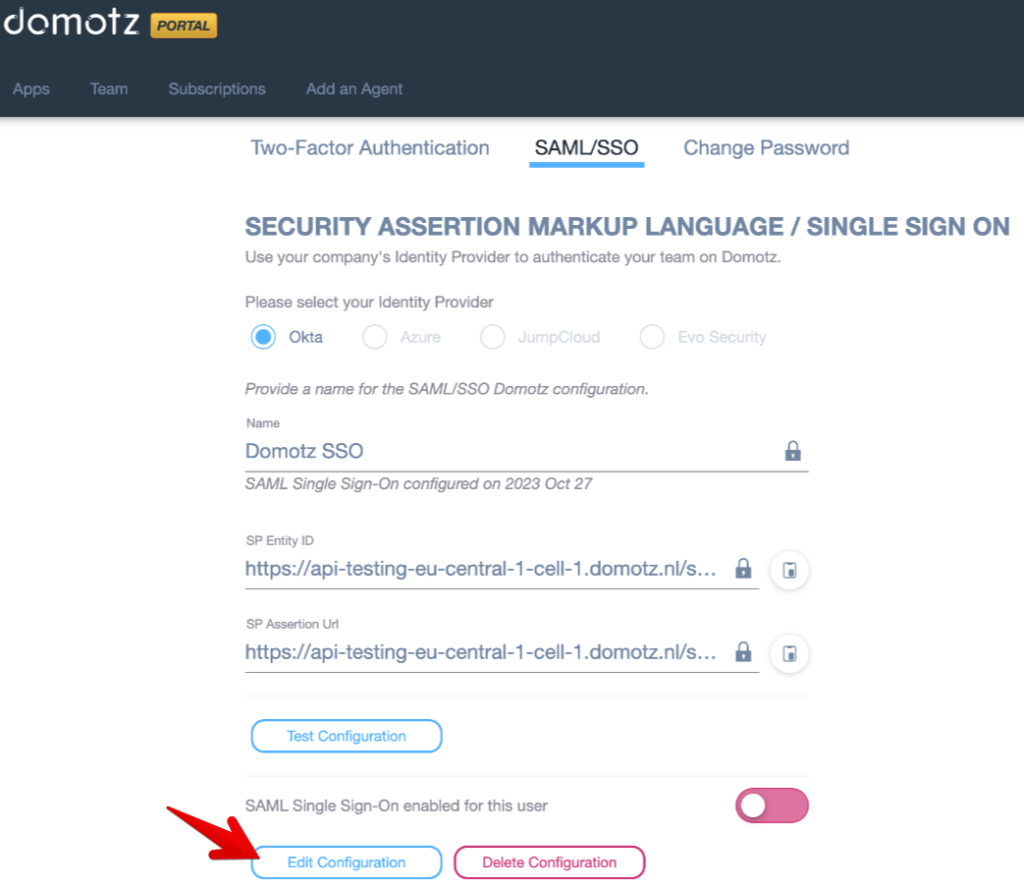
2) Access the Domotz app with a Team Leader account and go inside Account-> SAML/SSO Section:
click on the “Edit Configuration” button:
and then, click on “Upload metadata file”:
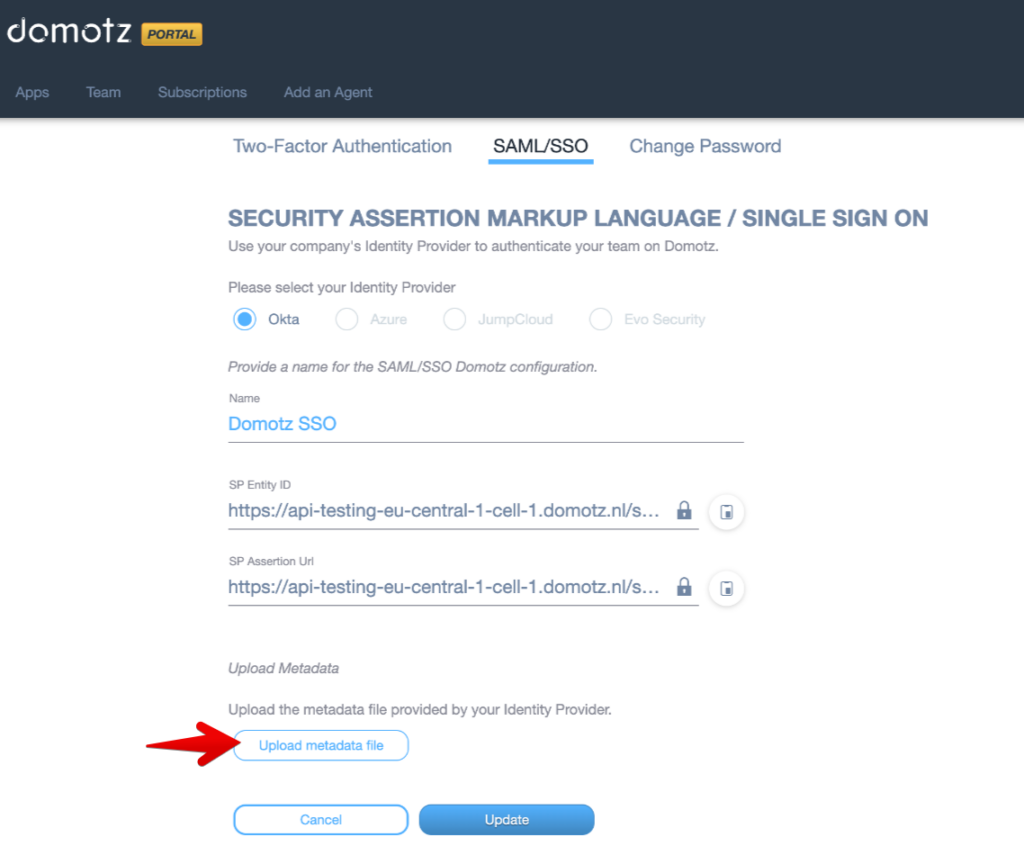
If the configuration testing has succeeded (and only if your configuration testing has succeeded), you may click the “Update” button.