Domotz Liongard Integration
Domotz network monitoring and management software includes integration with Liongard IT Automation software.
This integration allows you to show the devices you monitor with Domotz in the Liongard customer facing portal. This is beneficial because it instantly shows your customers all the technology you are managing on a network.
In addition, the Liongard integration uses the Domotz API to provide you with a view of your client’s devices in your Liongard account. Domotz can pass network information directly into a client’s infrastructure tab in Liongard. This data is available under the Network tab under Infrastructure.
Learn more about the Domotz integration with Liongard IT Automation software.
Learn more about how to set-up the Domotz and Liongard integration on the Liongard help center.
How to set up the Domotz Liongard Integration
In Domotz
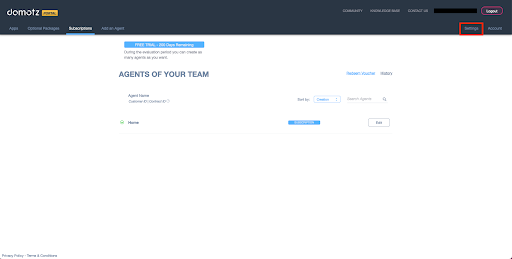
Step 1: In the Domotz portal, click on the Settings tab:
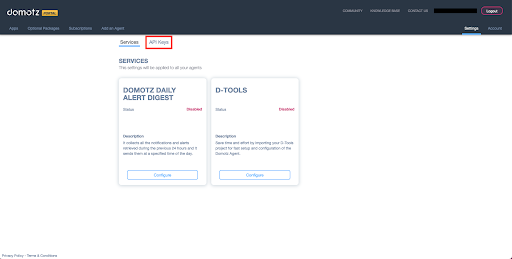
Step 2: On the Settings page, click on the API Keys tab:
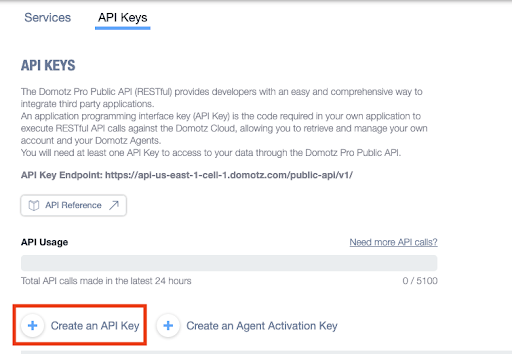
Step 3: Click on create a new API Key:
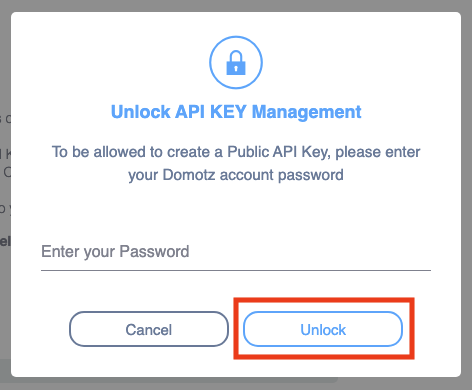
Step 4: Enter your password and click Unlock:
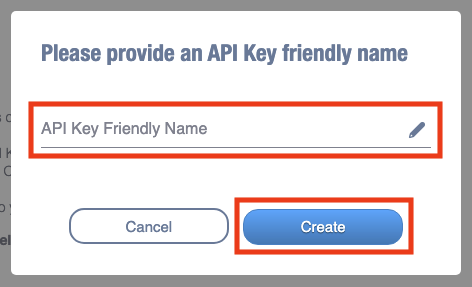
Step 5: Enter a Friendly Name for the API Key (Suggested Naming: Liongard) and click Create:
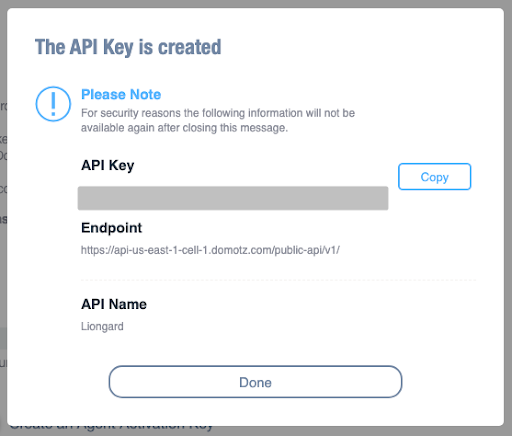
Step 6: Save the API Key and Endpoint URL for use when you configure the Inspector in Liongard:
In Liongard:
Step 1: Parent Inspector Setup
Set up a single “Parent” Inspector that will then auto-discover “Child” Inspectors for each Environment.
In Liongard, navigate to Admin > Inspectors > Navigate to the Domotz Inspector > Select Add System and fill in the following information:
- Environment: Select your MSP’s Environment
- Friendly Name: Suggested Naming: [MSP Name] Domotz Parent
- Agent: Select On-Demand Agent
- Inspector Version: Latest (Auto-Update)
- Endpoint URL: Enter the Endpoint URL saved from the Inspector Setup Preparation above
- API Key: Enter the API Key saved from the Inspector Setup Preparation above
- Scheduling: The Inspector will default to run once a day at the time the Inspector is set up. Here you can adjust the schedule
After you select elect Save, the Inspector will be triggered to run within the minute.
Step 2: Child Inspector Setup
After the first run of the Parent Inspector, your Domotz organizations will be auto-discovered and surfaced on the Discovered Systems page.
Navigate to the Discovered Systems tab in your Inspectors > Domotz page and take the following actions:
- Activate your Discovered Systems by ensuring they’re mapped to the correct Environment > Select the checkbox to the left of Inspector(s) > Select the Actions drop-down menu > Activate Launchpoints.
- Users may also Archive Discovered Systems by Selecting the checkbox to the left of the Inspector(s) > Select the Actions drop-down menu > Archive Launchpoints.
Looking for more Integrations with Domotz? Check out the articles on PSA & Ticketing Systems for tools like Zendesk, Syncro, Freshservice, Autotask, and more. Or view or a full list of Integrations.

