- Access the web interface of the switch.
- In the menu bar, select SNMP.
- Select ‘Communities’ in the SNMP submenu and click Add to create a new SNMP community.

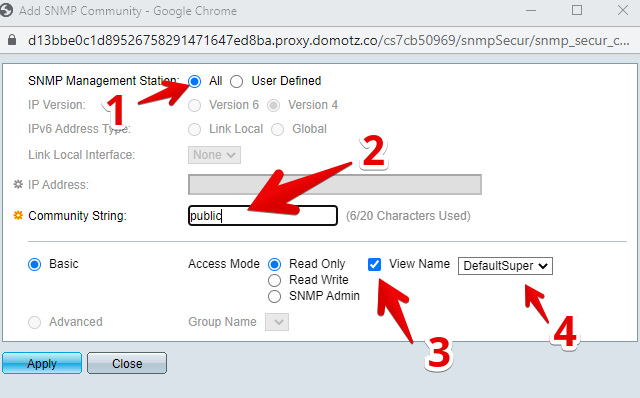
- Then in the pop-window that appears, please select All in the ‘SNMP Management Station’ section, type public (or another string of your choice) in the Community String textbox, then select ‘Access Mode’ Read-Only radio button, then the ‘View Name‘ checkbox and then select the DefaultSuper name in the dropdown menu: